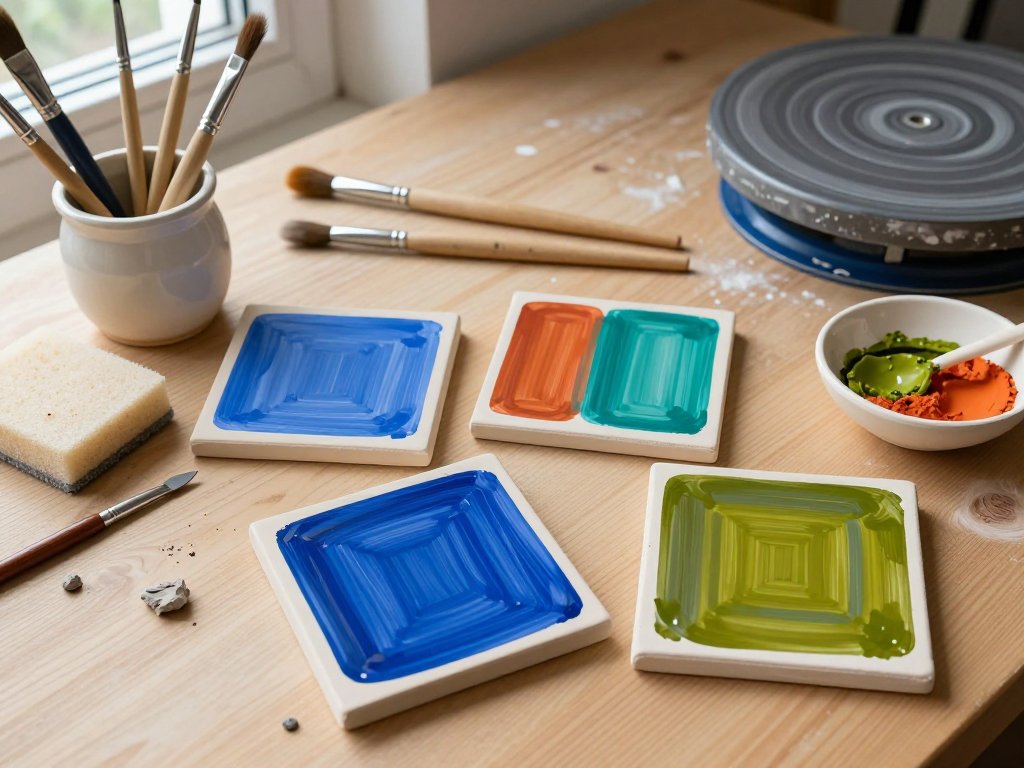
Introduction
There is a particular quiet that settles in when you sit down with a brush and a piece of bare clay. No glaze yet. No shine. Just an absorbent surface waiting for color, and a small window of time before the kiln decides how it all turns out.
Underglaze is the paint of the pottery world, and it is far more forgiving than most beginners expect. You can layer it, scratch through it, blend it, and wipe it back. Some mistakes simply become texture.
This guide walks through what underglaze actually is, when to apply it, which tools earn their place on your table, and how to finish a piece so it is genuinely safe to eat from. No kiln is required to read it. Only patience is required to practice it.
What Underglaze Actually Is
Underglaze is a pigmented slip: finely ground colorant suspended in a clay-and-water base, usually with a small amount of binder and flux. It is formulated to be applied to raw or fired clay, then sealed beneath a glaze.
That definition matters, because it separates underglaze from two things it is frequently confused with. The first is glaze itself. Glaze is glass. It melts into a waterproof, food-safe shell at temperature and carries its own color.
Underglaze does not melt. It sinks into the clay body, staining the surface, and then sits there beneath whatever you place on top. Left bare, it stays matte and faintly rough to the touch.
The second confusion is glaze stains. Glaze stains are raw oxides and carbonates, intensely concentrated and often hazardous in powder form. They are blended into buckets of glaze, not brushed onto pots.
Underglazes are engineered for brushing instead. They flow, they hold a line, and they arrive in reliable commercial colors. For a beginner, that reliability is worth a great deal.
You will also see the word "engobe" used nearby. An engobe is a slip applied to clay for color or texture, and underglaze is essentially its refined, pigment-loaded cousin made specifically for brushwork.
Commercial underglazes come in two useful forms. Liquid varieties are ready to brush straight from the jar, while dry or semi-moist cakes must be thinned with water to a consistency like heavy cream.
Opacity varies wildly by color. Whites, yellows, and some reds are fairly opaque and cover well, while blues and greens often turn translucent and show the clay beneath. Knowing which is which shapes how you plan a design.
- Underglaze: pigmented slip, brushed onto clay, sealed beneath glaze.
- Glaze: glass-forming liquid, applied over the entire piece.
- Glaze stain: raw colorant, blended into glaze, rarely brushed directly.
Greenware or Bisque: Two Moments to Paint
You have two windows of opportunity. Greenware is unfired clay, bone dry and chalky to the touch. Bisque is clay that has been fired once, around cone 04, and is porous but no longer fragile in quite the same way.
Painting greenware is the more traditional studio approach. Dry greenware is extremely porous, so it drinks color almost instantly and holds fine detail beautifully.
That thirst is also the difficulty. A wet brush can lift color that is already down, and a careless stroke leaves a permanent record. The surface is brittle too, and handling a bone-dry bowl invites hairline cracks.
Bisque is the gentler teacher. Because the clay has already been fired, the surface is sturdier and slightly less absorbent. Color sits on top for a moment longer, which gives you time to blend an edge.
Most beginners should start on bisque. You can purchase a bisque blank, paint it calmly across several evenings, and never worry about snapping a rim in your hands.
- Greenware: deepest color absorption, finest detail, fragile, unforgiving.
- Bisque: sturdier, easier to blend, slightly lighter color, beginner-friendly.
One practical note: if you do paint greenware, keep your hands clean and support the piece on a banding wheel or a padded bat. Finger pressure on dry clay is how rims crack before they ever reach the kiln.
There is a middle path worth knowing about. Leather-hard clay, which has dried only enough to hold its shape, accepts underglaze well and is stronger than bone-dry greenware. Just handle it firmly and evenly.
If your bisque surface feels rough or has sharp flashing, a light pass with fine sandpaper smooths it before color goes down. Wipe away the dust afterward with a damp sponge.
The Tools That Make the Difference
You need less than you think, but the few tools you do own matter more than the brand of underglaze you buy.
- Soft brushes. Round and flat synthetics in two or three sizes. Synthetic bristles stay springy and hold a point, which suits the thin consistency of underglaze.
- Deer-foot stippler. A domed brush that pounces color into soft, even clouds. Ideal for shading and for filling awkward curved areas.
- Banding wheel. A small rotating platform. Turn the piece instead of your wrist and your lines stay level.
- Sponges. A damp natural sponge for wiping back and softening edges, plus a dry one for cleanup.
- Sgraffito tools. A loop tool, an old pencil, a wooden skewer. Anything that scratches a clean line through color.
Why synthetic bristle over natural? Natural hair, such as sable or hake, is soft and thirsty. In underglaze it swells, clumps, and holds too much water, which dilutes color and floods your line.
Synthetic filament keeps its shape in a water-based slip and releases pigment more evenly. It is also inexpensive enough that you can keep a dedicated set for pottery alone.
Keep one brush reserved for light colors and one for dark. Underglaze pigment creeps into the ferrule, and a stray speck of black will eventually find your white.
Layering and Blending Color
Underglaze is built in layers, not laid down in one pass. Thin coats dry quickly, stay even, and give you a degree of control that a single heavy coat never will.
The rhythm is simple. Paint a thin layer, let it dry to the touch, paint the next, and repeat until the color is as deep as you want it.
Drying between layers matters more than it sounds. Wet color over wet color smears and muddies, especially when the lower layer is dark. Give each pass ten or fifteen minutes in a warm room.
For blending, use the deer-foot stippler and pounce rather than sweep. Two colors meet and soften at the edge without leaving a hard seam or scrubbing a hole in the surface.
You can also blend with a barely damp sponge, but go lightly. Water is the quiet enemy of a clean blend on bisque.
If you want a wash, thin underglaze with a little water and apply it in one direction with a wide flat brush. Let it pool slightly, then stop. Overworking a wash lifts pigment and leaves streaks.
Work from light to dark when you plan a layered design. Pale colors go down first and darker tones sit on top, because dark pigment under light pigment will always bleed through and muddy the result.
Thirsty bisque can pull water out of your brush faster than you expect. Dip more often than feels necessary and keep the pigment moving rather than scrubbing it dry.
Brush Control: Making Marks Disappear
Most beginner frustration is not about color choice. It is about visible brush marks, that telltale set of parallel lines across a surface that should look smooth and even.
The cause is usually too little pigment and too much pressure. Load the brush properly, then let the tip do the work rather than your elbow.
Hold the brush like a pencil, not a mop. Keep the ferrule off the surface and paint with the belly of the bristle, maintaining light and even contact.
Then go back with a second, thinner coat applied at a right angle to the first. The two directions cancel each other's texture and the surface reads as flat color.
On curved forms, rotate the banding wheel as you paint. A still wrist and a turning wheel produce a line that almost never wobbles.
For large areas, a sponge stipple is faster and more even than a brush. Build the tone in two or three pounces rather than one flood of color.
One more habit worth forming: keep a scrap tile beside you and test every color there before it touches the piece. It costs thirty seconds and can save an entire evening.
Wax Resist and Sgraffito
Here is where underglaze begins to feel like a real medium rather than a coloring exercise.
Wax resist is a liquid wax painted onto the clay to block color. Wherever the wax sits, underglaze will not adhere. Paint over it, let everything dry, then wipe the resist away with a damp sponge.
Use wax for clean stripes, for keeping a rim white, or for protecting a carved pattern you intend to reveal later. Apply it thin and let it dry fully, or color will creep beneath the edge.
Sgraffito is the reverse approach. You paint a layer of underglaze, let it dry, then scratch through it with a loop tool or a skewer to expose the clay beneath.
The contrast is the whole point. A dark underglaze over a pale clay body gives you crisp lines that a brush could never pull by hand.
Scratch with a steady hand and a light touch. Too much pressure digs a ridge into the clay, and that ridge holds glaze unevenly later.
The two techniques pair beautifully. Wax the areas you want to leave bare, paint and carve the rest, then sponge off the resist and you have a two-tone design that looks far harder than it was.
Clean your wax brush with soapy water immediately after use, before the wax sets in the bristles. A brush left overnight is usually a brush you will end up throwing away.
If a carved line looks faint, do not dig deeper with the tool. Instead, wipe a thin wash of darker underglaze across the area and let it settle into the groove before sponging the surface clean.
The Rule of the Covering Glaze
This is the single most useful thing to know before your first fired piece: what you see in the underglaze is rarely exactly what you get.
Under a clear glaze, underglaze colors generally stay close to true, though they often lighten slightly. The glass layer adds depth and a little lift to the surface.
Under a colored glaze, everything changes. A tinted glaze acts like a filter over your painting, and underglaze colors typically darken or shift hue. A blue under an amber glaze can turn a muddy green.
So choose your glaze with the painting in mind. If the design is the point, a clear, colorless gloss is the honest choice. It shows your work and adds the depth that makes underglaze sing.
Apply the glaze evenly and not too thickly. Two thin coats, brushed or dipped, give a better result than one heavy pass every time.
Food Safety and Firing Basics
Now the caveat that nobody should skip. Unglazed underglaze is not food safe. It is porous, it can harbor bacteria, and many underglaze pigments are not formulated for direct food contact.
An underglaze-decorated piece becomes food safe only when it is fully covered by a food-safe clear glaze. No bare patches, no unglazed rim, no "it is only on the outside."
Check your glaze label. Look for a statement that the glaze is food safe when fired to the recommended cone, and then follow that cone exactly.
On firing, here is a conservative general picture. Bisque firing is usually around cone 04. A mid-range glaze firing runs cone 5 to 6. Earthenware bodies are often glaze fired lower, near cone 06.
Your kiln and your clay body may want something different. Follow the manufacturer's schedule for both the clay and the glaze, and if you rent kiln space, simply ask the technician.
Consider the nerikomi technique if you enjoy building color into the clay body itself. It is a natural next step once underglaze painting feels comfortable.
One more simple rule: underglaze colors tend to hold up better at mid-range than at high fire. At cone 9 and above, certain reds and oranges simply burn away.
When Things Go Wrong
Almost every problem with underglaze has a cause you can name, which means you can fix it the next time around.
- Colors smearing when brushed over. The layer beneath was still wet, or your brush carried too much water. Dry longer and use less water.
- Pinholing and crawling. The underglaze went on too thick and the glaze could not adhere. Thin your coats and build color gradually.
- Color burning out at high fire. Some pigments, especially bright reds and oranges, fade above cone 6. Switch colors or fire lower.
- Streaky, uneven coverage. Too few layers, or too wet a brush. Two thin crosshatched coats solve most of it.
- Waxy patches where color will not stick. Finger oils or leftover wax resist. Wipe the surface with a clean damp sponge and let it dry.
And the habit that prevents most of it: make a test tile every single time. Same clay, same underglaze, same glaze, fired together in the same load.
Keep those tiles on a shelf with the color name written on the back. In a season you will have a personal color reference more useful than any catalog.
Do not judge a piece by how it looks in the bucket or on the bisque. Judge it by the tile that came out of the kiln.
Let the Color Settle In
Underglaze rewards the patient hand. It asks for thin layers, a light touch, and the willingness to let a surface dry before you touch it again.
Start with one bisque tile and one color. Paint a small shape, cover it with clear glaze, and fire it. That single tile teaches more than a shelf of books.
From there, add a second color and try a blend. Then carve a line with a skewer. Each small experiment stacks on the last, and before long your hands know the medium without being told.
Some pieces will not turn out the way you pictured. Colors will shift, a glaze will crawl, a line will wobble. Keep the tile anyway and write the lesson on the back.
That is how a potter's color sense is actually built, one small, quiet, imperfect piece at a time. Your next one is already waiting on the shelf.
