Introduction
There is a little café on the corner of my street with a window seat that I have come to think of as mine.
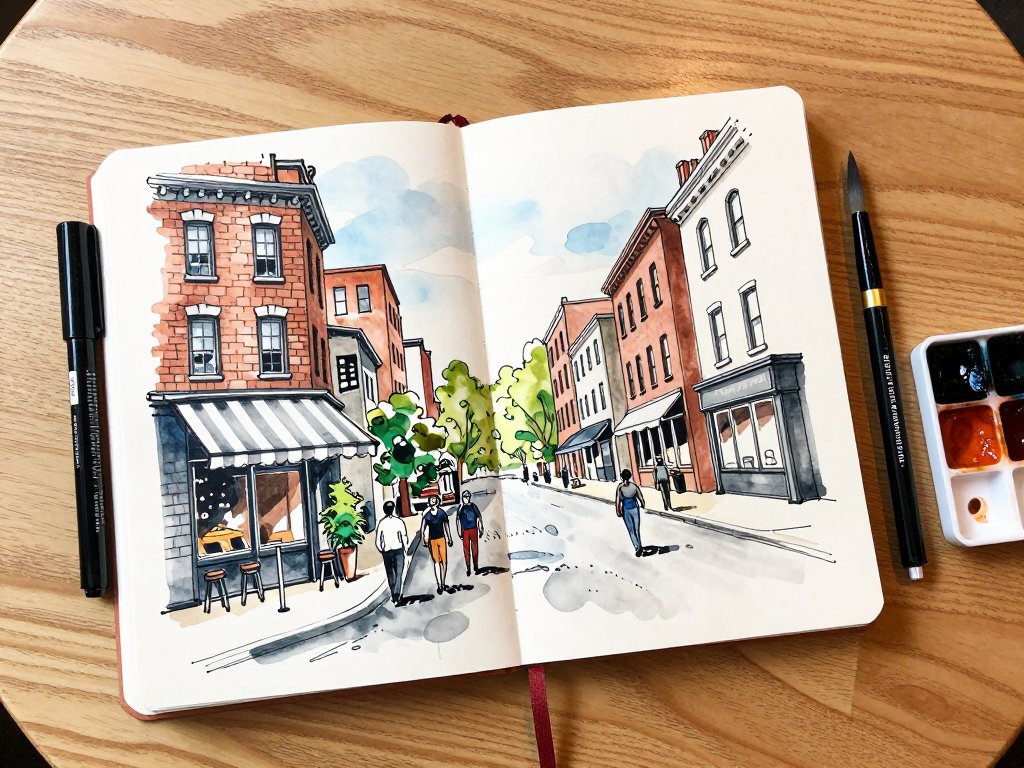
On the first Saturday of every month, I take my youngest daughter for a hot chocolate there, and somewhere between the first sip and the last crumb of her croissant, I pull out a small sketchbook and draw what I see outside the glass.
At first, I only drew the planters by the door because the street itself felt overwhelming.
Too many cars. Too many people. Too many shopfronts all shouting for attention. But over time, I learned that a busy city scene is not a wall of chaos — it is a collection of small, drawable moments stacked side by side.
A woman waiting for the bus. The striped awning of the bakery. The way the morning light slid across the cobblestones after rain.
If you have ever wanted to sketch the places you live and visit but felt paralyzed by the sheer amount of detail in front of you, this guide is for you.
We are going to break urban sketching into warm-ups, simple perspective tricks, and loose figure drawing, so that by the time you close this article, you will feel ready to sit on a bench, open your sketchbook, and begin.
Why Urban Sketching Feels Like Coming Home
Urban sketching is not about making a perfect picture of a perfect building. It is about recording the world as you actually experience it — the crooked roofline, the dog tied up outside the grocer's, the teenager laughing with her friends on the library steps.
The movement began with a journalist named Gabriel Campanario, who started the Urban Sketchers community in Seattle in 2007 with a simple mission: to show the world, one drawing at a time.
What I love about that phrase is how forgiving it is. There is no requirement to be fast, accurate, or impressive.
There is only the invitation to look closely and to draw what you see, wherever you happen to be.
For a busy mom, that is a gift. You do not need a studio, a long stretch of free time, or any special talent.
You need a sketchbook, a pen, and ten minutes stolen from the day while the kids are at a lesson or the dinner simmers on the stove.
The other thing that makes urban sketching special is the souvenir it gives you. Photographs capture what a place looked like, but a sketch captures how it felt to be there — the weather, the mood, the small details your eye lingered on.
When I look back at the sketches in my oldest notebook, I remember the exact sound of the rain on the awning and the warmth of the cup in my hands.
No camera roll has ever done that for me.
Your First Urban Sketching Kit
Here is the best news of the day: you already own most of what you need. The kit for urban sketching is famously small, and many sketchers carry everything in a single pencil case.
- A sketchbook. Look for something that opens flat and has paper around 110 to 140 pounds. You want paper that can take a little water if you decide to add washes later. A5 or A6 is perfect for slipping into a handbag.
- A pen or two. Waterproof ink is ideal because you can paint over it without smudging. Many sketchers love a fine-liner in 0.3 or 0.5, and a brush pen for thicker, expressive lines.
- A pencil and eraser. Even if you mostly draw in pen, a soft pencil like a 2B is lovely for loose planning lines.
- Optional color. A tiny watercolor set with a water brush, or a handful of colored pencils, lets you add a wash of life to any sketch.
That is genuinely all you need. The fancy fountain pens and foldable stools can come later, if the habit sticks. For now, keep your kit small enough that you never have a reason to leave it at home.
Warm-Up Exercises to Loosen Your Hand
Before you try to draw a whole street, spend five minutes warming up. These little exercises are the same ones professional illustrators use, and they work wonders for building confidence.
Exercise one: blind contour drawing. Choose a simple object near you — a shoe, a coffee cup, a leaf.
Place your pen on the paper and draw the outline of the object without looking at your paper, moving your eye slowly along the edges.
The result will look ridiculous, and that is exactly the point. Blind contours break the habit of drawing what you think things look like instead of what is actually in front of you.
Exercise two: one-minute gesture sketches. Set a timer and draw the same scene for sixty seconds, then sixty seconds again on a fresh page.
The first attempt will be stiff. The second will be looser, and that looseness is what gives sketches their life.
Do not erase anything. Just draw over the top.
Exercise three: thumbnail boxes. Draw three small rectangles, about two inches wide, and sketch the same view in each one, trying a different crop each time.
Thumbnails teach you to choose what matters — maybe you zoom in on the café window, or pull back to include the whole row of shops.
Choosing your frame is half of composition.
Do these warm-ups in your kitchen before you ever step outside, and they will feel like old friends by the time you are on a park bench.
Drawing Streets: One-Point Perspective Made Gentle
Perspective sounds like math, and math sounds like homework, so let us take the fear out of it right now.
You do not need rulers, vanishing points plotted with precision, or any of the intimidating geometry from art class.
You need one simple observation: things get smaller as they get farther away, and parallel lines appear to meet at the horizon.
One-point perspective is your best friend for drawing streets. Stand at the end of a road and look down it.
The edges of the sidewalk, the curb, and the rooflines all seem to lean toward a single point on the horizon.
That point is your vanishing point, and if you keep it in mind, everything else falls into place.
Here is a beginner-friendly way to sketch a street:
- Lightly draw a horizontal line across your page for the horizon.
- Mark a small dot on that line where the street seems to narrow.
- Draw the two lines of the road from the bottom of your page up toward that dot.
- Add the buildings as simple boxes rising from the road lines — the sides facing you are straight, while the sides receding toward the dot angle inward.
- Sketch the awnings, doors, and windows as smaller shapes that follow the same inward slant.
You will be amazed at how quickly a few boxes and lines turn into a convincing street. The secret is not precision; it is consistency. As long as your receding lines point toward roughly the same spot, the viewer's brain will read the scene as depth.
And if your lines wobble? Celebrate them. A slightly crooked street looks hand-drawn and human, which is exactly what a sketchbook should be.
Drawing Buildings: Two-Point Perspective and the Details That Matter
When you stand on a corner and look diagonally across an intersection, you can see two faces of the buildings at once. That is where two-point perspective comes in, and it is easier than its name suggests.
Instead of one vanishing point, you now have two, both sitting on your horizon line — one to the left of your subject and one to the right.
The vertical edges of the building stay straight up and down. The horizontal edges angle toward one vanishing point on one side and the other vanishing point on the other side.
That is the whole trick.
For your first corner building, try this:
- Draw your horizon line and mark two dots, one near each edge of the page.
- Draw a straight vertical line for the corner of the building nearest you.
- From the top and bottom of that line, draw light guidelines to each vanishing point.
- Decide how deep the building is and draw two more vertical lines where the guidelines end.
- Now you have a box floating in space. Erase the extra guidelines and start dressing it up.
The details are where your sketch starts to tell a story. Windows are rarely perfectly square, so give them sills and frames.
Add a door with a step or two. A fire escape, a sign, a potted plant at the entrance — each small element adds character.
Watch for the rhythms in a building: the repeating pattern of windows, the spacing of columns, the way floors stack.
Capturing that rhythm matters more than drawing every brick.
Here is a trick I use when a facade overwhelms me: count. Count the windows across and the floors up, then mark them in as simple ticks before you draw any of them properly. The proportions will be right without you having to measure a thing.
Drawing Crowds: People in Motion, Minus the Panic
People are the scariest part of urban sketching for most beginners, and I understand why.
We have looked at faces our whole lives, so we know instantly when a drawing of a person is wrong.
The good news is that you do not need to draw faces at all. In a street scene, people are usually small, distant, and in motion, and a few confident marks are all it takes to suggest them.
Think of a person in a crowd sketch as a tiny stick of shapes: a head, a torso, and legs.
If the figure is far away, that is almost literally all you need — a small oval for the head, a slightly larger shape for the body, and two lines for the legs.
Add a suggestion of a bag or a hat and the person comes alive.
For closer figures, pay attention to the line of action. This is the imaginary curve that runs through the body and shows what the person is doing — reaching, walking, leaning.
If you capture the line of action, the figure reads as moving even if the details are loose.
Try drawing the curve first, then hanging the body parts from it.
Three tips for sketching crowds without stress:
- Draw the gaps, not the people. Sometimes it is easier to see the sky or the wall showing between bodies. Sketch those negative spaces and the crowd appears around them.
- Group people into clusters. Instead of drawing ten individuals, draw two groups of five. The eye reads clusters faster than single figures.
- Accept the blur. In real life, people move. Your sketch of a busy sidewalk will naturally have quick, gestural figures, and that motion is part of the charm. Nobody expects a crowd sketch to look like a portrait studio.
If you want to practice figures without leaving your house, draw from the window, sketch people in a TV show paused on the screen, or sit in the school pickup line with your sketchbook on the steering wheel. Anywhere life moves is a good classroom.
Adding Light, Shadow, and a Touch of Color
Once your lines are down, you can give the scene its mood with a few simple shading and color techniques. You do not need to fill the page. A little goes a long way.
Shadows anchor a sketch. Pick a light direction and stick to it. If the sun is coming from the left, put shadows on the right sides of buildings, under awnings, and beneath figures.
A quick hatched shadow — a few parallel pen strokes — under a bench or across a sidewalk instantly grounds the drawing in a real time of day.
Value tells the story. Squint at your scene and notice which areas are darkest and which are lightest. Usually the darkest shapes are doorways, window openings, and under-eaves shadows. If you capture just those darks, the rest of the sketch reads as bright and airy.
Color is optional and forgiving. A single wash of watercolor across the sky, or a few colored-pencil strokes on a red door, is enough to bring a sketch to life.
Keep the color loose — let it pool and dry where it wants. The line drawing underneath will hold everything together.
My favorite finishing habit is to save one tiny detail for last. A bird on a wire, a bicycle leaning against a wall, the steam rising from a street vendor's cart.
These small marks are the ones that make people smile when they look over your shoulder, and they are the moments you will treasure when you flip back through the book years from now.
A Gentle Routine for Busy Days
Urban sketching does not have to be a weekend hobby that requires planning. It thrives on the small pockets of time you already have. Here is a rhythm that has worked for me, and I hope it gives you ideas for your own life.
- The five-minute wait. Sitting in the car at soccer practice? Draw the row of houses across the street. Standing in line at the post office? Sketch the ceiling fan or the feet of the person in front of you.
- The coffee-shop sketch. Keep a sketchbook in your bag, and every time you treat yourself to a coffee, spend the first five minutes drawing the window view. Over a year, that is dozens of little neighborhood portraits.
- The family outing. At the park, the farmers market, or the zoo, take one ten-minute break to sketch what you see. Your children will watch you draw, and that is a quiet lesson they will carry with them.
- The monthly review. At the end of each month, flip through your sketchbook and pick your favorite page. Notice what you are drawn to. That is your sketching voice growing.
None of these moments require a grand plan. They just require that the sketchbook is in the bag and the pen is in your hand.
Conclusion
The first time I drew my street, I came home with a page full of wobbly boxes and a smudge of ink on my sleeve. The awning was crooked, the bus was a lump, and the people looked like friendly little beans. I almost tore the page out.
I am so glad I did not. That crooked little sketch is now one of my favorite pages, because it holds a real Saturday morning — the smell of coffee, the chatter of the café, my daughter asking what the bean people were doing.
Urban sketching gave me a way to slow down and truly see the ordinary places I walk through every day, and it can do the same for you.
Start smaller than you think you need to. One building. One bench. One waiting figure.
Your city has been waiting to be drawn, and your sketchbook is the perfect place to begin.
When you are ready for your next adventure, try sketching a local market, a park in bloom, or the view from your own front porch — the same gentle techniques will carry you anywhere.