Introduction
I will never forget the first painting I almost threw away. It was a little bouquet of tulips, and I had worked on it for nearly an hour.
Then I reached for my brush with too much water on it, and a fat drop of blue landed right in the middle of a pale pink petal.
It spread into an ugly bloom, and I sat there staring at it, completely deflated.
Here is what I know now that I did not know then: almost every watercolor mistake can be fixed, softened, or turned into something better. That blue bloom became the shadow of the petal. The painting is still on my wall today, and honestly, it is one of my favorites.
Watercolor is a patient medium, but it is also a forgiving one if you know a few rescue techniques.
This guide is my collection of fixes for the most common beginner mistakes: muddy colors, blooms, lost whites, wobbly lines, and paper that has been overworked.
I will show you what causes each one, how to fix it, and when it is kinder to simply begin again.
Why Watercolor Mistakes Feel Worse Than They Are
There is a particular sting to ruining a watercolor. You have probably felt it: the quiet disappointment, the urge to crumple the paper, the thought that maybe painting is not for you after all.
Let me tell you something true. Every watercolor painter who has ever lived has ruined paintings. The ones whose work you admire did not stop making mistakes; they simply learned which mistakes could be rescued and which were worth starting over. That is the whole difference.
Watercolor is unusual because it is hard to paint over. Unlike acrylic or oil, you cannot just add another layer and hide what is underneath.
That is what makes mistakes feel permanent. But watercolor is also translucent, which means you can lift color out, soften edges, and let the paper forgive you in ways other mediums never allow.
So before we dive into fixes, change one small thing in your mind: a mistake is not a failure, it is information.
Your painting is telling you something about water, pigment, and timing. Listen to it, fix it, and you will learn more from that one rescue than from ten perfect paintings.
The First Rule: Know When to Save and When to Start Over
Not every mistake deserves a rescue mission. The first skill to learn is telling the difference between a fixable accident and a lost cause.
Usually worth fixing: muddy color, a bloom, a hard edge you did not want, a wobbly line, a wash that dried too dark, a small bleed outside your shape. These have well-known rescues, and they often improve the painting anyway.
Usually worth starting over: paper that has been scrubbed into a fuzzy mess (pilling), a composition that simply does not work, a painting that has been overworked into mud everywhere, or a palette that went wrong in a way you do not actually like.
Here is a comforting truth: starting over is not failure. It is practice. Every time you begin again, you bring everything you learned from the attempt before. The second version is always better, and the third better still.
Keep a stack of inexpensive practice paper for exactly this reason. When a painting is beyond saving, thank it for the lesson, lay it aside, and start a fresh sheet with a lighter heart.
Fix Number One: Muddy Colors
Mud is the most common complaint I hear from beginner painters. You mix what should be a lovely color, and instead you get something that looks like dishwater. Here is what causes it and how to fix it.
Why it happens: Mud usually comes from mixing too many colors together, overworking an area while it is still wet, or using a brush that still has a different color on it. When you keep adding pigments to the same spot, they eventually cancel each other out into gray-brown.
Prevention is half the fix: Limit every wash to two or three colors. Rinse your brush properly between colors and blot it on a paper towel. Let each layer dry before you add the next one, so the colors sit beside each other instead of mixing into sludge.
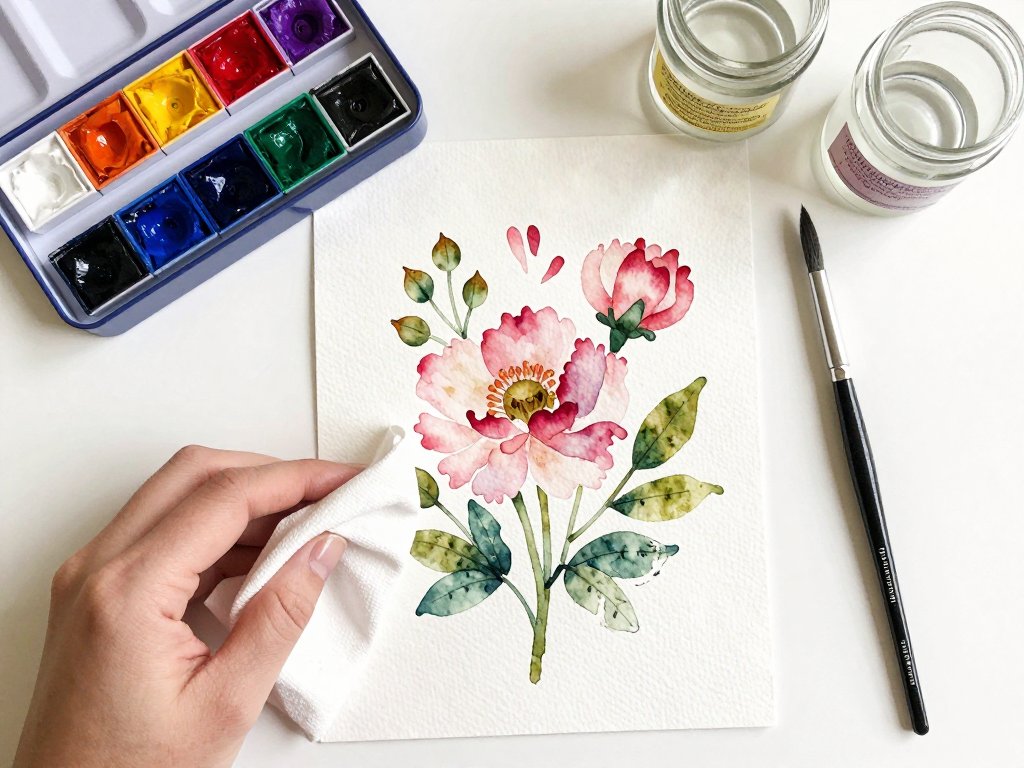
How to fix it while wet: If you catch the mud while the paint is still damp, blot the area gently with a clean, dry paper towel.
You will lift some of the pigment away. Then let it dry completely before deciding whether to repaint that area with a cleaner, fresher color.
How to fix it once dry: For a small muddy patch, wet the area with clean water, wait thirty seconds, and lift with a paper towel or a clean damp brush.
For a larger area, you can wash the whole region out and start that section again.
A soft, patient lift almost always brings back a cleaner color.
And remember: a little mud is actually normal in shadows. If your shadow color looks slightly gray, that may not be a mistake at all, it may be exactly right.
Fix Number Two: Blooms and Backruns
That spreading, feathery ring of darker pigment with a pale center is called a bloom, a backrun, or a cauliflower, depending on who you ask. It happens when a drop of water or wet paint touches an area that is still damp and pushes the pigment outward.
Why it happens: A bloom forms when wet paint meets paper that is drying unevenly, usually because you added more water or paint to an area that was not quite dry. The fresh water carries pigment to the edge and leaves a ring behind.
How to fix a fresh bloom: While the bloom is still wet, gently blot the whole area with a dry paper towel to soak up the excess water before the ring dries in. If you are quick, you can stop the bloom before it sets.
How to fix a dried bloom: Once dry, wet the bloom area with clean water using a soft brush, wait a moment for the pigment to loosen, then lift carefully with a paper towel.
You may need to repeat this two or three times. When the area is dry again, repaint it with a soft, even wash.
Better yet, embrace it: Blooms in clouds, water, or soft backgrounds can look like mist, texture, or shadow. I have left many blooms in place because they looked like weather. If the bloom is in a spot where texture belongs, you may not need to fix it at all.
Fix Number Three: Lost Whites and Washes Gone Too Dark
You planned to keep a bright white highlight, and now it is gone. Or your wash dried much darker than it looked when it was wet. Both are the same problem, and both have the same rescue.
Why it happens: Watercolor always dries lighter than it looks when wet, but it also pools in low spots, and paint can drift into areas you meant to keep white. Whites are lost when paint sneaks into protected areas or when a wash is simply too heavy.
Lift the color out: The most reliable fix is lifting. Wet the area with clean water, wait twenty or thirty seconds, then press a clean, dry paper towel onto it.
The pigment transfers into the towel. For more precision, use a clean damp brush to scrub the area gently, then blot.
Repeat for stubborn paint: Some pigments stain the paper more than others. For stubborn areas, you may need two or three lift-and-blot rounds, letting the paper dry between them. This works beautifully for restoring white foam, highlights on glass, and the glint on water.
Scrub carefully: If you scrub too hard, you will damage the paper surface, so be gentle and patient. A soft synthetic brush and a light touch will lift most pigments without pilling the paper.
White gouache is an emergency backup: a tiny dot of opaque white can restore a highlight that simply will not lift. Use it sparingly, only on small areas, and it will look like part of the painting.
Fix Number Four: Wobbly or Crooked Lines
You tried to paint a straight horizon or a crisp stem, and it came out wobbly. This is not a tragedy, it is a very common beginner moment, and there are several gentle ways to fix it.
Masking fluid for the future: The best fix is prevention. Paint masking fluid over the line you want to keep crisp, let it dry, paint freely over it, then rub it off to reveal a perfect white line underneath.
It is a little extra effort, and it is worth it for horizons and boat masts.
Straighten with a ruler: Once the paint is dry, you can clean up a wobbly line by placing a ruler along where the line should be and painting a crisp edge right up to it. The straight edge pulls the eye past the wobble.
Soften it into mist: A wobbly horizon can become a hazy, atmospheric one. While the line is still damp, run a clean wet brush along it to blur it slightly. Suddenly your shaky line looks like coastal fog, and nobody will know it was an accident.
Add a foreground interest: A boat, a tree, or a rock placed near the wobble draws the eye away from it. This is not cheating, it is composition. Painters have been arranging things to flatter their work for centuries.
Fix Number Five: Bleeding and Paint Outside the Lines
You painted a careful shape, and the color bled right out of it into the space beside it. Bleeding happens to everyone, and it is one of the easiest things to fix or avoid.
Why it happens: Watercolor follows water. If the paper beside your shape is damp, or if you use too much water in your brush, the pigment will travel wherever the moisture takes it.
Wait for dryness: The simplest prevention is patience. Make sure the area around your shape is completely dry before you paint the shape itself. Test with the back of your hand: if the paper feels cool, it is still damp.
Control your water: Wipe most of the water off your brush before you touch it to paper. Less water means less travel. You can always add more water, but you cannot easily take it back.
Fix a small bleed: If a little color has crept past your line, lift it immediately with a dry brush or paper towel while it is wet. Once dry, use the lift-and-blot technique from earlier to remove the stray pigment.
Turn it into a shadow: A small bleed along the edge of a shape can simply become its shadow. Soften the edge with clean water, and what looked like an error now looks like depth.
Fix Number Six: Overworked Paper and Pilling
If your paper starts to look fuzzy, rough, or like it is developing little balls of pulp, you have overworked it. This is the one mistake that is hard to fix, so prevention matters most.
Why it happens: Paper is made of pressed fibers. When you scrub at it repeatedly with a brush, especially a stiff one, you damage the fibers and they lift off the surface. Once pilling starts, the area will never hold paint the same way again.
How to avoid it: Use a softer touch and fewer passes. If a lift is not working after two or three tries, stop. Let the paper dry and try a different approach, like masking fluid or a fresh wash, rather than scrubbing harder.
Good paper helps: Heavier paper, 140 lb or 300 gsm, withstands more abuse than lightweight paper. If you find yourself pilling often, treat yourself to a better-quality pad. It makes a real difference for beginners who are learning to lift and correct.
If pilling happens: There is no perfect fix for a pilled area. You can disguise it with texture: a bit of granulating paint, a loose splatter, or a small painted detail over the damaged spot.
Or you can simply start the painting over on a fresh sheet and carry the lesson with you.
The Lifting Technique: Your Most Valuable Skill
If you take only one thing from this guide, let it be this: learning to lift pigment is the single most useful rescue skill in watercolor. It fixes muddy color, lost whites, blooms, and bleeds, which is most of this list.
Step 1: Wet the area. Use a clean brush and clean water to wet the pigment you want to remove. Do not scrub, just lay the water on gently.
Step 2: Wait. Give the water twenty to thirty seconds to loosen the pigment. You will see the color start to lift and cloud the water.
Step 3: Blot. Press a clean, dry paper towel onto the area and lift. The pigment transfers to the towel. For precise areas, use a dry brush to pull the softened paint away instead.
Step 4: Repeat as needed. Let the area dry between rounds, then repeat. Most pigments lift noticeably after two or three gentle rounds.
Know your pigments: Some colors, like ultramarine and the phthalo blues, stain the paper and lift reluctantly. Others, like the earth pigments and most oranges, lift easily. If a color will not lift, that is a property of the pigment, not a failure of your technique.
Practice lifting on a scrap sheet until it feels natural. I promise you, this one skill will save more paintings than any other technique you will ever learn.
When to Start Over, and How to Do It Gracefully
Sometimes the kindest thing you can do for a painting is to begin again. Let me help you let go without guilt.
Ask yourself two questions. First, does the mistake bother me, or is it just different from what I imagined? Second, would fixing it take more time and heart than starting fresh? If the answer to the second question is yes, start over.
Keep the first attempt. Do not throw it away. Keep it somewhere you can see it, because in two weeks you will look at it and see exactly what went wrong and how far you have come. Old paintings are your best teachers.
Change one thing. When you start the second version, change just one element: a different color, a looser approach, a smaller size. That single change keeps the new attempt exciting instead of feeling like a chore.
Remember the bigger picture. Every artist has a drawer of abandoned paintings. The painters you admire are not the ones who never made mistakes; they are the ones who started over without letting it stop them. You are allowed to be one of those people.
Final Thoughts
That blue bloom on my tulip painting taught me more than any tutorial ever did. It taught me that watercolor is not about control, it is about conversation. The paint tells you things, and when you learn to listen, every accident becomes a choice.
Keep this guide somewhere handy. The next time a drop lands where it should not, take a breath, reach for a paper towel, and remember you have options. Lift it, soften it, embrace it, or begin again. All of those are valid. All of those are what painters do.
And when you rescue a painting that you almost gave up on, hold it up and be proud. That is not a painting of tulips or waves or whatever you painted. That is a painting of persistence, and it is the most beautiful subject there is.