Introduction
I ruined a 16x20 canvas last March, trying to save about eight dollars on medium. I mixed a glaze with almost nothing but water, brushed it over a sky that was half dry, and watched the whole thing turn grey mud.
Two tubes of paint, one full afternoon, and a canvas I had spent three evenings building. Gone, because I did not understand what glazing actually is.
Do the math with me. The canvas was twelve dollars. The paint I scraped off was another twenty. That is thirty-two dollars and roughly nine hours of my life, spent on a mixing mistake.
I did not repeat it. What follows is the ratio I use now, the layering order that protects the light, and the drying rules that keep a layer from lifting the one below.
If your acrylic paintings look flat, chalky, or strangely grey in the midtones, glazing is most likely the missing step. It is also the cheapest upgrade available in any studio.
What Glazing Actually Is
A glaze is a transparent layer of pigment suspended in binder. Light travels through it, hits the layer below, and bounces back to your eye.
That round trip is the entire trick. It is what makes a glaze glow in a way that opaque paint never can, because opaque paint sits on top and blocks the light.
Now the distinction that costs people the most time: a wash is not a glaze. A wash is pigment thinned with water, and it is usually under-bound, pale, and slightly powdery.
A glaze is pigment extended with medium. The binder stays intact while the pigment spreads thin, so the film still holds together and still adheres.
Think of a wash as milk poured onto the canvas and a glaze as tinted glass laid over it. Both change the color underneath. Only one keeps it luminous.
Every glaze has three jobs: stay transparent, keep enough binder to hold, and dry to a surface you can paint over without damage. Miss one and you get grey, chalky, or sticky results.
There is a second effect worth knowing. Because a glaze sits over a dried layer rather than mixing into it, you can adjust color in small increments without destroying the layers below.
That is why glazing reads as gradual and optical rather than painted. You are stacking colored filters, not covering with a brush.
The Math of Dilution
Start with one part paint to two to four parts glazing medium, then add water only as a final splash, a few drops at a time.
Why medium first? Acrylic medium is essentially acrylic binder with little or no pigment. It thins your color without reducing the film's ability to form.
Water does not add binder. Past roughly thirty percent of your total mix, water begins to break the acrylic emulsion apart.
The result is a film that looks chalky, feels powdery to the touch, and can lift or dissolve when the next layer goes on top of it.
Here is a concrete mixing example. A pea-sized blob of phthalo blue, three peas of glazing medium, and two drops of water. That covers about a square foot.
Stir with a palette knife rather than a brush. Brushes whip air into the mix, and those bubbles dry as tiny white specks in your film.
Consistency test: drag the knife through the puddle and lift it. The glaze should run off like skim milk, thin but still coating the blade evenly.
If it beads up or slides off in clear streaks, you are water-heavy. Add a small amount of medium to pull the ratio back.
If it sits like heavy cream and refuses to flow, add water one drop at a time. When you find the ratio you like, write it on the palette paper.
Keep the puddle small. A quarter-sized pool of glaze is enough for several square feet, and anything larger starts skinning over before you finish.
Also mix more than you think you need. Matching a glaze color by eye after it has run out is far harder than making extra in the first place.
Glazing Medium vs. Matte, Gloss, and Plain Water
Glazing medium is formulated specifically for transparency. It dries clear, extends your working time slightly, and keeps pigment from clumping.
Matte medium can stand in as a glaze extender. The tradeoff is its matting agent, which can slightly cloud a clear glaze and soften the depth you are chasing.
Gloss medium is the most transparent of the three. It dries to a hard, reflective film that some painters love for depth and others find plastic.
Satin medium sits between the two. It is a reasonable compromise when you want luminosity without a high-shine finish catching every lamp in the room.
Plain water is the free option and the weakest one for glazing. It thins without binding, and the film it leaves is dull and under-bound.
Pick one finish and stay with it for the whole painting. Mixing finishes across layers produces uneven sheen that only shows up in raking light.
One more note on water: if you have already thinned your paint with water in the jar, do not count that as your glaze medium. Add medium to the puddle separately.
Retarders and Flow Improvers
Acrylics dry fast. That is a feature until you are trying to glide a wide brush across a two-foot sky before the edge sets.
A retarder slows the drying of the paint film. In practice it buys you roughly ten to thirty extra minutes of working time, depending on your humidity.
Flow improver is a different product. It lowers surface tension so the glaze levels itself out instead of holding every brush mark.
Use retarder at about five to ten percent of your glaze volume. Beyond that, the film stays tacky for hours and soft for days.
Too much retarder also risks weak adhesion between layers, which is how a painting develops a sticky surface months later.
My working recipe: three parts medium, one part paint, a few drops of water, and a single drop of retarder for anything larger than a sheet of paper.
In a warm, dry studio you will reach for it constantly. In a humid one you may not need it at all, so test before you add it.
Never pour retarder straight from the bottle into the puddle. Dip a brush tip, stir it in, and add more only if the glaze still sets too quickly.
The Transparency Test
Do not guess how transparent a pigment is. Test it, because every color behaves differently and the label will not always tell you.
Here is the black line test. Draw a thick stripe with a black permanent marker on a scrap of canvas or gessoed card.
Brush one even coat of your mixed glaze across the stripe and let it dry completely before you judge it.
Then read the result. If you can clearly see the black line through the color, you have a genuine transparent glaze.
If the line has gone faint and patchy, that pigment is semi-opaque. If the line has vanished entirely, you are glazing with an opaque paint.
Build a test card for your whole palette. A 5x7 panel divided into a grid, one dried glaze per square, labeled with the pigment name.
This costs an hour and a few drops of paint, and it saves you from discovering an opaque pigment halfway through a painting you care about.
Two coats give you a second data point. Some pigments look transparent in one pass and turn muddy the moment you stack them.
Tape the finished card inside your supply box. Six months from now you will not remember which red glazed cleanly, and the card will.
Layer Order and Value Planning
Value planning before you paint saves you layers. Decide your darkest dark and lightest light, then work over a tonal underpainting.
A grisaille is a monochrome underpainting in greys or a single earth tone. It establishes every value; the glazes only add color on top.
Glaze dark over light, never light over dark. Transparent pigment can only darken or tint what sits underneath it, the way a colored lens does.
You cannot lighten a dark glaze with more glaze. The only fix is to add opaque paint, which flattens the exact luminosity you worked for.
Transparent workhorses: quinacridone magenta, phthalo blue and green, and dioxazine purple. These glaze beautifully over a fully dry underpainting.
Opaque blockers: the cadmiums, titanium white, cerulean, and most earth reds. Mixed into a glaze they quickly kill transparency and dull the light.
Titanium white is the biggest offender. Save it for underpainting and opaque accents rather than stirring it into a glaze.
Keep three or four transparent colors on hand and you can mix most of what a landscape needs. You do not need a drawer of tubes to glaze well.
Depth is also a composition problem, not only a value problem. These composition techniques cover how the eye travels into a painting before you glaze a single layer.
Drying Between Layers
Thin glazes are touch-dry in five to ten minutes in a warm room. Touch-dry is not the same as cured, and the difference matters.
Acrylics dry in two stages. Water evaporates first, then the polymer particles continue to coalesce into a continuous film over the following days.
Practical rule: wait until the surface is dry to a light touch and no longer feels cool against your fingertip.
For heavy or repeated glazing, overnight is a safe wait in most conditions. A thin layer can usually be recoated in twenty to thirty minutes.
Test the edge of the painting, not the middle of a thick passage. If it feels cool or rubbery, give it more time and come back later.
What happens if you do not wait? Your brush drags through the soft layer below, lifting color and smearing it into the new glaze.
Lifting turns a clean edge into a muddy blur, and glazing over it will not repair the damage. Wait, or scrape back and start that section again.
Humidity matters more than temperature. A seventy percent humidity day can double your drying time; a hair dryer on low, held well back, can shorten it.
Thin layers dry faster than thick ones, so glazing rewards patience in a different way than opaque painting does. Two thin passes beat one heavy one.
Application Technique
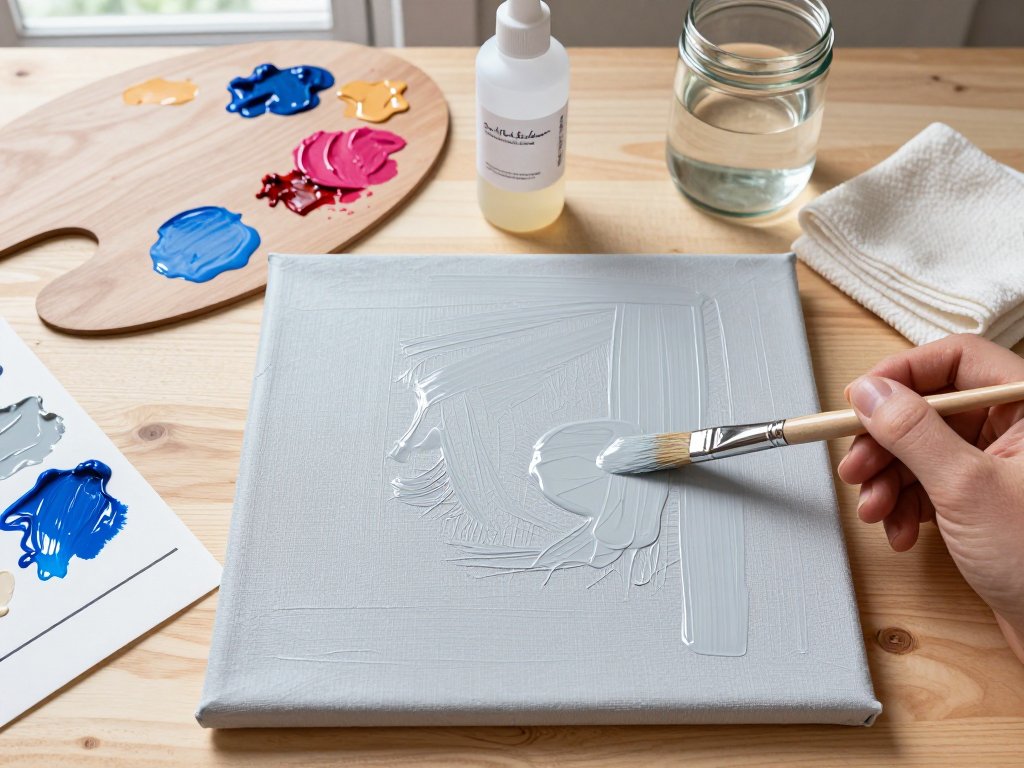
Use the biggest soft brush the area allows. A one to two inch flat or a wide synthetic wash brush holds enough glaze to cover without constant reloading.
Load the brush lightly, then touch it once to the palette to shed the excess. A dripping brush is a streaking brush.
Apply in one direction and lay off with the same stroke. Keep brushstrokes minimal, because every extra pass over wet glaze pulls pigment back up.
Maintain a wet edge. Work from one corner and move across, always overlapping into glaze that is still wet, never into a patch that has already set.
If the area is large, break it into bands and blend each band into the previous one before it flashes off.
Lift a mistake with a damp cloth before the glaze sets. It comes up cleanly in the first few minutes and hardly responds after that.
For a soft gradient, apply with a damp sponge instead of a brush. Sponges leave no stroke direction and blend one value into the next.
Tilt the canvas slightly so you can see the wet sheen. Glare on a wet layer tells you where the glaze is still thin before it dries.
Wash the brush out thoroughly between glazes. Dried pigment in the heel of a brush sheds into your next layer as grit.
The Budget Math
Let us talk cost, because this is where glazing either earns its keep or quietly eats your supply budget.
A four-ounce bottle of quality glazing medium runs about eight dollars. Student and craft-grade medium can be found for four or five.
A single light glaze coat on a 16x20 canvas uses roughly half a teaspoon. That bottle will glaze the same canvas about sixty times.
That works out to roughly thirteen cents per full-canvas layer. Compare that against rebuilding a canvas you muddied with watered-down paint.
Run a cost-per-square-foot note on your palette paper once, and you will never have to guess at it again.
When is cheap craft medium good enough? For practice panels, underpaintings, and color studies, absolutely. For a piece you plan to sell, use the good medium.
Budget medium may contain more filler and less binder, which can dry slightly hazy over a dark underpainting. Test it on a scrap before committing.
DIY medium: three parts matte medium, one part water, and one drop of glycerin per two tablespoons. Seal it in a jar and label the date.
The glycerin acts as a humectant and extends open time. Mix small batches, because a medium cut with water lacks the preservatives that keep manufactured medium stable.
Do not skip the label. A jar of homemade medium looks exactly like a jar of wasted paint water three weeks later.
Troubleshooting
Cloudy or Milky Layers
Milky glazes usually come from matte medium, over-thinning with water, or applying in high humidity that traps moisture in the film.
Switch to gloss or satin medium, pull your water back, and let each layer dry fully before the next one goes down.
A Plastic-Looking Sheen
That hard shine is gloss medium drying on a surface with no tooth. A final coat of matte or satin varnish will knock it back.
Brush Streaks
Streaks mean too much glaze on the brush, too small a brush, or too dry a surface. Reload less, use a wider brush, and work faster.
A drop of flow improver in the mix also helps the glaze level itself out before it sets.
Lifting the Layer Below
You painted over a layer that was not dry enough. Slow down, thin the next glaze a little more, and load the brush with less pressure.
Cracking in a Thick Glaze
Thick glazes crack because acrylics shrink as they dry. Glazing works best in thin layers, so build depth with many coats rather than one heavy pass.
Great Wet, Flat When Dry
Every acrylic darkens slightly as it dries and loses the sheen that made it look rich. Judge color on a dried test strip, not on the wet puddle.
Drips Running Down the Canvas
Drips mean the glaze was too watery or your brush was overloaded. Thin less, load less, and work with the canvas flat rather than upright.
If a drip has already formed, catch it while wet with a dry brush corner and lift it, then blend the area lightly.
Edges That Chip or Peel Later
Chipping usually traces back to an over-thinned layer sitting on a slick, glossy surface. Scuff glossy layers lightly and use medium in every glaze.
Where to Use Glazing
Landscapes benefit most. Glaze warm and cool layers over a grisaille to push distance back and pull foreground forward.
For skin tones, glazing is how you build the translucent glow that opaque mixtures cannot reach. Thin layers of quinacridone over a warm underpainting do the work.
Tinting an underpainting is the fastest use of all. One or two glazes can unify a whole canvas and set its color key in under an hour.
Finally, glazing lets you finish a piece without losing the drawing underneath. The line work survives because transparent layers never cover it up.
Portraits and animal studies benefit too. A glaze unifies the halftones and keeps the eyes and fur texture from looking pasted on.
Even your practice panels are worth glazing. Ten minutes of layering on a study teaches you more than an hour of reading about it.
Start with a scrap panel, mix your ratio, and run the black line test tonight. Tomorrow the same colors you already own will look like a different palette.