Introduction
Bavarian crochet is often traced to the household needlework traditions of central Europe, where warm textiles were built from small, repeating units rather than cut and shaped like dressmaking fabric.
Commonly said to have spread through domestic pattern books and needlework schools, it was carried by women who taught one another over kitchen tables. No single inventor is reliably named, and no firm date survives.
What did survive is the logic of the thing. A square grows outward from its centre in rounds, and every round leaves a raised ridge behind it.
The fabric that results is unusually dense and soft, with a sculpted surface that catches light in bands. It looks complicated from across a room. Up close, it is a short rhythm repeated.
This walkthrough teaches that rhythm slowly, one square at a time. You will build a foundation ring, set four corners, grow the rounds, change colour, and finish the square so it lies flat.
If you can make a double crochet and a chain, you have every stitch you need. The rest is placement, which is a calmer skill than speed.
What Makes a Stitch Bavarian, and How to Read It
Three things define the family of stitches sold under the Bavarian name. First, the work begins at the centre and travels outward in closed rounds, never turned.
Second, the shape is square rather than circular. Four corner spaces act as hinges, so the fabric widens along four straight edges instead of blooming evenly.
Third, the texture is built from clusters rather than plain stitches. Each group is a small bundle of tall stitches worked together at the top, so it sits proud of the fabric beneath.
That last point is the whole reason to learn it. A plain double crochet square is flat and pleasant. A Bavarian square has depth you can feel through a blanket.
The clusters also interlock. Each new round's groups sit in the gaps of the round below, and the raised round wraps around the front of earlier groups rather than sitting on top of them.
The effect resembles braided rope or a woven basket more than it resembles ordinary crochet. The shadow lines do most of the visual work.
Reading the pattern is easier once you know its shape. Published Bavarian patterns vary in small ways, and that frightens beginners more than it should. The underlying unit is nearly always the same: four rounds worked as one set.
Within a set, one round establishes the groups, one round adds height, one round creates the raised band, and one round settles everything back into line.
Think of it as a bar of music rather than a chart. Group, chain space, group, corner. Then the same bar, larger, with one more group along each side.
Patterns usually write the repeating unit once and then say "repeat rounds four to seven" for the rest of the square. The counts grow; the instructions do not.
When you read "group" in a Bavarian pattern, it almost always means four double crochet worked together in one space and joined at the top. Some books call it a cluster, some a shell, some a block.
When you read "corner space", it means the two-chain gap at each of the four corners. Those two chains are the hinge. Nothing else in the pattern matters as much.
Materials: Yarn, Hook, and Markers
Choose a smooth worsted or DK yarn in a single solid colour. Smooth matters because the clusters are made of several loops drawing through one another, and a fuzzy yarn will felt together under that friction.
Solid colour matters even more. A variegated yarn changes tone every few inches, and those changes fall across the raised ridges exactly where the shadow lines should be reading.
The texture stops being legible. You still feel it with your hands, but the square looks like noise from a distance, and the whole point of Bavarian crochet is that visible depth.
Use a hook one size larger than the yarn label recommends. A worsted weight that suggests a 5 mm hook works well on a 5.5 mm, and a DK on a 4.5 mm.
The extra size buys drape. Bavarian fabric is already dense because the clusters pack stitches closely, so a slightly generous hook keeps it from turning into a board.
You will also want stitch markers for the four corners, a tapestry needle for the ends, and small scissors. Place a marker in each corner chain space as you close a round, and you will never lose your place.
The Foundation Ring and the First Round
Begin with a ring. Either chain four and join with a slip stitch, or make a magic ring if you prefer a centre that closes completely. Both work; the chain ring is easier for a first attempt.
Chain three. This counts as the first double crochet of your first group, which is a small accounting trick worth remembering for every round that follows.
Work three more double crochet into the ring itself. Work them into the hole, not into the chain stitches, so the group can fan out.
You now have four double crochet gathered at the top, which is one group. Chain two for the corner space.
Repeat that pair three more times: four double crochet into the ring, then chain two. Join with a slip stitch into the top of the starting chain three.
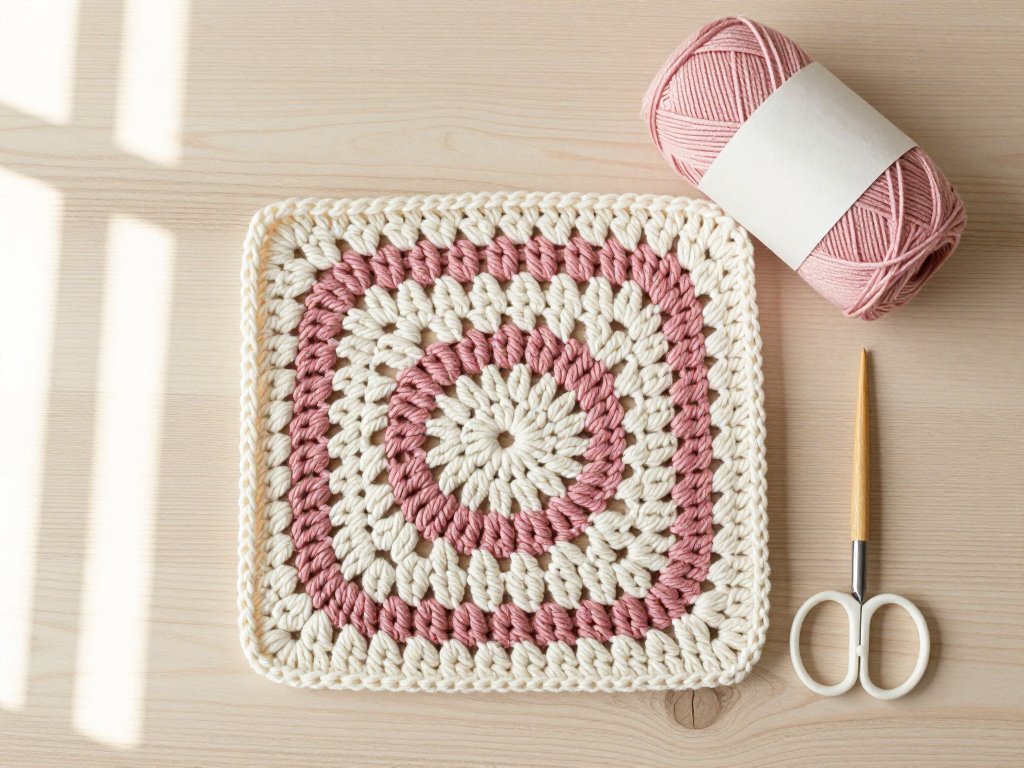
You should have four groups and four corner spaces, arranged like a tiny pinwheel. Lay it on the table. It will look like a small, thick flower, not yet a square.
Snug the centre closed by pulling the tail, but do not strangle it. The middle should be firm enough to hold shape and soft enough to lie flat.
Four Corners, and How the Square Turns
Slip stitch across to the first corner space. From here on, almost every round begins in a corner, which is why the markers earn their keep.
Into that corner space work one group, chain two, then one group again. That single instruction is what turns a circle into a square.
The two groups share one corner space and lean away from each other at a right angle. The chain two between them is the pivot.
Move to the next corner space and do the same. Work all four corners, then join. The piece will now sit as a small square with rounded, soft corners.
Notice what did not happen. You did not turn the work, and you did not work along a flat edge. The square grew outward from its own centre, evenly, on all four sides at once.
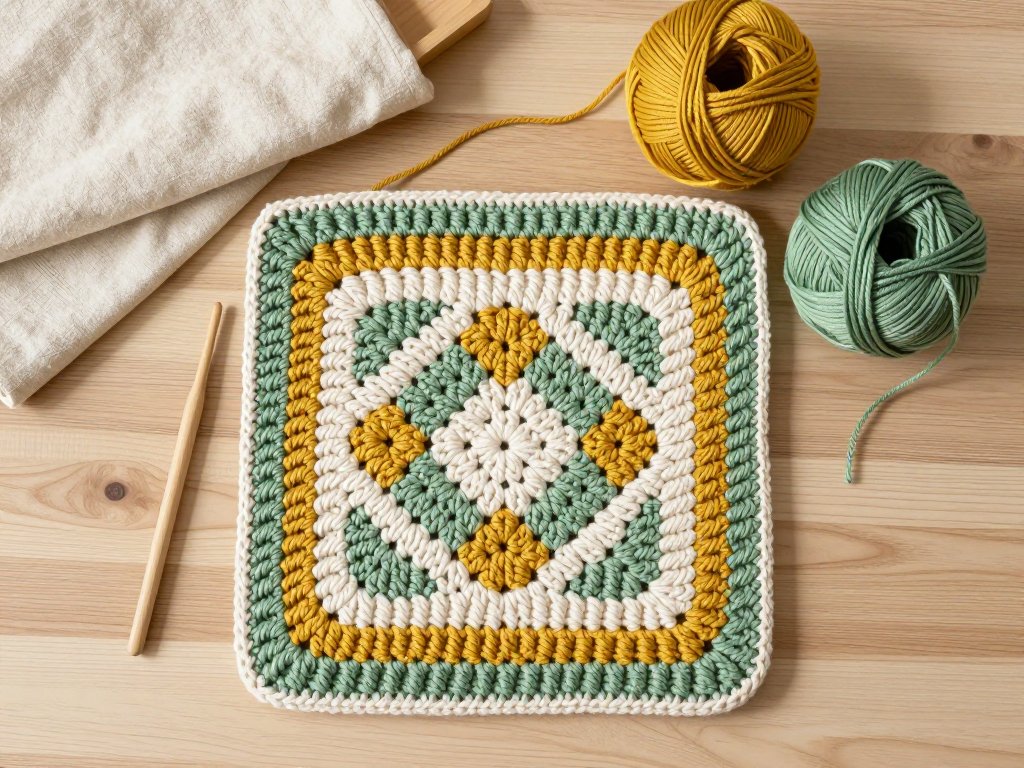
That is the geometry of the whole technique. Every round you complete adds a frame around the frame before it, like a picture that keeps gaining mats.
Keep the corner chain at exactly two chains. Three makes a hole; one makes a pucker.
The Repeat Rounds: Growing the Square
Rounds now follow a pattern you can predict. In each corner space, work a group, chain two, and a group. Along each side, work one group into every space between the groups of the round below.
That is the entire rule. Corners get two groups and a chain; sides get one group per gap.
Each round therefore adds one group along each of the four sides. Four new groups per round, every round, which is why the stitch count climbs in a steady, countable way.
Work your groups into the spaces, not into the tops of the stitches. This is the single most common beginner error, and it is what flattens the texture.
In one round of each four-round set, the groups are worked around the front of the previous round's groups instead of into a space. Some patterns describe this as working around the post.
That round is where the raised band appears. Hold the previous group forward with your finger as you work behind it, if the pattern asks for that, and the clusters will cross like folded ribbon.
Count at the end of every round. If a side has one group too many, the corner has absorbed a stitch that belonged to the edge, and the square will begin to flare.
Changing Colour and Carrying It Up
Change colour at the end of a round, never in the middle of a side. Finish the round, join with the old colour, then fasten off or set it aside.
Join the new colour in a corner space with a slip stitch, then chain three and begin the round as usual. Starting at a corner hides the join in the place where the fabric already has a break.
If you plan to return to the first colour, do not cut it. Carry it up the side of the square instead, letting the strand run loosely along the edge.
Catch the carried strand behind your work every round, or crochet over it as you pass, so it does not loop across the front. Keep it slack; a tight carry pulls the edge in.
Carrying works for two or three rounds. Beyond that, the strand becomes visible and the edge stiffens, so fasten off and rejoin instead.
Weave the old tail into the same colour band before you continue. Later rounds will lock it in place, and the square stays tidy inside as well as out.
Tension: Why the Relaxed Hand Matters
Bavarian crochet rewards a loose hand. Each group is four stitches crowded into one space, and those stitches need room to sit beside each other instead of stacking.
If you work tightly, the clusters compress. They lose height, the raised round has nothing to wrap around, and the square cups at the corners as the fabric contracts.
A tight hand also makes the hook drag. You will feel it before you see it: the yarn squeaks, splits, and the group will not sit flat when you finish it.
Check yourself after the fourth round. Lay the square on a table and press it lightly. It should lie flat with a slight dome at the centre, not curl up like a bowl.
If it curls, change the hook before you change anything else. One size up solves most tension problems, and it is faster than relearning how you hold the yarn.
Joining Squares, Border, and Blocking
For a first blanket, join as you go. You work the final round of each new square attached to its neighbour, so the squares align themselves and you never face a pile of pieces and a needle.
Join-as-you-go also distributes the weight as you build, which matters on a large throw. The join becomes part of the last round rather than a seam sitting on top of it.
Seaming gives a flatter, more controlled finish, and it lets you block each square to an exact measurement first. A mattress stitch seam disappears into the edge and leaves the texture uninterrupted.
Seaming is the harder choice for a beginner, because every square must match before the first stitch of the seam. Join as you go forgives a little more.
Finish the blanket with a simple border: one round of single crochet to even the outer edge, then a round of half double crochet or a small shell if you want a soft finish.
Keep the border quiet. The clusters are the event; the border is the frame.
Then block. Textured squares need it more than flat ones. Blocking opens the corner spaces, evens the cluster heights, and teaches the fabric to lie flat instead of remembering the basket it travelled in.
Pin each square to its finished measurement on mats, mist it, and let it dry untouched. If you are new to the process, this guide to how to block knits covers pinning, shaping, and drying in detail.
Troubleshooting the Common Snags
Wavy edges. You have too many groups along the sides, usually because a corner group was worked into a side space. Count one group per gap and two per corner, and the wave will settle.
Cupped corners. The corner chain is too tight, or the clusters are pulled small. Loosen the corner chain slightly, working it over the hook's shaft rather than the tip, and check your hook size.
A square drifting into a circle. The corners are not being worked as corners. Every round must place two groups and a chain in each corner space, or the fabric rounds off.
Uneven clusters. Groups made of different heights, usually because the first loop was pulled tight or a stitch landed in the wrong space. Undo the group and rework it rather than pressing on.
Running out of yarn mid-round. If the round is nearly done, finish it in a second colour and call it a design choice. If it is not, undo to the corner and change there.
None of these are serious. Every one is a placement problem, and placement is fixable with a hook and five quiet minutes.
What to Make, and a Warm Goodbye
A dozen squares make a pram blanket. Twenty make a lap throw. Six make a cushion cover, and three make a table runner that shows the texture off in daylight.
Small squares also work as potholders, bag panels, and the front of a simple envelope purse. The density of the fabric suits anything that needs body.
Start with one square, though. Not a blanket, not a plan. One square, worked slowly, with the markers in place and the hook a size larger than you think you need.
Bavarian crochet is one of those techniques that feels clumsy for four rounds and then suddenly makes sense in your hands. That moment is worth waiting for.
When it arrives, you will have a small, thick, deeply textured square that looks nothing like the flat pieces you have made before. Set it on the table and look at it for a moment.
Then begin the next one. The rhythm is already in your fingers now, and the second square is always calmer than the first.