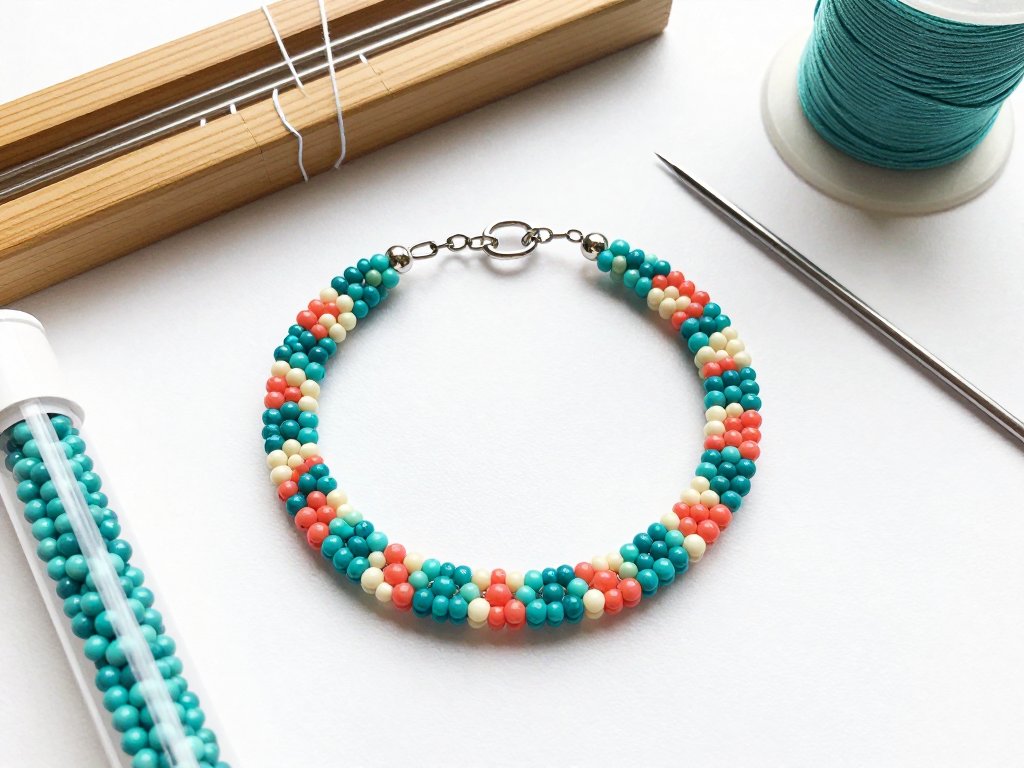
Introduction
There is a particular quiet that arrives when you sit down at a bead loom. The threads are already stretched. The pattern is already decided. Your hands only have to lift, slide, and pass.
Bead loom weaving is one of the oldest ways to turn tiny glass beads into fabric. You stretch warp threads across a frame, then weave a weft thread through them, catching a row of beads with each pass.
Ten columns of beads, ninety rows, and you have a bracelet. It is a genuinely achievable first project — the kind you can finish over two evenings and wear on the third.
This guide walks through the whole shape of it: choosing a loom, sizing beads, warping with even tension, weaving straight rows, and finishing an edge that looks deliberate.
If you have ever admired a beaded band in a shop and wondered whether you could make one, the answer is yes. Start small. Start simple. Let the loom carry the hard part.
Why the Loom Does the Hard Part
Every bead-weaving technique has to solve the same problem: holding a row of beads steady while you attach the row below it. Off-loom stitches like peyote or brick stitch solve it with your fingers and a patient, even tension.
A loom solves it with geometry instead. The warp threads are tied under tension across a frame, so the beads line up in columns before you have woven anything at all. Your job is simply to travel across.
That division of labour is exactly why bead loom weaving suits beginners. Tension is the hardest skill in beadwork, and here the loom owns it. You get to focus on the rhythm of the pass.
You will still make mistakes — a bead in the wrong column, a thread that slips under instead of over. But mistakes on a loom are visible and fixable, not mysterious.
There is also something soothing about the motion itself. Over, under, over, under, slide a row of beads up, repeat. It occupies your hands enough to quiet the rest of your mind.
Many weavers describe the rhythm as the craft equivalent of a long walk. Not exciting, exactly. Just steady, and oddly restoring.
Choosing a Beginner Loom
Bead looms come in two broad families, and both will make a bracelet. The question is which one suits the way you work.
Metal looms are the workhorses. They usually have a coiled spring at each end, and the gaps between the coils set your warp spacing. They are sturdy, inexpensive, and easy to wipe clean.
Wooden looms feel warmer in the hand and often look lovely on a shelf. Some use a spring like the metal ones; others use a grooved bar or notches. Wood gives slightly under tension, which some weavers find gentler on the thread.
The trade-off is mostly about adjustability and grip. A metal loom with a roller lets you wind finished work out of the way on a longer band. A small wooden loom is often lighter to hold in your lap while you watch something.
An inexpensive beginner loom typically runs about fifteen to twenty dollars. That is a low-risk entry, and it will carry you through many bracelets before you outgrow it.
Whichever you choose, check two things before you buy. First, that it sits flat without rocking. Second, that the spring spacing suits size 11/0 beads without letting them tip sideways.
Do not buy the largest loom you can find. A short loom with ten to fifteen warp positions is plenty for bracelets, name bands, and bookmarks.
Beads, Thread and Needles
Your results depend far more on your materials than on your skill. Choose well and the loom almost weaves the bracelet for you.
Choosing Beads
Size 11/0 is the beginner default, and for good reason. It is large enough to see without squinting, small enough for detail, and available in every colour you could want.
Size 8/0 beads are noticeably chunkier. They weave faster and build a bold, rustic band, but the holes are wide and the rows can feel clunky. Size 15/0 sits at the opposite end — delicate, precise, and slower to work with.
The more useful distinction is shape. Round seed beads have softly rounded edges, so they nestle unevenly and your rows can look gently wavy.
Cylinder beads, often sold as Delica-style, are shaped like tiny tiles. They sit flush against one another, which is why cylinders give straighter rows and crisper pattern edges.
That is also why most published graphs are designed for cylinder beads. If a pattern promises sharp diagonal lines, it is almost certainly drawn for cylinders.
Before you commit to a tube, tip a few beads onto a tray and look closely at the holes. Uniform holes mean the needle passes evenly and the beads sit square. Set aside any batch where the holes wander.
One honest note: mixing round and cylinder beads in the same band will show. Pick one style and stay with it for the whole bracelet.
Thread, Conditioner and Needles
Beading thread is the standard choice. It is thin, strong, and made to pass through a bead more than once, which matters because you will re-enter finished rows.
Nylon thread behaves similarly but tends to stretch under load and can fray at the eye. Fishing line is nearly unbreakable and excellent for stiff structural work, but it has no give and can saw at beads over time.
For a bracelet you actually intend to wear, a good beading thread is the calmest choice.
Waxing the thread, or drawing it over a thread conditioner, is a small step with real returns. It stiffens the thread slightly so it tangles less, and it helps the needle glide through tight bead holes.
Thread colour matters more than most beginners expect. A matching thread disappears into the work; a contrasting thread becomes a design element in its own right. When unsure, match the darkest bead in your pattern and let the thread recede.
Beading needles are long, thin, and flexible, usually size 10 to 12. They are made to bend without snapping and to pass through a bead twice. Standard sewing needles will not do the job.
When the needle falls off the thread mid-row — and it will — use the folded-thread trick. Fold the thread over the needle and pinch both strands flat, then thread the folded loop through the eye.
Warping Your Loom
Warping is the setup, and it decides how the whole bracelet will behave. Ten minutes of care here saves an hour of frustration later.
Your warp count is your column count. A warp count of seven means seven beads across in every row. Count the spring gaps you need, then add one or two more warp threads than the pattern calls for.
Those extra threads become a clean outside edge. They give the outermost beads something to sit against, so the selvedge stays tidy instead of wandering sideways.
Tie on at the spring or bar with a firm double knot — a surgeon's knot if you want extra hold. Leave a tail of several inches, because you will weave that tail back in at the end.
Run each thread across the loom and tie it at the far end, keeping the strands parallel and untwisted. Twists are easy to miss and they reappear later as a lumpy row.
Tension is the delicate part. Warp threads should be snug — firm enough to hold a row of beads flat, loose enough that you can slide a fingernail underneath them.
Snug, but not guitar-string tight. Over-tensioned warps bow the loom, stretch the thread, and make it genuinely difficult to pass your weft between them.
Run a finger across the warp like a harp. Every thread should sound about the same note. If one is slack and one is twanging, retie until they agree.
The Weave, Step by Step
Now the pleasant part. The motion is simple, and once your hands learn it you will stop thinking about it entirely.
- Thread your needle with a comfortable length of weft thread — roughly an arm's length. Longer threads tangle; shorter threads run out mid-row.
- Pass the needle under the warp threads from one side to the other. Count the threads as you go so you always know where you are.
- Slide the beads for your first row onto the needle in pattern order. Push them down the thread until they rest against the warp.
- Hold the beads from underneath with one finger and pass the needle back over the top of the warp, this time above the beads.
- Snug the thread gently. The beads should stand upright and side by side, not leaning against each other.
- Repeat across the row until every warp thread has been crossed above and below.
The single habit that matters most is this: keep the weft thread on top of the warp, never beneath it, while you are seating beads. A thread that slips below a bead splits the row and pulls it tight.
Another habit worth forming early is pushing the beads up between passes. After each row, nudge the finished beads firmly against the row above with a fingertip or a needle.
That small push is what makes rows sit tight and pattern edges look crisp. Skip it and you will get a ladder with visible gaps between the rungs.
Keep an eye on your columns. Each bead belongs in the pocket between two warp threads, and it should be obvious which pocket it is sitting in. A bead straddling a thread will tilt.
If you spot a missed bead or a wrong column, stop. Weave back through that row, remove the bead, and reset it correctly. Fixing it at row three takes a minute; at row thirty it takes an evening.
Keeping the Edges Neat
Edges are where a handmade bracelet either looks thoughtful or looks improvised. The fix is a habit, not a tool.
On the outer column, make a turn-and-go-back. After your final bead in a row, pass the thread back through the last bead you just laid before starting the next row.
This wraps the outside edge in thread and locks the column, giving the selvedge a fine cord-like finish that reads as deliberate.
If your sides already look like a staircase, do not unpick everything. Finish the band, then add a thin border of edge beads or a woven thread line to straighten the silhouette.
For your next bracelet, add one extra warp thread on each side. That gives the edge beads a buffer, and the staircase usually stops happening altogether.
Patterns for a First Bracelet
You do not need a published chart for your first band. Four simple patterns will teach you nearly everything worth knowing.
A stripe. Five to seven columns, one colour across the whole row, repeated for a block of rows, then switch to a second colour. This is the most honest practice band there is.
A chevron. Work a V shape by stepping one bead in on each side as you climb, then out again as you descend. Chevrons are forgiving, because a slightly uneven row hides inside the angle.
A name band. Letter out a name or an initial on graph paper, one square per bead. Graph paper and a coloured pencil remain an honest pattern tool — cheap, quiet, and easy to correct.
A checkerboard. Two colours, alternating in both directions. It is the fastest way to train your eye to place beads in the correct columns without counting.
Colour does a great deal of the work. Two shades with good contrast look crisp even when your rows are imperfect, while five subtle shades will expose every wobble.
Start with a pattern you can hold in your head. Reading a chart and learning the loom at the same time is more than most beginners need on a first evening.
Finishing the Ends and Choosing a Closure
A finished bracelet is one where nothing can work loose. Finishing well is a short list of small, deliberate steps.
To secure a weft end, thread it onto a beading needle and weave it back through a few rows of finished beadwork. Follow the path of the existing thread so it disappears into the work.
Weave back through three or four rows, changing direction once in the middle, then trim close to the beadwork. The end will hold without any knot at all.
You are avoiding knots on purpose. A knot in beadwork is a bump, and it wears through thread over time. Woven-back ends hold better and stay invisible.
The same goes for your warp ends when you free them from the loom. Needle them back into the body of the band rather than tying them off in a lump at the edge.
Then there is the closure, which is also a design decision. Ribbons are soft, forgiving, and suit a casual bracelet you will wear with cotton. Leather cord gives a slightly more grown-up look.
A clasp with jump rings is the most secure option and the best choice for daily wear. A sliding knot adjusts to any wrist and is genuinely easy to make in an evening.
A loom-woven loop is the most satisfying option. Extend the loom work into a narrow strip, then finish the other end with a bead that buttons through the loop.
For an everyday bracelet, choose comfort: ribbon, cord, or a sliding knot. For a gift, choose security and polish: a clasp with jump rings, or the woven loop.
Finishing Touches Worth the Time
Two minutes of finishing can lift a bracelet from homemade to genuinely handmade.
Steam or press the band gently between two cloths. A little warmth settles the thread and coaxes a slight curve into a straighter line. Do not press beads directly with a hot iron.
Check for loose beads by running your thumbnail along each row. Anything that shifts should be re-stitched before it becomes a lost bead in a car park.
Before wrapping a bracelet as a gift, flex it gently end to end and look at the edges in daylight. That quick check catches almost everything worth catching.
When the Weave Goes Wrong
Almost every problem at the loom has a cause and a fix. Here are the ones you are most likely to meet.
Beads sliding off the edge. This usually means the outer warp thread is slack. Retie it firmly, or add an extra warp thread on that side for the next band.
Warp threads pulling loose. If a warp works its way out of the spring, the tension has gone uneven. Untie that thread, reseat it, and tie it again — do not simply tug it tighter.
Bracelet too short or too long. Measure the wrist with a soft tape, then add about half an inch of ease for a comfortable fit, and a little more if the band is stiff.
Because finished length depends on bead size and row height, measure a woven sample band before you weave the real one. It saves a rebuild later.
Thread tangles. Tangles come from threads that are too long, and from letting the thread hang free while you reach for something. Keep weft lengths to about an arm's length.
Letting the needle dangle lets the thread spin and loop on itself. Rest the needle on the loom, or hold the thread loosely between two fingers, whenever you pause.
When a tangle does appear, stop pulling. Set the work down, find the crossing point, and work it open patiently. Pulling only tightens it into a knot you cannot undo.
A Stack of Bracelets, A Stack of Gifts
Once you have one bracelet, you will notice how quickly the second goes. The setup is the slow part, and you have already learned it.
A stackable set in three related colours takes an evening and makes a generous gift. Three narrow bands worn together look intentional, and they use very little bead.
If you enjoy working small and rhythmic, the same instinct shows up in other jewellery crafts. Chain maille asks for similar patience, with jump rings instead of beads.
A matching set — a bracelet and a slim bookmark in the same colours — is a lovely pairing for a teacher or a friend. A bookmark is simply a long, narrow band, and it teaches you to hold steady over many rows.
Keep a small notebook of what you made: bead size, warp count, column count, finished length. Your third bracelet will be easier because of your first.
Final Thoughts
Bead loom weaving is a quiet, repeatable craft. It does not demand a studio, a large budget, or any particular talent. It asks for a loom, some beads, and an hour that belongs to you.
Your first band may have a wobbly edge and a row that sits a little loose. That is not a failed bracelet. That is a first bracelet, and it will still be the one you reach for.
The second will be straighter. The third will be a gift. Somewhere around the fourth, you will stop counting rows and start designing them.
So set the loom on the table, wax a length of thread, and tie on your warp. The rhythm is waiting for you.
