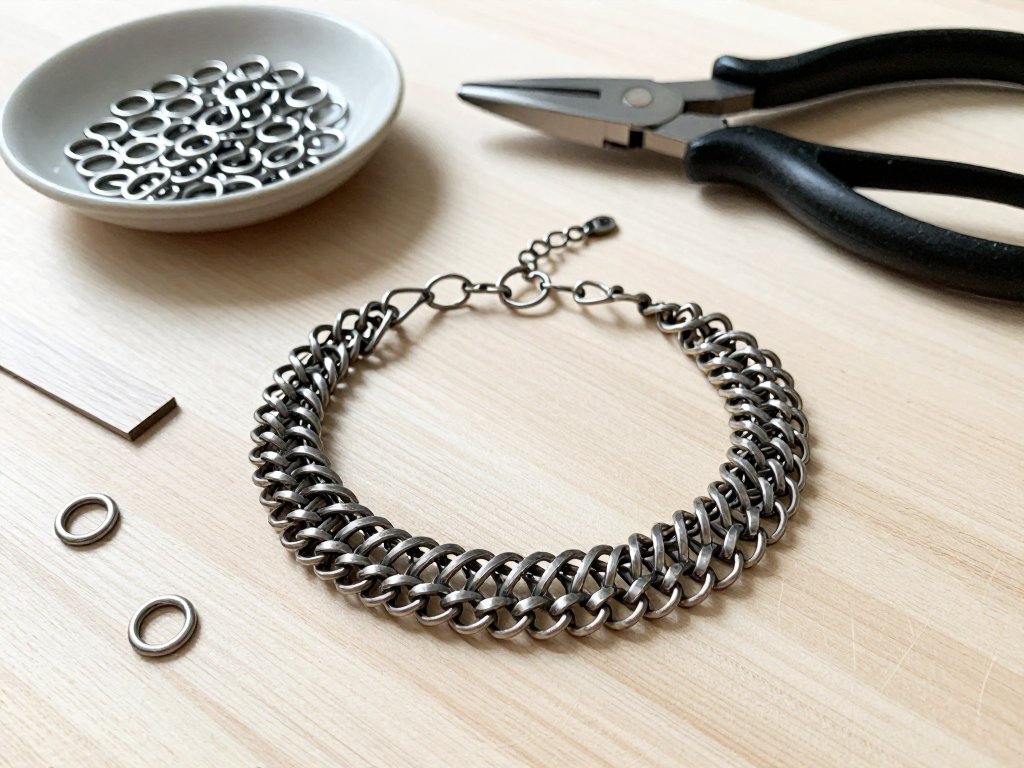
Introduction
Chain maille is a craft with a long memory. The same weave that once protected a knight's arm now makes a bracelet you can wear to the grocery store.
The technique is simple at heart: you open a metal ring, thread it through other rings, and close it again. Repeat that motion, row after row, and fabric appears.
If that sounds forgiving, it is. Chain maille has no tension to manage and no stitches to count. Every ring is independent, and every mistake can be undone.
You will not need a loom, a sewing machine, or a kiln. Two pliers and a bag of jump rings will carry you through the whole project.
By the end of this guide you will have learned European 4-in-1, the foundational weave of the craft, and turned it into a bracelet sized for a real wrist.
Give it an afternoon. Chain maille rewards patience more than talent, and it is unusually kind to a first attempt.
Why European 4-in-1 Is the Right First Weave
There are hundreds of named chain maille weaves, and beginners often get lost among them. European 4-in-1 is the one to learn first, for good reasons.
The name describes the rule: every ring passes through four others — two from the row before, two from the row after. That is the entire pattern.
Historically, this weave is medieval European armour. It appears across mail shirts, coifs, and sleeves from the twelfth century onward, worked by the thousand of rings.
The structure is what made it practical for armour. Each ring is supported by four neighbours, so the fabric resists stretching in every direction without any backing.
Modern jewellers kept the weave and changed the material. Anodised aluminium and copper replaced iron, and the same four-in-one logic became a design vocabulary.
Visually, European 4-in-1 reads as a dense, slightly diagonal mesh. Rings alternate in tilt, which gives the finished band a subtle herringbone shimmer as it moves.
It behaves like fabric, too. The band drapes, folds, and follows the curve of a wrist — qualities you do not get from most beginner jewellery techniques.
Best of all, the weave is self-correcting. Because each ring locks into four others, a single loose ring rarely ruins a band. You simply replace it.
Materials: Jump Rings, Gauge, and Aspect Ratio
Everything in chain maille begins with the jump ring, and two measurements define it.
The first is gauge, which describes the thickness of the wire the ring is made from. Lower numbers mean thicker wire, so 16-gauge is heavier than 18-gauge.
18-gauge wire is roughly 1.0 mm thick. 16-gauge is about 1.2 mm. Both are comfortable for a beginner to handle with pliers.
The second measurement is inner diameter — the size of the hole inside the ring, not the outer edge. It is given in fractions of an inch or in millimetres.
Those two numbers combine into the most important idea in the craft: aspect ratio.
Aspect ratio is the inner diameter divided by the wire diameter. It tells you how much room a ring has inside it for other rings to pass through.
European 4-in-1 needs an aspect ratio of roughly 3.5 to 4.0. Below that, rings are too tight to hold four neighbours. Above it, the weave turns loose and floppy.
Two combinations work beautifully for a first bracelet: 16-gauge wire with a 1/4-inch inner diameter, or 18-gauge wire with a 5/32-inch inner diameter.
If a supplier lists aspect ratio directly, use it. If not, do the division yourself before you buy, and you will avoid the most common beginner frustration.
Choosing a Metal
Bright aluminium is the usual starting point. It is light, inexpensive, and silver-toned, and it will not tarnish or discolour on your wrist.
Anodised aluminium comes in a wide range of colours. The colour is an oxide layer rather than paint, and it can chip slightly at the cut ends of the rings.
Copper is warm and weighty, and it develops a dark patina over time. Some wearers love that deepening colour; others prefer to polish it back.
Brass sits between copper and gold in tone. It is sturdy, takes a good polish, and holds its shape well in a woven band.
For a first project, bright aluminium is the kindest choice. It is cheap enough to practise with and light enough that the finished bracelet is comfortable.
How Many Rings You Need
Ring count depends on ring size, because smaller rings pack more densely into the same length of band.
A seven-inch bracelet in European 4-in-1 typically uses roughly 120 to 160 rings. A smaller ring size pushes you toward the higher end of that range.
Buy more than you need. A bag of a hundred rings costs about five dollars, and having spares on hand matters more than saving a dollar.
Tools You Actually Need
The full toolkit for this project is two pliers. That is not an exaggeration.
Choose chain-nose pliers, which have a tapered jaw, or flat-nose pliers, which have a squared tip. Either style works; pick the one that feels comfortable.
Smooth jaws matter more than any other feature. Serrated or textured jaws leave bite marks on the wire, and those marks stay visible in the finished piece.
Optional additions make the work easier without being necessary. Ring-opening pliers have a specialised tip for levering rings apart, which reduces hand fatigue.
A bead reamer is useful for smoothing the cut ends of rings, though quality rings arrive with clean ends already.
A rotary tumbler with stainless steel shot will work-harden a finished piece, burnishing it to a soft shine in a couple of hours. It is a luxury, not a requirement.
Opening and Closing Rings the Right Way
This is the single most important skill in chain maille, and it is worth practising before you weave anything at all.
Hold a ring with one plier on each side of the cut. Your goal is to move the two ends apart sideways, in the plane of the ring.
Never pull the ring open. Pulling stretches it into an oval, and an oval ring will never close flush again.
Think of the motion as twisting rather than spreading. One hand moves forward, the other back, and the gap opens between the cut ends.
Closing is the same motion in reverse, with one refinement. Push very slightly past flush so the ends overlap, then ease back.
That tiny over-compression does two things. It removes the springiness that keeps ends apart, and it seats the cut faces against each other.
Run a fingertip over the join when you are done. You should feel a faint click rather than a step, and no light should show through the seam.
Gaps are the enemy of a woven band. An open ring can catch on clothing, snag hair, and gradually work its way free of its neighbours.
Worse, a gapped ring lets the weave spread. Four rings that should sit snugly together drift apart, and the pattern loses its density and its shape.
Practise on twenty rings before you begin. Open and close each one until the motion feels ordinary, and the weaving ahead becomes much easier.
The Weave Itself: Through Two, Add One
European 4-in-1 is built in strips. You will make a short chain of units first, then extend it, then widen it into a flat band.
The logic throughout is "through two, add one." Each new ring passes through two existing rings and then closes, becoming a unit the next ring will pass through.
Keep every ring oriented the same way. All rings should tilt consistently, and every new ring should close in the same direction as the row before it.
Hold the work loosely in your non-dominant hand, letting it hang from your fingers. You need three points of contact: two pliers on the ring, work supported nearby.
Step by Step
- Close four rings completely and set them aside. These are your starter units.
- Open a fifth ring, thread it through two of the closed rings, and close it. You now have a unit of three rings linked in a triangle.
- Open a sixth ring, thread it through the same two closed rings as the fifth, and close it. This creates a four-ring cluster.
- Open a seventh ring and pass it through two adjacent rings of your cluster — the two that lie side by side and face the same way.
- Close that ring. You have just added a new unit, and the strip has begun to grow.
- Continue along the strip. Each new open ring goes through two rings of the last unit, then closes.
- Work row by row rather than randomly. Adding rings in order keeps the pattern readable and the tension even.
Once your strip is four or five units long, something useful happens: the weave stops behaving like a chain and starts behaving like cloth.
At that point you can widen it. Instead of extending the strip lengthwise, add rings along the upper edge, passing each new ring through two rings of the existing row.
Widen until the band is four units across — roughly half an inch in 16-gauge, 1/4-inch rings. That width suits a bracelet comfortably.
Then continue extending the band lengthwise until it wraps your wrist with a little room to spare. Check the length against your wrist as you go.
How to Hold the Work
Position the ring you are closing so you can see the cut. If the seam faces away from you, rotate the work rather than twisting your wrist.
Cradle the growing band in your palm. Supporting it stops the rings from swinging and gives the pliers something stable to lever against.
Reading Your Work
A correct European 4-in-1 band is easy to recognise once you know what to look for.
Lay it flat on the table. The rings should settle into a stable, slightly diagonal grid, with each ring cradled by four neighbours.
Looking along the edge, you should see a repeating scalloped line — a series of small arcs. Rotate one ring and the line turns jagged.
Try to lift a single ring away from the band with your finger. In a correct weave it resists, because four closed neighbours hold it in place.
Now look for the mistakes. A mis-oriented ring sits at the wrong tilt, usually standing proud of the surface rather than lying flat.
Backing out a ring is simple. Open it, slide it free of the two rings it passes through, and set it aside. It can be reused if the ends still meet cleanly.
Repairing early is almost always faster than finishing a band you know is wrong. The rings do not mind how many times you change your mind.
Rhythm, Batching, and Hand Fatigue
Once the weave is familiar, you will find a rhythm: open, thread, close, check. The motions shorten, and your hands begin to anticipate the next ring.
Batching helps. Close a batch of ten rings, weave them, then close another batch. Switching tasks keeps your attention fresh and your fingers from cramping.
Sort your rings before you start. A shallow dish of closed rings, a dish of open rings, and a third for finished work keeps you from hunting mid-weave.
Hand fatigue is real, and it shows up first in the thumb and the base of the palm. Two pliers mean two grips held for a long time.
Work in twenty-minute sessions. Set the project down, stretch your hands, and come back when your grip has recovered.
If your hands ache, try lighter wire or a smaller ring size. Both reduce the force needed to open and close each ring.
Stop before your hands are tired rather than after. A tired grip distorts rings, and distorted rings cause the very mistakes you are trying to avoid.
Finishing the Bracelet
Your band is a strip of mail. Turning it into a bracelet takes three short decisions.
First, check the length. Wrap the band around your wrist and add about half an inch of ease, so the bracelet rests rather than bites.
Second, close the band into a loop. Bring the two ends together and join them with a ring that passes through the edge rings of both ends.
Work along the seam with two or three rings until the join matches the density of the rest of the band. It should look like the weave continued.
Third, attach a clasp. A simple lobster clasp with a matching jump ring is the easiest option and suits a woven band well.
Attach the clasp to the seam you just closed, using a ring that passes through both the edge ring of the band and the clasp loop.
With a fold-over clasp or a hook, you can often skip the separate attachment and thread the edge ring of the band directly through it.
If you prefer an extension chain, add a short length of chain and a few jump rings at intervals so the bracelet adjusts across a range of sizes.
Troubleshooting Common Problems
Most beginner problems in chain maille come down to four things, and all of them are fixable.
Gaps at the Ring Ends
A visible seam means the ring was not over-compressed as it closed. Open it fully, then close it again with a slightly firmer push past flush.
If a ring will not close flush no matter what, it was probably stretched into an oval at some point. Replace it — an oval ring cannot be recovered.
Accidental Work-Hardening
Metal hardens every time it is bent. Open and close the same ring too many times and it becomes brittle.
Handle each ring as few times as possible. If a ring feels stiff or starts to crackle, retire it and take a fresh one from the dish.
Mixed Ring Sizes Distorting the Pattern
Rings from different batches can vary slightly in size, and in a tight weave those differences show.
Keep each batch separate while you work, and avoid mixing suppliers within a single project. A little variation reads as texture; a lot reads as a mistake.
Rings That Will Not Lie Flat
A band that curls or twists usually has one or two rings oriented the wrong way along an edge.
Lay it flat and look along the scalloped edge. Find the point where the line breaks, open that ring, and reorient it to match its neighbours.
Occasionally the problem is overall tension. If a whole row sits proud, back out the last few rings and rebuild that section more loosely.
Care, Wear, and Storage
Chain maille jewellery is sturdier than most handmade pieces, but it still appreciates a little attention.
Bright aluminium does not tarnish the way silver does, because the oxide layer that forms on it is clear and stable. It may dull slightly with wear.
Clean it with a soft, dry cloth. A light rub along the grain of the weave restores most of the brightness without disturbing the rings.
Copper is a different story. It darkens over time into a warm brown patina, and how you feel about that is a matter of taste.
If you like the patina, do nothing. If you prefer the original brightness, a soft polishing cloth will lift the surface layer without harming the weave.
Moisture is the main thing to avoid. Take aluminium bracelets off before swimming, and dry them if they get wet.
Store pieces flat where they will not be crushed. A small pouch or a jewellery box compartment works well; a tangle of chain maille is slow to undo.
Check the clasp ring every so often. It is the part that takes the most stress, and it is the easiest part to replace.
A Simple Next Step
Once European 4-in-1 has settled into your hands, a whole family of projects opens up.
The most natural next project is a wider band. Keep adding rows across instead of along, and the bracelet becomes a cuff or a watch strap.
You can also work the same weave in a narrower strip for earrings. A short length of mail, closed into a loop and hung from an ear wire, looks deliberate.
A necklace uses exactly the same logic at greater length. The only real change is that you will want to weigh the finished piece as you go, since mail has more mass than it looks.
When you want to combine techniques, chain maille pairs well with other metalwork. A woven bracelet looks lovely alongside a run of hand-stamped metal pendants, where hammered sheet echoes the texture of the rings.
For now, finish the bracelet. Wear it. The weave you learned in an afternoon is the same one that armoured medieval Europe, and it is now yours.
