Introduction
The first time I tried to draw a fern, I was sitting in my backyard with a sketchbook I had just bought, feeling very pleased with myself.
I had watched a few time-lapse videos of botanical artists creating these gorgeous, curving fronds with perfect little leaflets tapering to a delicate point.
I thought, how hard could it be? I looked down at the fern growing by the fence, looked at my blank page, and drew a lumpy green zigzag that looked more like a broken zipper than a plant.
That was about three years ago. I had wasted eight dollars on a sketchbook and another four on a pencil I did not need, and I had a piece of paper that looked like a kindergartner's first attempt at a Christmas tree.
I closed the sketchbook and did not open it again for six months.
Here is what I did not know then: botanical illustration is not about drawing what you think a leaf looks like.
It is about drawing what you actually see. And the difference between those two things is the entire craft.
Once I learned to slow down and really look at a leaf — to trace its veins with my eyes, to notice how the edge curls, to see where the light hits and where the shadow falls — everything changed.
I stopped wasting paper on frustrated scribbles and started making drawings I was actually proud to frame.
If you have ever wanted to draw the plants in your garden or the leaves you collect on a walk, this guide will save you the six months I spent staring at a closed sketchbook. Let us start with the basics that actually work.
Why Botanical Illustration?
Before we get into techniques, let me tell you why this craft is worth your time.
Botanical illustration is one of the few drawing disciplines that rewards patience over talent. You do not need to be able to draw a perfect circle or a convincing face.
You need to be able to look at a leaf and notice things about it — the shape of its edge, the pattern of its veins, the way it attaches to the stem.
If you can do that, you can create botanical drawings that feel alive and accurate.
It is also a genuinely useful skill. Unlike abstract drawing or figure sketching, botanical illustration has practical applications.
You can use it to document plants in your garden, create personalized greeting cards, design your own stationery, or just keep a nature journal that actually looks like the things you saw on your walk.
And because the subject matter is right there in front of you — on your windowsill, in your backyard, on the trail — you never run out of things to draw.
Best of all, botanical drawing is cheap to start. A pencil, an eraser, and some printer paper will get you through the first month of practice.
If you decide you love it, you can invest in proper materials later. But there is no reason to spend forty dollars on supplies before you know whether you enjoy the process.
The Tools You Actually Need
Let me save you the money I wasted on equipment I did not need. Here is the minimal kit that will take you from absolute beginner to competent botanical sketcher:
A mechanical pencil with 0.5mm HB lead. I spent my first year using a cheap wooden pencil, sharpening it constantly, and wondering why my lines were never consistent.
A mechanical pencil gives you a uniform line width every time, and the HB lead is soft enough to shade with but hard enough to hold a fine point.
Cost: about five dollars.
A kneaded eraser. Not a pink eraser. A kneaded eraser lifts graphite off the page without smudging. You can shape it into a fine point for tiny highlights or press it flat for broad lifting. Cost: about two dollars.
Printer paper or a cheap sketchbook. Do not buy expensive paper until you have filled thirty pages with practice drawings. A ream of standard printer paper costs about eight dollars and will last you months. Cost: eight dollars.
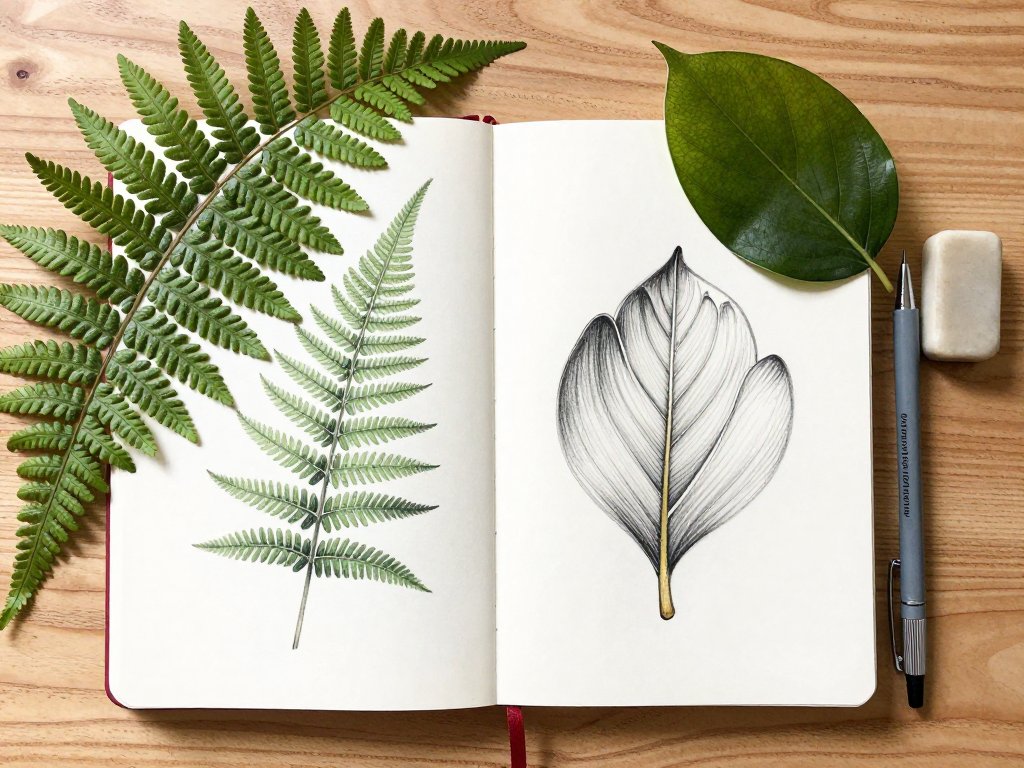
A real leaf. Go outside and pick one. A maple leaf, an oak leaf, a fern frond, a blade of grass. The best botanical reference is a living plant, not a photograph. You can rotate it, feel its texture, and see how it catches light from different angles. Cost: free.
Total: about fifteen dollars. That is less than a dinner out, and it will keep you busy for months. Do not buy a botanical illustration kit with twelve different pencils and a magnifying loupe until you know you will use them.
The Single Most Important Skill: Observation
Here is the technique that changed everything for me, and it is not even a drawing technique. Before you put pencil to paper, spend five minutes just looking at your leaf. Do not draw. Just look.
Ask yourself these questions:
- What is the overall shape? Is it round, oval, heart-shaped, spear-shaped, or something else?
- Is the edge smooth, serrated (like a saw), lobed (like a maple leaf), or undulating (wavy)?
- Where is the main vein (midrib), and does it go straight up the center or curve to one side?
- How do the side veins branch off? Do they go straight to the edge, or do they curve and connect to each other?
- Is the leaf flat, or does it curl at the edges? Is the surface shiny or matte? Smooth or textured?
- Where does the light hit? Where is the shadow?
I keep a small notebook where I answer these questions in writing before I draw.
It sounds silly, but it trains your brain to see details it normally skips. Our brains are optimized to recognize a leaf and move on — they do not care about the vein pattern.
You have to teach them to care.
Drawing a Simple Leaf: Step by Step
Let us start with a basic oval-shaped leaf with smooth edges — like a magnolia or a rubber plant leaf. This is the easiest shape to begin with because there are no lobes or serrations to complicate things.
Step 1: Lightly Sketch the Gesture Line
Using your mechanical pencil with the lightest possible touch, draw a single curved line from the base of the leaf to its tip.
This is the gesture line — it represents the midrib (central vein) and the overall direction of the leaf.
Do not press hard. This line is just a guide, and you will refine it later.
Leaves in nature almost never grow perfectly straight; a gentle S-curve or arc looks more natural than a ruler-straight line.
Step 2: Block in the Overall Shape
Using the same light touch, sketch the outline of the leaf around your gesture line.
Start at the base, follow the left edge up to the tip, then come back down the right edge.
Do not worry about accuracy yet. You are just establishing the territory. If the outline looks lumpy or uneven, that is fine.
You will refine it in the next pass.
Step 3: Refine the Outline
Now compare your outline to the actual leaf. Where is it too wide? Too narrow?
Is the tip too rounded or too pointed? Adjust the outline by drawing a new line closer to the true edge.
Do not erase the first line — just draw a better one next to it.
This layered approach — building up from rough to refined — is the secret to botanical drawing.
Each pass gets closer to the truth.
Step 4: Add the Veins
Once you are happy with the outline, draw the side veins branching off the midrib.
Look at your reference leaf to see the pattern. Some leaves have parallel veins (like grass blades).
Others have branching veins that curve toward the edge (like elm leaves). Still others have net-like patterns (like grape leaves).
Draw the main veins first, then add the smaller ones if you want more detail.
Veins should be lighter lines than the outline — they are structural guides, not hard edges.
Step 5: Add Light Shading
Look at your leaf and identify which side is in shadow and which is in light.
Using the side of your mechanical pencil lead (or a softer pencil if you have one), gently shade the shadow side of the leaf.
Keep the shading light and build it up gradually. The goal is not to create a photorealistic rendering — it is to give the leaf a sense of volume and form.
A tiny bit of shading goes a long way on a simple leaf drawing.
Step 6: Lift Out Highlights
If your shading got too dark, use your kneaded eraser shaped into a point to lift graphite from the highlight areas — the parts of the leaf that catch the most light.
This creating of light areas after shading is what gives botanical drawings their crisp, fresh look.
It is also incredibly satisfying. Every time I lift out a highlight, the drawing suddenly pops into three dimensions.
Drawing Ferns: The Zigzag That Works
Remember my broken-zipper fern? Here is the technique that finally made ferns click for me. Ferns look complicated because they have dozens of tiny leaflets arranged along a central stem, but they follow a surprisingly simple structure once you know what to look for.
A fern frond is essentially a central stem (called the rachis) with leaflets (called pinnae) arranged in pairs along both sides.
Each leaflet is a miniature version of the whole frond — it has its own central vein and smaller sub-leaflets.
But you do not need to draw every single one to create a convincing fern.
The Three-Stage Fern Method
Stage one: Draw the main stem as a graceful, curving line. Fern stems are never straight. They arch, bend, and curve in response to gravity and light. Spend a minute just observing the curve of your reference fern before you draw it.
Stage two: Mark the positions of the leaflets along the stem. Instead of drawing full leaflets, just make tiny tick marks at regular intervals on both sides of the stem, indicating where each leaflet will go.
This step is purely structural — it ensures your leaflets are evenly spaced before you commit to drawing them.
Stage three: Draw each leaflet as a small, elongated oval or triangle, angled slightly upward from the stem.
Start at the bottom of the frond and work your way up. The bottom leaflets are the largest; the top leaflets gradually get smaller.
This tapering is what gives ferns their elegant, organic look. If all the leaflets were the same size, the fern would look like a ladder instead of a living plant.
Do not draw every single leaflet. Ferns have a lot of them, and trying to draw each one individually will exhaust you and make the drawing look stiff.
Instead, draw every other leaflet on each side, then suggest the ones in between with a simple curved line.
Your brain fills in the gaps, and the result looks more natural than if you had drawn every single one mechanically.
Common Beginner Mistakes and How to Fix Them
I made every mistake in the book so you do not have to. Here are the most common ones, along with the fix that saved me.
Drawing what you think, not what you see. This is the biggest one. Your brain has a mental image of a "generic leaf" — a symmetrical oval with veins going in neat parallel lines.
Real leaves are rarely symmetrical. The left side is wider than the right. The veins curve.
The tip bends. The fix: look at your reference leaf at least as much as you look at your paper.
Every time you draw a line, look at the leaf first.
Pressing too hard. Heavy lines lock you into a bad drawing. Light lines let you adjust. The fix: hold your pencil near the end, away from the tip, and use your whole arm to draw, not just your wrist. This naturally produces lighter, freer lines.
Forgetting to measure proportions. Is the leaf twice as long as it is wide? Three times?
Does the stem account for a third of the total length or just a fifth?
The fix: use your pencil as a measuring tool. Hold it at arm's length and align the tip with one end of the leaf, then slide your thumb up to mark the other end.
Compare that measurement to another part of the leaf. This old illustrator's trick works perfectly for botanical drawing.
Skipping the stem. Beginners often focus on the leaf blade and add the stem as an afterthought.
But the stem is a structural element. Its curve, thickness, and angle relative to the leaf determine whether the drawing looks like a real plant or a floating shape.
The fix: draw the stem first, then build the leaf around it.
Giving up too early. A botanical drawing goes through an awkward phase around the fifteen-minute mark where it looks worse than it did at five minutes.
This is normal. You are in the middle of building information, and it is not cohesive yet.
Keep going. The twenty-minute mark is where it usually comes together. The fix: set a timer for thirty minutes and do not judge the drawing until the timer goes off.
Building a Practice Routine That Works
The best way to improve at botanical illustration is to draw a leaf every day. But "draw every day" is vague and easy to skip. Here is a specific routine that takes fifteen minutes and fits into even a busy morning.
Week one: Draw one simple leaf per day. Stick to the same type of leaf for the whole week — five maple leaves, five oak leaves, five ivy leaves. Repetition teaches you the structure faster than variety. By day five, you will see measurable improvement.
Week two: Add a second leaf type and practice drawing them side by side. Focus on the differences between them — how one edge is serrated while the other is smooth, how one has parallel veins while the other has branching veins.
Week three: Draw a whole sprig or small branch with two or three leaves attached. This adds the challenge of composition and stem structure. Pay attention to how leaves are arranged on the stem — alternately, opposite each other, or in a rosette.
Week four: Try a fern or a compound leaf (a leaf made of multiple leaflets, like a rosehip or an ash tree leaf). Apply the three-stage fern method. Do not worry if it takes longer than fifteen minutes — compound leaves are more complex, and they deserve the extra time.
After four weeks of daily practice, you will have twenty to thirty drawings in your sketchbook. Look back at your first one and your most recent one. The improvement will be obvious enough to motivate you to keep going.
Moving Beyond Pencil
Once you are comfortable with pencil drawings, botanical illustration opens up into a rich world of color.
Watercolor is the traditional medium for botanical art, and it pairs beautifully with pencil sketches.
A light pencil outline with a wash of transparent watercolor is the classic botanical illustration look — clean, fresh, and accurate.
Colored pencils are another excellent option. They give you more control than watercolor and are less intimidating for beginners.
Start with a set of twelve basic colors and learn to layer them. Most botanical greens are not a single pencil color — they are a base layer of yellow-green with a shadow layer of blue-green on top.
Experiment with layering to match the subtle color variations in real leaves.
If you want to go digital, there are excellent botanical illustration apps for tablets that simulate watercolor and pencil textures.
But I recommend spending at least a few months working with physical materials first. The tactile feedback of pencil on paper teaches you things about pressure, angle, and texture that a screen cannot replicate.
Taking Your Drawings Further
Once you have a collection of leaf and fern drawings, here are some ways to use them:
- Create a nature journal documenting the plants in your garden through the seasons
- Design your own greeting cards with hand-drawn botanical elements
- Frame a series of small botanical studies for a gallery wall in your home
- Scan and digitize your drawings to create custom stationery or gift tags
- Practice identifying plants by their leaf shapes — botanical drawing makes you a better observer of nature in general
Botanical illustration is one of those rare skills that gets better the more you do it, and the subject matter is always free and available. You do not need a studio or special lighting. You need a leaf, a pencil, and the willingness to really look at it.
I still have that first broken-zipper fern drawing. I keep it tucked into the back of my current sketchbook as a reminder that every skill looks impossible until the moment it clicks.
That fern drawing took me six months to get right. My most recent one took twelve minutes.
The difference was not talent — it was learning to see what was actually in front of me instead of drawing what I assumed was there.
Find a leaf. Any leaf. Give it your full attention for five minutes. Then draw what you see, not what you think a leaf should look like. That is the entire craft, and it is waiting for you in your own backyard.