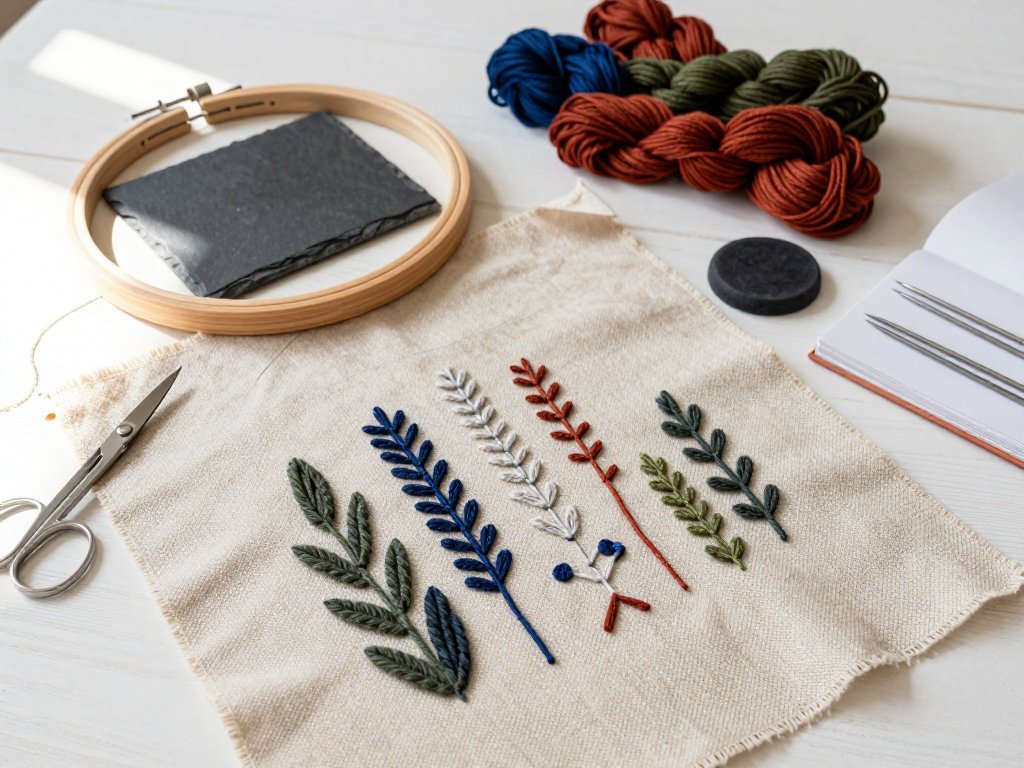
Introduction
There is a quiet magic in wool on linen. The colours sit deep and soft, the surface has a gentle nap, and the whole thing feels older and warmer than thread alone can manage.
Crewel embroidery is that craft. It is wool worked on a firm woven ground, usually linen, in stitches that have barely changed in four hundred years.
You do not need a degree in textile history to begin, though a little of the story helps you understand why crewel is made the way it is.
This guide walks through the linen, the wool, the needles, the stitches, and the small habits that keep a piece flat and lovely. Start with one motif. The rest will follow.
What Crewel Embroidery Actually Is
Crewel is embroidery worked in wool on a firmly woven ground fabric. Traditionally that ground is linen twill, and traditionally the wool is a thin, tightly twisted two-ply yarn.
That is the whole definition, and it is worth holding onto, because the words "embroidery" and "crewel" get used interchangeably when they should not be.
Silk embroidery uses filament silk, which is glossy, fine and smooth. Cotton floss is matte, inexpensive, and friendly to beginners working on cotton or muslin.
Crewel uses wool, which is none of those things. Wool is thicker, slightly fuzzy, and it has a natural springiness that silk and cotton simply do not have.
That fuzziness is the point. Wool fills the weave of linen in a way silk never quite does, giving you solid, rounded colour with a soft bloom rather than a shine.
The result reads as a picture made of yarn rather than a line drawn in thread. Depth comes from the wool itself, not from a trick of the light.
The Historical Thread: From Opus Anglicanum to the 1970s
Wool embroidery is old. The medieval English workshops, working between roughly 1200 and 1350, produced what Europe called Opus Anglicanum, or "English work".
Those pieces were ecclesiastical vestments, copes and chasubles covered in figures worked in silk and gold, with wool sometimes laid beneath for body. Kings and popes commissioned them.
After the Reformation, English embroidery turned domestic. By the early seventeenth century, crewel work had become the fashionable decoration of the home.
The Jacobean heyday ran roughly from 1600 to 1700. Women worked bed hangings, curtains, cushion covers and boxes with curling tree-of-life designs, exotic birds and enormous flowers.
Those schemes were copied freely from herbals, travellers' accounts and imported Indian painted cottons. The palette leaned on indigo blues, brick reds, olive greens and soft yellows.
The name "crewel" comes from the yarn, not the stitch. It descends from an older word for a curly, worsted-spun wool, the kind of yarn with a tight twist and a faint kink.
That yarn was associated with the Bay of Naples, which traded worsted and embroidery wools across Europe, so the thread arrived with a place attached to it.
The craft faded through the eighteenth and nineteenth centuries. Then William Morris and the Arts and Crafts movement picked wool work back up as a handmade antidote to factory goods.
Morris's circle used crewel on furnishing fabrics deliberately, treating it as honest, pre-industrial making. That revival gave the craft a second life.
The Embroiderers' Guild, founded in England in 1906, carried the knowledge forward through teaching, exhibitions and published patterns. It kept stitches and standards alive.
Then came the 1970s. Crewel kits appeared in every department store, and a generation of women stitched Jacobean trees onto cushions in front of the television.
Some of those pieces are still hanging in family homes. If you find one at a flea market, look at the back before you decide. Hand-worked crewel is worth restoring.
Linen Twill and Setting Up: Tape, Frame, Tension
Crewel needs a ground that can hold weight. Linen twill is the traditional choice, a firm evenweave with a diagonal structure and just enough tooth to grip wool.
Why does the fabric matter so much? Wool is heavier than silk or cotton floss, and a loose weave will simply drop under it, leaving sagging stitches and a pulled-out design.
Good crewel linen has a visible, even grid. It is often sold as crewel linen or twill, and it comes by the width, commonly around 140cm.
Test any substitute by holding it up to a window. If you can see a dense, regular weave, it will work. If the light pours through in patches, keep looking.
Before a single stitch, tape the raw edges. Cut lengths of cotton twill tape and fold them over the cut edge, catching them down with a simple whip stitch.
This stops fraying and keeps the fabric square. Linen frays quickly at a cut edge, and a frayed edge distorts the whole piece as you work.
Now decide how to hold the fabric. An embroidery hoop works for a small motif, but a larger Jacobean design is easier on a slate or scroll frame, or a lap stand.
A stand frees both hands, which matters with wool. It also keeps the tension even, because you are not continually dragging the fabric out of shape.
Tension should be drum-tight. Pluck the linen like a small drum; it should give a low, firm note rather than a soft thud.
Drum-tight tension is the single best defence against puckering. Slack fabric lets each stitch pull the weave tighter than its neighbour, and the surface ripples.
Retighten as you go. Linen relaxes as it is handled, and a frame that was tight on Monday may have gone soft by Thursday.
Choosing Your Wool: 2-Ply, Persian, and Blooming
The traditional wool is called crewel wool, a fine two-ply yarn spun and twisted for strength. Two plies give it enough structure to sit crisply on linen.
You will also see Persian wool, a slightly thicker, softer yarn sold in small hanks or skeins. It is often used alongside crewel wool or on its own.
Persian wool covers faster, which makes it tempting for beginners. On fine linen it can swamp the design, so save it for larger areas or single-accent stitching.
For finer lines, split a strand of crewel wool. A single ply laid carefully will outline detail that a full two-ply strand would blur.
Coverage is what you are aiming for. The wool should sit on the linen, filling the weave completely, with no bare cloth showing between stitches.
If you can see the linen through your stitching, your thread is too thin, your stitches are too short, or your tension is too loose.
Blooming is what happens to wool after a little handling. The fibres relax and the yarn fluffs up, softening the surface and closing small gaps.
Blooming is desirable, but it means you should not over-handle a cut length. Keep strands short, around 45cm, and let them bloom naturally in the stitch.
Cheap wool blooms unevenly. It frays, pills and sheds on the linen, so buy the best crewel wool you can afford and store it out of direct sunlight.
Needles and Tools: Why Crewel Needles Are Sharps
Here is a detail that trips up almost every beginner. A crewel needle is a sharp, not a blunt tapestry needle.
Tapestry needles are blunt with a large eye, designed for counted work like needlepoint, where you push between the threads of an evenweave canvas.
On linen twill you often want to pierce the fabric itself, so you need a point. A crewel needle is a sharp with a long eye wide enough for wool.
The long eye matters because the wool is thick. A short eye compresses and frays the yarn every time you pull it through the cloth.
For two-ply crewel wool on linen, sizes 3 to 5 are the usual range. Size 5 is finer and good for detail. Size 3 takes thicker yarn and heavier coverage.
Buy several of each. Needles blunt with use, and a dull needle will skip and split the linen instead of gliding through it.
Add a small pair of snips or fine embroidery scissors, a needle book and a thimble if you like one. Keep the set together in a tin.
Sharp snips matter more than they sound. Clean thread ends keep the back of your work tidy, and a tidy back keeps the front looking flat.
Transferring a Jacobean Design
A Jacobean tree-and-bird design is the classic first project, and there are three ways to get the lines onto linen.
The oldest is prick and pounce. Trace your design onto paper, prick holes along every line with a fine needle, and lay the paper on the linen.
Then rub powdered charcoal, or a chalk pounce, through the holes with a soft pad. Lift the paper and a dotted outline of your design remains.
Join the dots with a fine brush and a pale watercolour or fabric-safe powder. Pounce is gentle, traditional, and works on thick or dark fabric.
Second is the light window. Tape your design to a sunny window, tape the linen over it, and trace the lines with a fine pencil or a water-soluble pen.
This is the easiest method at home and it costs nothing. Work in the morning, when the light is brightest, and keep the linen taut as you trace.
Third is a lightbox, which is the window method without the weather. An inexpensive LED tracing pad works well and lets you work at the kitchen table.
Whichever you choose, keep your lines pale and thin. Dark transfer lines can shadow through light wool stitches and show on the finished surface.
If you are curious how outlines behave on other fabrics, this piece on bead embroidery looks at the same problem in a very different material.
The Core Stitches, Taught in Order
Learn these in sequence. Each one builds on the last, and the order matches how a Jacobean piece is actually worked.
Outline, or stem, stitch comes first. Bring the needle up on the line, take a small backward stitch, and come up again exactly where the last stitch began.
The stem stitch produces a fine, slanted line with a slight rope twist. It is ideal for stems, tendrils and the long outlines of a design.
Split stitch is next. Work a small stitch forward, then bring the needle up through the middle of the previous stitch, splitting the wool as you go.
Split stitch gives a smoother, denser line than stem stitch. It is perfect for fine outlines and for stitching small, tight curves.
Chain stitch follows. Bring the needle up, hold the working thread in a loop with your thumb, and re-enter the fabric inside the loop.
The chain is bold and decorative. Work it singly for an accent, or in rows to fill a wide shape or to create a knotted edge.
Satin stitch fills small solid shapes such as leaves, petals and bird wings. Lay straight stitches side by side, closely packed and lying flat.
Satin works best on shapes under about one centimetre wide. Any wider and the stitches lift and sag, so break long shapes into smaller sections.
Long and short shading, sometimes called Bayeux stitch in older texts, is the heart of crewel work. It creates a graded change of colour within a shape.
Work one row of stitches with every other stitch long and every other short, then fill the next row between them, alternating again as you go.
The blending happens because the long stitches overlap into the row below, so the transition between tones stays soft and unbroken.
French knots add the small round accents that make a Jacobean design sparkle. Wrap the thread twice around the needle before pulling it back down.
Two wraps give a tidy, firm knot. One wrap sits loose; three wraps make a knot too big to lie flat against the linen.
Laid and couched work covers large areas quickly with smooth, flat thread. Lay long strands across the shape, then tack them down with tiny couching stitches.
Couched work is fast, but it uses a lot of wool. Use it for bark, baskets, decorative bands, and any area where you want a dense flat surface.
Trellis filling is a pattern of crossing couched lines, forming a lattice over a shape. Work the diagonal lines first in one direction, then cross them.
Catch each crossing with a tiny stitch, called a tie-down, so the lattice holds its shape and does not shift when the piece is finished.
Finally, seed stitches and detached chain accents. Seed stitch is a scatter of small straight stitches, used to suggest texture and light.
A detached chain makes a tiny single leaf or petal. Bring the thread up, form a loop, and secure it with one small stitch at the base.
Starting, Finishing, and Shading Direction
Never use a knot in crewel work. Knots create lumps under a flat linen surface, and those lumps show straight through the front of the piece.
To start, hold a short tail of wool on the back of the fabric and trap it under your first few stitches. Then clip the tail flush.
Another method is the waste knot: tie a knot far from your design, bring the needle down at your starting point, and work over the tail on the back.
Once several stitches anchor the thread, cut the waste knot away. The back stays smooth and nothing bumps against the linen.
To finish, run the tail under the back of four or five existing stitches, then work a tiny backstitch into the wool and trim it.
Burying the ends this way is quick and secure. It also keeps the underside nearly as neat as the front, which matters if your work will be framed and seen at an angle.
Now, direction. Long and short shading only works if every stitch lies in the same direction across the whole shape.
Keep the stitches angled to follow the form. A leaf's stitches should run along its length; a bird's breast should curve around the body's volume.
For colour, work from the darkest tone to the lightest. This lets you judge the gradient as it grows and keeps the deepest colour at the outer edge.
Some stitchers reverse that order for a light source coming from an unusual angle. Whatever you choose, be consistent, because broken direction reads as an error.
Consistent direction is what separates a piece that looks carved and dimensional from one that looks flat, however neat the individual stitches are.
Finishing Your Piece: Blocking and Framing
When the last stitch is in, the work is not finished. Crewel wool pulls linen slightly out of square, and the piece needs to be returned to true before it is displayed.
Blocking is the fix. Mist the linen lightly with cold water from the back, taking care not to soak the wool or let colours bleed.
Lay the piece face down on a clean towel, then pin the edges square to a board, using rust-proof pins every few centimetres.
Then leave it. A piece should dry flat and undisturbed for at least a day, sometimes two, until the fabric is completely dry.
Do not press crewel with an iron directly. The weight of a hot iron flattens the wool and kills the bloom you worked to create.
If you must smooth the surface, hover a steam iron a few centimetres above the back and let the steam do the work.
From there you have a choice. Framing a crewel panel is the traditional finish, and a simple wooden frame, or a stretched and laced panel, suits the craft.
Lace the linen over a board with strong thread rather than gluing it, so the piece can be removed and washed if it ever needs to be.
Or make it useful. Crewel wants to be touched, and a cushion cover is the most natural home, backed with sturdy cotton or a plain linen.
Whichever you choose, sign it. A small stitched initial in one corner is a quiet record of the maker, and it will matter to someone later.
A Warm Word to Begin With
Crewel is generous to beginners in a way that fine silk embroidery is not. The wool hides small irregularities, and the texture forgives an uneven line.
Start small. One flower, one bird, one Jacobean leaf. Work it on a scrap of linen taped to a hoop and learn how the wool behaves.
You will make mistakes. A stitch will lie the wrong way, a knot will appear on the back, a colour will read differently than you imagined.
None of that matters. Crewel has absorbed four hundred years of imperfect stitching, and it will absorb yours.
The craft is worth making. Every finished piece is a small, tangible thing, and that is a rare and steadying pleasure in a busy week.
So tape your linen, thread your needle, and put in the first stem stitch. The rest, as always, is just time and wool.
