Introduction
Some bracelets flatter an outfit; others hold our history. A handmade charm bracelet belongs to the second kind. Each charm is a small, wearable annotation — a place visited, a child born, a fear finally overcome.
Charm bracelets have enjoyed revivals for more than a century, and the reasons are easy to grasp. They are among the few pieces of jewelry that grow with us, gaining new chapters long after the clasp is fastened. Today the maker's options are wider than ever.
The techniques, happily, are genuinely easy to learn. With two pairs of pliers, a handful of jump rings, and a few charms that mean something to you, a bracelet can take shape in a single afternoon. This guide begins with design, moves through tools, and offers three complete projects.
You will learn to open a jump ring without distorting it, to tie a knot that will not fail, and to arrange your treasures so the finished piece reads as deliberate rather than random. Above all, you will learn to personalize jewelry in a way no store could ever replicate.
Design First: Choosing a Story and Palette
Before any pliers touch a jump ring, decide what your bracelet is about. A jumble of unrelated trinkets becomes clutter; a collection united by a theme becomes a narrative. Consider travel: miniature landmarks, tiny suitcases, stamped coins from faraway markets.
Family stories work beautifully too. Birthstone beads, initial charms, and small engraved discs can stand for each child or a beloved grandparent. Hobbies translate beautifully — a gardener might thread a silver trowel beside green glass beads, a musician brass notes among matte rounds.
Milestones make powerful anchors: graduation caps, anniversary hearts, the year a long-held dream came true. Choose the theme that stirs your heart when you glance at your wrist, and let everything else follow from it.
Once the theme is set, build a color story. Select two or three hues that harmonize, and let the charms introduce small accents. For quiet sophistication, work within one color family, varying texture instead of shade; for a bolder personality, allow one vivid bead to punctuate the line.
Metal tone deserves equal thought. Warm gold feels heirloom-like; cool silver reads crisp and modern; a deliberate mix can look fashion-forward when balanced with care. When uncertain, echo the tone you already wear most, and the new piece will settle into your collection naturally.
Think about how charms, beads, and chain work together. Charms supply story, beads supply rhythm, and the chain or cord supplies structure. A bracelet of charms alone feels busy; one of beads alone feels generic; blended well, each element strengthens the others.
Finally, consider layout and balance. Odd numbers of charms — three, five, seven — please the eye more than even counts. Space elements so the gaze can rest, and do not fear negative space; an empty stretch of chain is breathing room, and the future home of next year's charm.
Supplies That Make It Easy
Good materials turn a frustrating hour into a satisfying one, and you need fewer of them than you imagine. A few quality fundamentals carry every project in this guide. Start with the foundation: the base that carries your charms.
Cable chain is the classic choice — smooth, flexible, and easy to open with pliers. Leather and suede cord lend warmth and a relaxed character. Stretch cord, a clear or black elastic, slips over the hand with no clasp at all; memory wire holds its own coil for spiral designs.
Jump rings are the small circles that connect everything. Open jump rings have a cut, so you can thread them through a charm and a chain link. Soldered rings are seamless and permanent; split rings — tiny key rings, really — offer extra security for heavier charms.
For closures, lobster clasps are the dependable daily choice and open with one hand. Toggle clasps add a design statement with their bar-and-ring silhouette. Magnetic clasps are the most convenient of all, though best reserved for lighter bracelets.
Pliers matter more than their price. Chain-nose pliers grip and reach into tight spots; round-nose pliers form smooth loops; flat-nose pliers hold findings without marring them. Add flush wire cutters, and your kit is complete.
Stringing projects call for crimp beads and crimp covers. The crimp bead is a soft metal tube you compress onto the wire to secure a clasp; the cover closes over it for a smooth, bead-like finish.
Beads open a wide world of color. Czech glass offers affordable brilliance with handmade character; wooden beads warm any palette and feel lovely against the skin; resin appears in nearly every shape imaginable. Enamel charms add glossy pops of color.
Charms hide in surprising places. Craft stores carry themed metal findings, and vintage shops reward patient digging with tarnished treasures. Your own jewelry box may hold broken pieces ready for a second life.
Heirloom buttons and keys make unexpected charms, and nature contributes its own: a smooth beach stone wrapped in wire, a pressed flower sealed in resin.
A practical note: buy more jump rings than you think you need; they are inexpensive, and some will vanish into the carpet. A small magnetic dish keeps the rest within reach.
Technique: Opening and Closing Jump Rings the Right Way
Every charm bracelet depends on one humble skill: opening a jump ring without damaging it. Pulled apart with pliers, the ring stretches into an oval whose ends never meet flush. The result is a gap that catches on fabric and lets charms slip away.
The fix is to twist, never to pull. This is the single most valuable habit a beginner can adopt. Hold one pair of chain-nose pliers in each hand, grip the ring on either side of the cut, and then push one pair toward you while drawing the other away.
That sideways motion opens the ring within its own plane, like turning a key, so the circle keeps its shape. Slide the open ring through the charm's loop and the chain link, then reverse the motion to close it. The ends should meet with a small click.
If a ring will not close fully, it was likely over-bent; squeeze it gently with flat-nose pliers, pressing the ends straight together. If it now resembles an egg rather than a circle, set it aside. A fresh ring costs pennies; a frustrated evening costs far more.
Project One: Single-Strand Chain Charm Bracelet
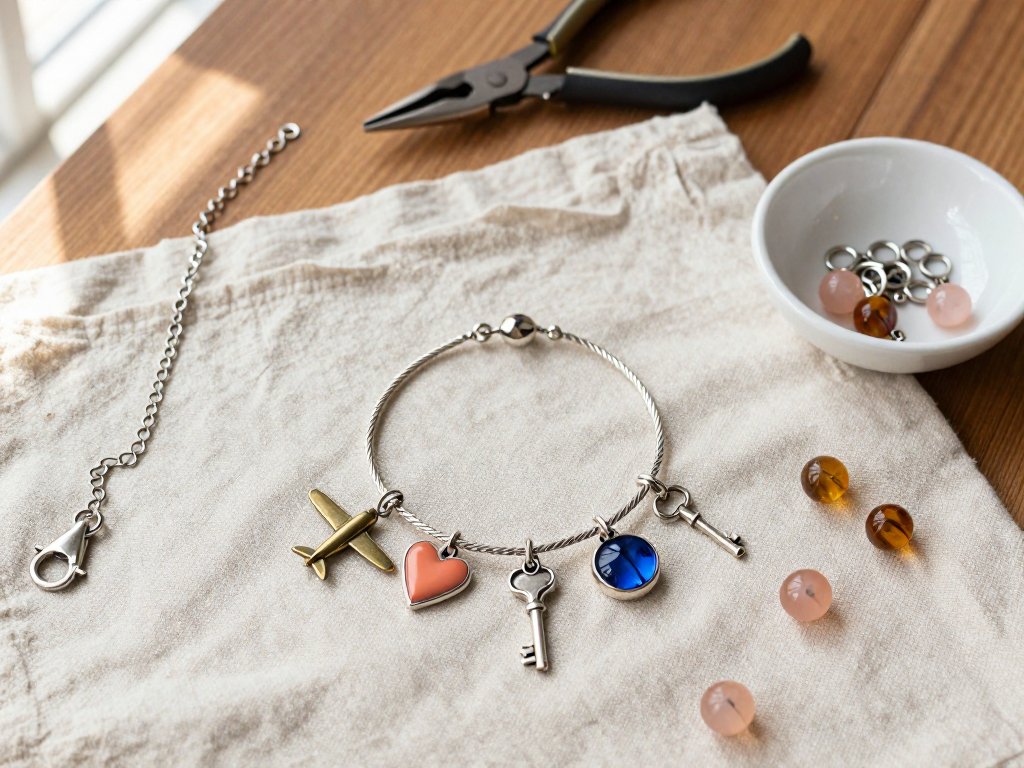
This is the bracelet most people picture first: a slim cable chain carrying a row of meaningful dangles. It is quick, forgiving, and easy to extend as your collection grows. Gather five to seven charms, one clasp, and a chain that wraps your wrist with a little slack.
What You Will Need
- A cable chain about an inch longer than your wrist measurement.
- Five to seven charms in varied sizes, plus two or three small beads for rhythm.
- A lobster clasp, a soldered jump ring, and six or more open jump rings.
- Chain-nose pliers, flat-nose pliers, and flush wire cutters.
Step by Step
- Wrap the chain around your wrist, add one inch of slack, and cut it with the flush wire cutters.
- Attach the lobster clasp to one end with the soldered jump ring, using the twist method.
- Lay the charms out along the chain before attaching anything, placing the largest near the center.
- Open a jump ring sideways, thread it through the first charm and a chain link, and close it flush.
- Continue one charm at a time, leaving two or three empty links between them so the chain can drape.
- Finish the open end with a plain jump ring, or add a short extension chain for an adjustable fit.
- Wear the bracelet for an hour, then rearrange any charm that twists or overlaps.
Styling note: this bracelet loves movement. Wear it alone against bare skin, or layer it with a fine watch and a plain bangle. The dangles will catch the light as you gesture, while the empty links keep the whole composition airy.
Project Two: Stretch Cord Bracelet with Beads and Charms
For immediate gratification, nothing beats a stretch bracelet. There is no clasp to fasten and no wire to crimp — beads slide onto elastic and are tied once. It is the most beginner-friendly project in this guide, and it is complete in under half an hour.
Stretch cord arrives clear or black; choose whichever disappears best against your beads. Round elastic passes easily through small holes, while flat elastic lies snugly and wears well. Whatever you pick, buy a quality cord meant for jewelry rather than household string.
What You Will Need
- Stretch cord about four inches longer than your wrist.
- Enough beads to cover your wrist, chosen from your color story.
- Two or three charms with small loops, plus their jump rings.
- Beading glue and small scissors.
Plan the layout before threading. Repeat a pattern — two rounds, one accent, two rounds — or build a gentle gradient from light to dark. Place the charms at the center of the wrist, where they will be seen rather than pressed against the table.
Step by Step
- Thread the beads in your planned order, sliding each charm on where you want it to sit.
- Leave the last two inches of cord empty, then bring the two ends together, overlapping them slightly.
- Tie a surgeon's knot: cross the ends, wrap the cord twice through the loop, and pull firmly.
- Add a second surgeon's knot on top, then trim the tails close to the knot.
- Dab a drop of beading glue over the knot and let it dry completely.
- Slide the knot into the opening of a nearby bead with a wide hole, hiding it from view.
- Roll the bracelet between your palms to settle the beads, and check that the fit is snug.
A stretch bracelet should sit snugly without spinning on the wrist. Too loose means removing a bead and retying; too tight means adding one. With no clasp to fasten, this project is easy enough for a quiet afternoon.
Project Three: Leather Cord with Clustered Charms
The final project trades metal for texture. Supple suede or leather cord feels earthy and modern, and it carries charms that would look lost on a delicate chain. Here the dangles gather in a cluster at the center, while the bare cord keeps the design calm.
Suede cord is a rounded, softly stretchy lace; flat leather thong has more structure. Both cut cleanly with sharp scissors and accept beads with generous holes. For a hint of shine, thread a few metal spacer beads between the leather and the charms.
What You Will Need
- One yard of suede or leather cord, about two millimeters thick.
- Three to five slide-on beads with holes wide enough for the cord.
- Three to five charms for the central cluster, each with a jump ring.
- Sharp scissors and clear glue or nail polish for the cut ends.
Step by Step
- Slide the beads onto the cord and arrange them on either side, leaving the center bare.
- Check each charm loop against the cord; if the cord passes through, thread the charm on in its spot. If the loop is too small, attach a slightly larger split ring and thread the cord through that instead.
- Adjust the cluster until the charms hang naturally without twisting against one another.
- Seal both cut ends of the cord with a dab of clear glue and allow them to dry.
- Overlap the two ends by an inch and tie a sliding knot: wrap one end twice around the other cord, pass it back through the wraps, and tighten gently.
- Repeat the sliding knot from the opposite direction with the second end, so the two knots travel toward each other.
- Pull the knots apart to open the bracelet, slide it over your wrist, and draw them together to close.
Styling note: the clustered dangles read like a pendant at the wrist, so keep the rest of the arm simple. This bracelet suits linen and bare summer skin and stacks beautifully with a plain watch. Adjust the sliding knots as the mood — or the season — changes.
Finishing Touches and Care
A bracelet is finished when it closes cleanly, hangs correctly, and feels comfortable, but small refinements elevate it to professional. If your design uses wire, close each crimp bead with chain-nose pliers, then snap a crimp cover over it for a smooth, bead-like silhouette.
Inspect every jump ring once more, pressing any seam that is not perfectly flush. Run your fingers along the whole piece to catch sharp wire ends, and clip or file anything that snags. A final wipe with a soft cloth removes the oils left by your working hands.
Wear will dull chain and charms, yet simple care keeps them luminous. Wash sterling silver and gold-filled pieces in warm water with a drop of mild soap, brushing crevices with a soft toothbrush. Dry at once and buff with a jewelry cloth, skipping harsh dips that strip finishes.
Store bracelets where they cannot tangle or scratch: flat in a lined box, each piece in its own pouch, or hanging from separate pegs. Keep stretch cord and leather out of direct sun and heat, which dry and crack them over the years.
Know when to remove your jewelry. Take bracelets off before showers, swimming, and exercise, since soap, chlorine, and sweat tarnish metal and weaken elastic. Leather is especially water-shy, so a cord bracelet should come off first at any sink.
Adjusting length is easier than beginners fear. Chain gains or loses links with pliers, and stretch cord re-knots in minutes with a bead added or removed. A sliding knot adjusts continuously, with no tools at all.
Build your first bracelet slightly loose, since wrists swell through the day. The right fit is one you forget you are wearing.
Common Beginner Worries
Every maker meets the same small snags, and none of them signal a lack of talent. Knowing them in advance lets you respond calmly when the first one appears at your worktable.
Chain kinking: fine chain folds into stubborn knots. Lay it flat, find the twisted link, and coax it open with a pin or the tip of your pliers. Hanging the bracelet overnight with a small weight often persuades reluctant links to relax.
Jump rings that gap: a ring that will not close flush was over-bent or pulled apart. Squeeze it shut with flat-nose pliers, pressing the ends straight together. If the ring has gone oval, replace it rather than forcing it, since bent metal weakens.
Stretch cord snapping: usually a single overhand knot pulled too hard, or elastic nicked by a sharp bead hole. Use the double surgeon's knot, and place a smooth spacer bead beside any sharp-edged glass. A drop of glue at the knot adds insurance.
Charms sliding or spinning: on chain, hang each charm from a single link and choose a jump ring one size smaller. On cord, flank the charms with snug beads, or add tiny rubber stops between elements.
Above all, take heart: imperfect results are part of the craft. A charm slightly off-center or a knot you can just barely feel is the signature of a handmade object, not a failure. Your first bracelet will carry the memory of making it, and that is exactly the point.
Conclusion
A charm bracelet is a diary worn on the wrist — a record of places visited, people loved, and obstacles overcome. Making one by hand adds another layer to that record: the hour spent choosing each element, the pliers in your palm, the small click of a jump ring closing.
Begin with whichever project calls to you. Chain suits the classicist; stretch cord suits anyone wanting immediate joy; leather suits those drawn to texture. All three are easy once the foundational moves are yours, and all three invite adding one charm as life unfolds.
Consider making a bracelet for someone you love. Gift a new mother a charm for her baby's birth month, a friend a tiny airplane before her first long journey, a parent a heart engraved with a grandchild's initial. A handmade charm bracelet says what wrapping paper cannot.
For yourself, keep a small box of charms waiting for milestones — a new home, a finished degree, a year of good health — and a ritual is ready. Open the box, choose the charm, find its place on the chain, and let your bracelet grow along with you.