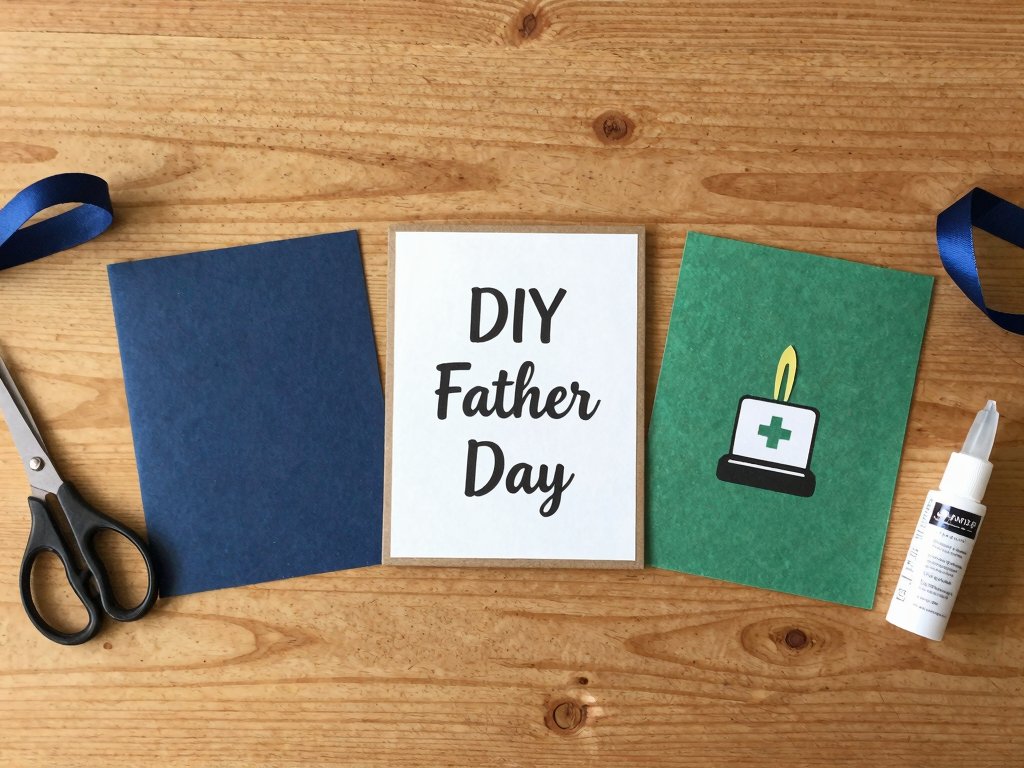
Introduction
Let me guess. You have a stack of construction paper, a glue stick with a crusty cap, and a vague memory of cutting out handprint turkeys from years ago. Father's Day is next weekend, and you want to give Dad something that does not look like it came from the drugstore aisle — but you are also a busy mom who does not have time for an elaborate Pinterest project that requires seventeen specialty supplies.
I have been there. Every year, I tell myself I will start early. Every year, I am hunched over the kitchen table on Saturday night, trying to figure out how to make a card that says "I love you, Dad" without resorting to a printed-out internet template.
The good news is that the best Father's Day cards are not the ones with the most layers or the fanciest techniques. They are the ones that feel personal. The ones that make Dad stop and actually read the words. And the ones that — let us be honest — do not take all afternoon so you can actually enjoy the weekend before the holiday.
Here are five card ideas that hit all three marks. They use supplies you probably already own. They take under an hour each. And they will genuinely make the dad in your life smile.
The Philosophy of a Good Dad Card
Before we get into the projects, let us talk about what makes a Father's Day card land well. Because the truth is, a lot of DIY cards miss the mark simply because they focus on the wrong thing.
Dads tend to appreciate cards that are either heartfelt or funny — or ideally, a mix of both. A card that makes him laugh and then makes him tear up a little? That is the sweet spot. Cards that try too hard to look "crafty" (think: twelve layers of scrapbook paper, glitter glue, and a three-dimensional pop-up mechanism) can feel more like a display of skill than a message from the heart. And cards that are too generic — "World's Best Dad" with nothing personal — get a polite smile and end up in the recycling bin by Tuesday.
The card ideas below are designed to feel personal first and crafty second. Each one includes space for a handwritten message, because that is what Dad will actually keep. A handwritten card from a child or partner is one of those rare things that gets tucked into a drawer and pulled out years later.
Every project in this article uses basic craft supplies: cardstock or heavy paper, scissors or a craft knife, adhesive, and something to write with. A few call for a ruler or a bone folder. None of them require a Cricut or a heat gun. Because the best Father's Day card is the one you actually finish, not the one you planned to finish and ran out of time for.
Card 1: The Sports Jersey Pop-Up
This card works for any dad who loves sports — and honestly, even for dads who do not. The idea is simple: the card front looks like a miniature jersey, and when you open it, a simple pop-up element gives it dimension.
Materials: One sheet of cardstock in Dad's team color (or his favorite color), one sheet of white cardstock, scissors, glue stick, a black marker, a ruler.
Step 1: Make the card base. Fold the colored cardstock in half to create a standard 5-by-7-inch card. If your cardstock is 8.5 by 11 inches, fold it in half to get a 5.5-by-8.5-inch card — close enough.
Step 2: Create the jersey front. From the same colored cardstock, cut a rectangle about 4 inches wide and 5 inches tall. Round the top corners slightly with scissors to mimic the neckline of a jersey. Cut a small V at the top center for the neck opening. Cut two small rectangles from the sides at the bottom for the shirt hem slits. This sounds more complicated than it is — you are basically cutting a T-shape from a rectangle. If it looks a little uneven, that is fine. Jerseys are not perfectly geometric either.
Step 3: Add the number. Cut a large number from white cardstock — Dad's favorite jersey number, or the year he was born, or just a number that means something to your family. If cutting numbers by hand feels daunting, use a stencil or print a large number font outline from your computer and trace it. Glue the number to the center of the jersey.
Step 4: Add details. With the black marker, draw horizontal stripes across the shoulders and sleeves of the jersey. You can also draw a small nameplate above the number with Dad's name or "DAD" in block letters.
Step 5: Attach the jersey to the card. Glue only the edges of the jersey to the front of the card, leaving the center free. This creates a pocket. Tuck a small handwritten note or a gift card into the pocket before giving it.
Step 6: Write the inside message. On the inside of the card, write something specific. "Thanks for coaching my soccer team even though I cried every practice" or "I learned how to change a tire by watching you, and I still call you when I get a flat." The specific memory is what makes this card keepable.
Variation for the non-sports dad: Skip the jersey number and turn the colored rectangle into a simple vest or tool apron. Add a small pocket cut from contrasting paper and tuck a tiny paper "tool" (a wrench shape or a paintbrush) into the pocket.
Card 2: The "Reasons Why" Accordion Fold
This is the card that gets dads emotional every single time. It is a simple accordion-fold insert that slides out of a card sleeve, revealing a list of specific reasons you love him. The magic is in the specificity, not the complexity.
Materials: One sheet of cardstock for the outer sleeve, one sheet of heavier paper or lightweight cardstock for the accordion insert (printer paper works in a pinch), scissors or paper trimmer, glue stick, a bone folder or the edge of a ruler for creasing, a pen.
Step 1: Make the outer sleeve. Cut a piece of cardstock to 6 inches by 9 inches. Fold it in half to create a 6-by-4.5-inch card. This will be the cover. Decorate the front simply — Dad's initial in a nice font, a small heart, or just leave it blank and elegant. The cover should be understated so the inside is the star.
Step 2: Create the accordion strip. Cut a strip of paper 4 inches wide and 18 inches long. If you do not have paper that long, tape two 9-inch strips together at the short end using a clean, flat seam. Score the strip every 3 inches using a bone folder or the edge of a ruler. Fold each score line in alternating directions — mountain fold, valley fold, mountain fold, valley fold — until you have a zigzag strip with six panels (three on each side).
Step 3: Write the reasons. On each panel, write one specific reason you love Dad. The key word is specific. Instead of "You are a good dad," try "I love how you always let me pick the radio station even though I know you hate my music." Instead of "You work hard," try "I remember the summer you worked double shifts and still made it to my recital." Fill all six panels. If you have kids, let them write their own reasons on the panels — their handwriting and spelling mistakes are what make this card priceless.
Step 4: Attach the accordion. Glue the first panel of the accordion to the inside center of the card. Fold the accordion closed, close the card, and press flat. When Dad opens the card, the accordion will fan out with all the reasons visible.
Step 5: Seal with a belly band. Cut a thin strip of cardstock (1 inch wide, 6 inches long) and wrap it around the closed card. Secure the ends with a small glue dot or a piece of tape on the back. Slide a small tag or a paper clip onto the belly band that says "Open when you need a reminder." This turns the card into a keepsake that he can revisit on tough days.
I made this card for my own dad two years ago, and he still has it on his nightstand. He told me last month that he reads it on mornings when he is feeling low. That is the power of a specific, handwritten list of reasons. No store-bought card can do that.
Card 3: The Shirt-and-Tie Fold-Over
This is a classic for a reason: it looks impressive, it is easy to make, and it fits the Father's Day theme perfectly. The shirt-and-tie card is a folded card where the front becomes the shirt, complete with a collar and a tie.
Materials: One sheet of white or light-colored cardstock, one sheet of patterned paper or a contrasting solid color for the tie, scissors, glue stick, a small button (optional), a ruler.
Step 1: Fold the shirt base. Cut a piece of white cardstock to 8.5 by 11 inches. Fold it in half crosswise so it is 5.5 by 8.5 inches. This is your card base. Orient it so the fold is at the top.
Step 2: Create the collar. With the card still folded, cut two small slits from the top fold downward, about 1.5 inches long and 2 inches apart. These slits are the collar opening. Fold the two resulting flaps outward and downward at a slight angle to create the collar points. Press the creases firmly. When you open the card, the collar flaps should stick out from the top like an open shirt collar.
Step 3: Make the tie. Cut a tie shape from patterned paper or a contrasting color. A tie is basically a long triangle with the top cut straight across. Make it about 1 inch wide at the top, tapering to a point about 6 inches below. Cut a small matching triangle for the knot. Glue the knot at the top of the tie, then glue the tie assembly to the front of the card, positioning it so it hangs down from between the collar flaps.
Step 4: Add the button. Glue a small button at the top of the shirt, just below the knot, as if the top button of the shirt is fastened. If you do not have a button, draw one with a marker — a small circle with four dots in the center.
Step 5: Write the message. Inside the card, write your message. A good fit for this card style: "Thanks for always being someone I can look up to" or "You wear the Dad title well."
Variation: If Dad wears ties with specific patterns — stripes, polka dots, plaid — try to match the paper to his style. A dad who wears bow ties gets a miniature bow tie instead of a straight tie. A dad who never wears ties at all? Skip the tie and make the card a simple button-down shirt. Sometimes less really is more.
Card 4: The Map of Us
This is the most creative card on the list and the one that consistently gets the strongest reaction. It uses a simple road map metaphor to tell the story of your relationship with Dad.
Materials: One sheet of white or cream cardstock, a fine-tip black pen, colored pencils or markers, a ruler, a pencil with an eraser.
Step 1: Draw the map frame. Lightly pencil a rectangle on the cardstock about 1 inch from each edge. This is the border of your map. Inside the border, you will draw roads, landmarks, and destinations.
Step 2: Draw the roads. Think of the major moments in your life with Dad as roads. The main road could be labeled "The Early Years." A branching road could be "Learning to Ride a Bike." Another could be "The Teenage Years." The roads do not need to be straight — winding roads with curves and intersections look more like real maps. Use the ruler for straight sections and freehand for curves.
Step 3: Add landmarks. At key intersections or along the roads, draw small symbols and label them: a tiny house for "The house I grew up in," a fish for "The fishing trip where I fell in the lake," a graduation cap for "Watching me get my diploma," a wrench for "Teaching me to change my oil." Each landmark is a memory. The more specific, the better.
Step 4: Mark the destination. At the end of the main road, draw a star. Label it "Here. With you." Or "The best place: home." Or whatever ending feels right for your story. The star represents the present moment — the destination the roads all lead to.
Step 5: Add map details. Draw a compass rose in one corner (you can keep it simple — just an N, S, E, W). Add a small scale bar. Give the map a title at the top: "The Map of Us" or "How I Found My Way Home" or something personal. Color the map lightly with colored pencils — green for parks, blue for water features, brown for the roads.
This card takes the longest of the five — about 45 minutes to an hour — but it is the one that Dad will frame. It tells a story that only you and he share, and it does it in a format that feels both creative and personal. I have seen dads cry over this card. Bring tissues.
Card 5: The Coupon Book That Does Not Feel Like a Joke
Coupon books are a Father's Day classic, but they usually fall flat because the coupons are jokes that no one ever redeems. "One free lawn mowing" from a kid who already mows the lawn every week is not a gift. This version of the coupon book is different. Each coupon offers something Dad genuinely wants but would never ask for.
Materials: Five to ten small cardstock rectangles (about 3 by 4 inches each), a ring binder or a piece of ribbon or twine, a hole punch, a pen, optional: a small envelope to hold the booklet.
Step 1: Brainstorm the coupons. This is the most important step. Think about what Dad actually enjoys or needs. Good coupon ideas include: "One afternoon with no phone calls — I will handle the interruptions," "Breakfast in bed made by me (pancakes optional, love guaranteed)," "One guilt-free afternoon to go fishing/golfing/reading with no timeline," "I will watch your favorite movie with you without complaining," "One home-cooked meal of your choice, prepared by me."
The coupons that work best are the ones that show you have been paying attention. If Dad has been mentioning he would like to visit a particular museum, that is your coupon. If he has been eyeing a new coffee shop downtown, make a coupon for a coffee date. The specificity is what makes this gift feel thoughtful instead of obligatory.
Step 2: Design each coupon. Write the offer on one cardstock rectangle per coupon. Use the format: "Good For: [the offer]. Redeemable: [anytime/on a date of your choosing]. Expiration: Never." Decorate the edges with a small doodle or a border. If your kids are involved, let them decorate the coupons with drawings and stickers. A coupon with a crayon drawing of a fish on the "fishing afternoon" coupon is worth a thousand words.
Step 3: Assemble the booklet. Stack the coupons and punch a hole in the top left corner of each. Thread a ribbon, a piece of twine, or a binder ring through the holes. Tie or close to secure.
Step 4: Make a cover. Cut a slightly larger cardstock rectangle for the cover. Write something like "The Dad Book: Coupons for the Man Who Deserves Everything" or simply "Happy Father's Day." Decorate the cover with a simple drawing or a photograph.
Step 5: Present it. Place the coupon book in a small envelope with the words "Open whenever" written on the front. Give it to Dad with a real, honest hug — the kind that lasts a second longer than usual. That hug is part of the gift.
This coupon book works because it gives Dad permission to ask for what he actually wants — time, attention, and small gestures of care — without feeling like he is imposing. And unlike a store-bought gift, the coupons can be redeemed all year long.
Making It Work With Kids of Any Age
If you are making these cards with children, here is how to adapt each project for different ages.
Toddlers and preschoolers (ages 2-4): Let them scribble on the inside of the card, then pick the best scribble and turn it into a design element. For the shirt-and-tie card, let them finger-paint the tie. For the reasons accordion, write their dictated reason word for word — "I love when Daddy does the tickle monster" is perfect. The card will not look polished, and that is precisely the point. A lopsided scribble from a three-year-old is worth more than any perfectly cut letter.
Elementary age (ages 5-10): Kids this age can help with cutting and gluing. Let them choose the colors and decorate the covers. For the map card, have them draw their own memory landmarks. A seven-year-old's "map" might feature a giant playground and a pizza place, and that is exactly the kind of detail Dad will love. Let kids write their own messages even if the spelling is creative — "I love you DAD becuz you are the best" is perfect.
Tweens and teens (ages 11+): Older children can take the lead on any of these projects with minimal supervision. They might prefer the map card or the accordion reasons card, which give them space to express more complex emotions. Encourage them to write something specific and honest rather than a generic sentiment. A teenager's admission that "I used to think your advice was annoying, but now I realize you were usually right" is a gift that will stay with a dad forever.
No matter the age, the most important thing is that the child contributes something genuine. A card made by a five-year-old with a crooked crayon heart and a dictated message is more valuable to most dads than a professionally designed card from a store. Lean into the imperfection.
Tips for a Stress-Free Card-Making Session
A card-making session with kids can go from joyful to chaotic very quickly. Here is how to keep it calm and productive.
Prep your materials ahead of time. Cut the cardstock to size and fold the bases before you involve the kids. Have glue sticks uncapped and scissors within reach.
Set a timer. Kids lose focus after about 20 minutes. Aim to finish the main structure in that window. Decoration and messages can happen in a second session.
Prepare the card message in advance. Draft your message on scrap paper first. A thoughtful message deserves your full attention, not a last-minute scramble.
Embrace the mess. Glue will get on the table. Scissors will cut slightly crooked. These are not failures — they are the texture of a handmade gift. Dad will not remember the straight edges. He will remember the afternoon you all sat around the table together.
Father's Day Craft Supplies at Arttools
Conclusion
The best Father's Day card is not the one with the most elaborate design or the most expensive materials. It is the one that makes Dad feel seen. The one that references an inside joke, a shared memory, or a quiet moment that only the two of you remember. A card does not need to be perfect to be precious. It needs to be personal.
Choose one of these five ideas — the one that feels most like your dad — and give yourself an hour this week to make it. Get the kids involved if you can. Write something specific. And then watch his face when he opens it. The smile that is trying not to be a tear? That is the whole point.
Happy Father's Day to the dads who coach soccer games, grill burgers, give advice we did not know we needed, and show up for every single recital. You deserve a card that says exactly how much you are loved.
