Introduction
The first hanging plant stand I ever made was a disaster. I bought a twenty-dollar macrame kit from a big-box craft store, watched a five-minute tutorial on fast-forward, and ended up with something that looked more like a tangled fishing net than a plant hanger. My pothos spent three weeks sitting on a bookshelf while I tried to untangle the mess.
That kit had instructions written for someone with eight hands and infinite patience. What I needed — and what I eventually figured out — was a straightforward method using basic supplies that actually makes sense on a Saturday afternoon with a cup of coffee.
If you have been putting off making your own hanging plant stand because the tutorials look too complicated or the supplies seem expensive, this is the guide for you. I am going to show you how to build one with rope from the hardware store, an old metal ring from the junk drawer, and about an hour of your time. Total cost: under fifteen dollars. And I promise — no tangled fishing net.
Why Make Your Own Hanging Plant Stand?
Let me be direct about the economics. A pre-made macrame plant hanger from a home decor store runs anywhere from eighteen to forty dollars depending on how trendy it looks. A bohemian-style one from an online boutique can hit fifty bucks before shipping. And half the time they are made from the same three-dollar rope you can buy at the hardware store.
Making your own gives you three things buying cannot:
- Control over length. Standard hangers are always too short or too long for your specific space. You decide exactly where the pot hangs.
- Better materials. The rope from the craft store is often thinner and weaker than what you can get from a hardware or marine supply store for the same price or less.
- Custom color. You can dye cotton rope any color you want. Try finding a mustard-yellow plant hanger at Target on a Tuesday.
What You Need (Everything Costs Under $15)
Rope or Cord
For a basic hanging plant stand, you want a rope that is strong, looks good, and does not stretch too much under weight. Your best options:
- 3/8-inch (9mm) cotton rope. This is the classic macrame look — soft, natural, and easy to work with. Available at any hardware store in the utility rope section for about six to eight dollars for fifty feet. That makes three or four hangers.
- Polypropylene rope. Cheaper and more water-resistant than cotton. Great for outdoor use. About four dollars for fifty feet. Slightly stiffer than cotton, which means the knots hold their shape better but are harder to tighten.
- Jute twine. Cheap (three dollars for a large roll) but rough on hands and sheds fibers everywhere. It works but it is not as comfortable as cotton.
Do not use: Nylon climbing rope (too expensive, overkill), paracord (too thin — the pot will tilt), or clothesline (stretches too much). Stick with 3/8-inch cotton rope for your first project.
Rings
You need two rings: one small ring (about one inch in diameter) for the top where the hanger hangs from a hook, and one larger ring (about two to three inches) for the bottom where the pot rests.
You can buy brass or stainless steel curtain rings at a dollar store for about two dollars for a pack of six. Or reuse an old key ring for the top and a mason jar ring for the bottom. I have used both — they work fine.
Tools
- Scissors (sharp enough to cut through rope cleanly)
- Measuring tape or ruler
- Painter's tape or a binder clip (to hold rope ends while you work)
- Lighter (for melting synthetic rope ends to prevent fraying — skip for cotton)
The Knot You Actually Need to Know
Here is the secret that took me way too long to learn: you only need one knot to make a hanging plant stand. It is called the square knot, and you already know how to do it even if you have never tied one.
A square knot is simply: right over left, tuck under. Left over right, tuck under. That is it. Two motions. If you have tied your shoes, you have done something very similar.
For a plant hanger, you will tie square knots with four strands of rope — two from one side crossing over two from the other. This creates the diamond-pattern net that holds your pot. The same knot repeated about a dozen times in the right sequence makes the entire hanger.
That is the whole technique. One knot, repeated in a pattern. If you can tie your shoes, you can make this.
Step-by-Step: Build Your Hanging Plant Stand
Step 1: Cut Your Rope
Cut eight pieces of rope, each eight feet long. This gives you a hanger that will hold a standard six-inch pot and hang about three feet from the ceiling. Adjust longer if you want a lower hanger.
Tie all eight pieces together at one end with a simple overhand knot, leaving about four inches of tail above the knot. This is the top of your hanger.
Step 2: Attach the Top Ring
Push the top ring over the tail ends and down against the overhand knot. The ring should sit on top of the knot with the tails sticking out above it. Separate the eight strands into four groups of two strands each.
Step 3: First Row of Square Knots
Take one group of two strands. You will tie a square knot using all four strands together — think of them as two pairs working together. Tie a square knot about two inches below the top ring. Repeat for the other three groups. You should now have four square knots at the same height, evenly spaced around the ring.
Step 4: Second Row of Square Knots
Here is where the diamond pattern starts. Take two strands from one group and two strands from the adjacent group. Tie a square knot about two inches below the first row of knots. Do this all the way around. This connects the groups and creates the net.
Step 5: Third Row of Square Knots
Repeat the same pattern as Step 3 — take strands from the same original groups, tie a square knot two inches below the second row. This gives the net enough depth to hold a standard pot.
Step 6: Test the Fit
Set your pot (without the plant — use an empty pot) into the net. The pot should sit about halfway into the net, with the rim above the last row of knots. Adjust if needed by tying more rows or loosening knots.
Step 7: Finish the Bottom
Once the pot fits correctly, gather all sixteen strands below the pot and tie them together with a tight overhand knot. Trim the tails to about four inches. For cotton rope, you can leave the ends natural — they will soften and blend in after a few days.
Step 8: Hang and Enjoy
Screw a ceiling hook into a stud (or use a heavy-duty drywall anchor rated for at least twenty pounds), loop the top ring over it, and hang your plant. Water gently at first — new hangers stretch slightly under the weight of wet soil.
Common Beginner Mistakes (And How to Avoid Them)
The Net Is Too Tight or Too Loose
If the pot does not slide into the net, your knots are too tight or the spacing between rows is too small. The fix: before you commit to the final knot tightness, set the pot into the net after each row. Check the fit as you go instead of waiting until all knots are done.
If the pot wobbles or the net is baggy, your knots are too loose. Square knots should be firm — pull each knot snug before moving to the next. Loose knots let the pot shift and make the hanger look sloppy.
The Hanger Tilts to One Side
This means your strands are not even. Before starting, make sure each of the eight strands is exactly the same length. A one-inch difference in one strand will tilt the whole hanger by several degrees. Measure twice, cut once — it matters here.
Rope Ends Fray
For cotton rope, a quick pass with a lighter over the cut ends seals them. Do not hold the flame on for more than a second or two — cotton catches fire easily. Just a quick lick of flame to melt and seal the fibers together. For synthetic rope, the same method works with slightly more heat.
How to Make It Look More Expensive Than It Is
Once you have the basic hanger built, there are a few tricks that take the look from handmade to something that could sit in a boutique window.
- Dye the rope. Ten dollars worth of Rit dye and a bucket of hot water can transform white cotton rope into any color. I made a set of three hangers in navy, mustard, and natural — total cost per hanger dropped to about eight dollars including the dye.
- Add wooden beads. A bag of one-inch wooden beads costs three dollars at a craft store. Slide one onto each strand before tying the first square knot. It adds a decorative detail that looks intentional and high-end.
- Use a brass or copper ring. A decorative curtain ring from the hardware store costs two dollars and looks much nicer than a plain metal ring. The warm metal against natural rope is a classic combination.
- Double up the strands. Instead of eight strands, use sixteen thinner strands of macrame cord. The result is a fuller, more textured look that feels more substantial.
What to Do with Extra Rope
Fifty feet of rope will make three or four full hangers. If you have leftover material, here are a few quick projects that use the same square knot technique:
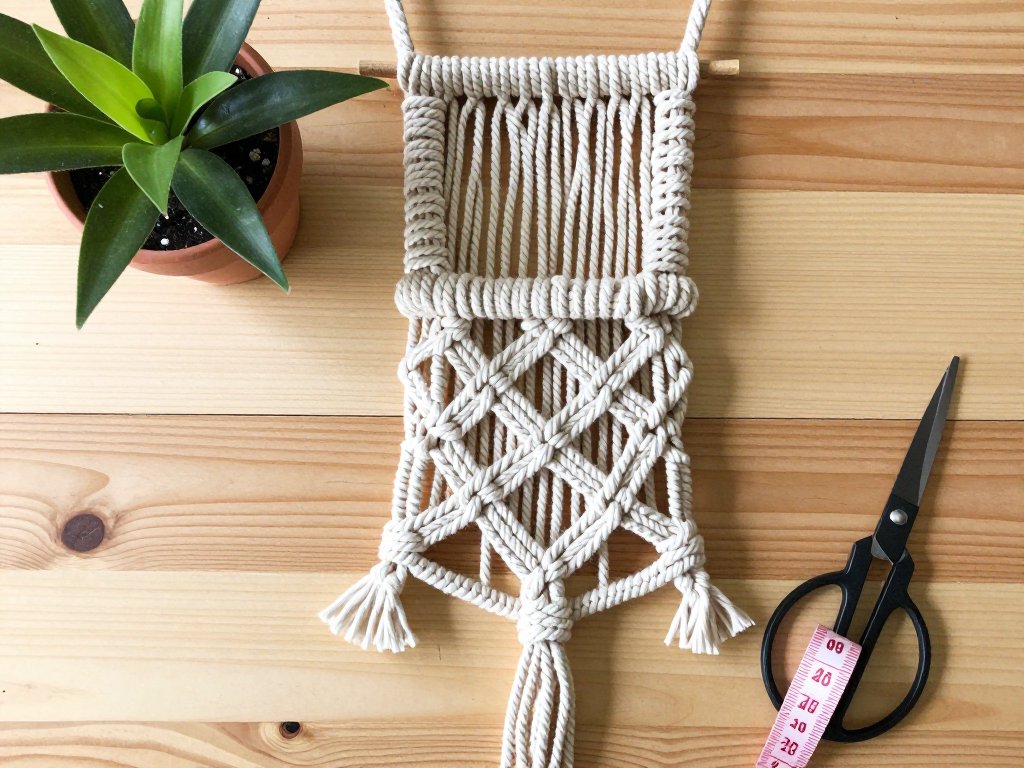
- Wall hanging — same knots, wider pattern, hung on a wooden dowel
- Table runner — flat square knots in a row
- Keychain — mini version with a single key ring
- Gift wrap accent — a few knots around a gift box look surprisingly elegant
From One Maker to Another
My second hanging plant stand turned out better than the first. Not because I suddenly became talented overnight, but because I stopped following the complicated kit instructions and started using a method that made sense for the materials I had. The pothos that waited on my bookshelf for three weeks is now hanging in my living room window, happy and thriving in a hanger I built for under twelve dollars.
That is the thing about this project: it does not take special skills or expensive tools. It takes eight pieces of rope, one knot, and the willingness to try again if the first attempt gets tangled. Your plant will thank you.
