Introduction
Let me paint you a familiar picture. School supply lists are out, the stores are crowded, and your child has announced they "really need" five different notebooks for reasons that are not entirely clear.
Before you reach for your wallet, here is a thought: you can make adorable mini notebooks at the kitchen table in about ten minutes. Best of all, you can make them with no glue at all.
No glue means no sticky fingers, no drying time, and no ruined tabletops. It also means younger kids can join in safely, which makes this a perfect after-school or weekend activity.
In this guide, I will show you four easy no-glue binding methods, the simple supplies each one needs, and plenty of ideas for putting your mini notebooks to use.
These notebooks also make wonderful gifts for classmates, teachers, and grandparents. There is something special about a handmade book waiting to be filled.
Why No-Glue Notebooks?
If you have ever helped a child with a glue-stick project, you already know the appeal of skipping it entirely.
- No mess. No glue bottles to uncap, no sticks to lose the caps of, no dried glue flakes on the table.
- No waiting. Glue means holding pages together while they dry. These methods are ready the second you finish them.
- Kid-friendly. Staplers, rubber bands, and blunt needles are easier for little hands to manage than a careful glue application.
- Budget-friendly. Every method uses paper you probably already have, plus one or two household items.
- Fast. Most of these notebooks take under fifteen minutes from start to finish.
That combination makes no-glue notebooks ideal for school crafts, rainy afternoons, and handmade gifts that kids can produce in quantity.
What You'll Need
Here is the honest supply list. You will not need everything for every method, so pick the project first and gather accordingly.
- Paper. Printer paper, notebook paper, scrapbook paper, or leftover construction paper all work. For the folded booklet, one sheet makes one notebook.
- Cardstock or a cereal box. This becomes the sturdy cover. A recycled cereal box is free and works beautifully.
- Scissors. For trimming covers and cutting notches.
- A ruler. Helpful for measuring covers and finding the center of your paper.
- A stapler. Needed for the staple-bound method. A long-arm stapler reaches the center fold, but a regular one works if you staple from the outside edge.
- Rubber bands. For the elastic band method. Wide, flat bands hold better than skinny ones.
- A needle and thread. For the sewn method. A blunt tapestry needle is safest for kids.
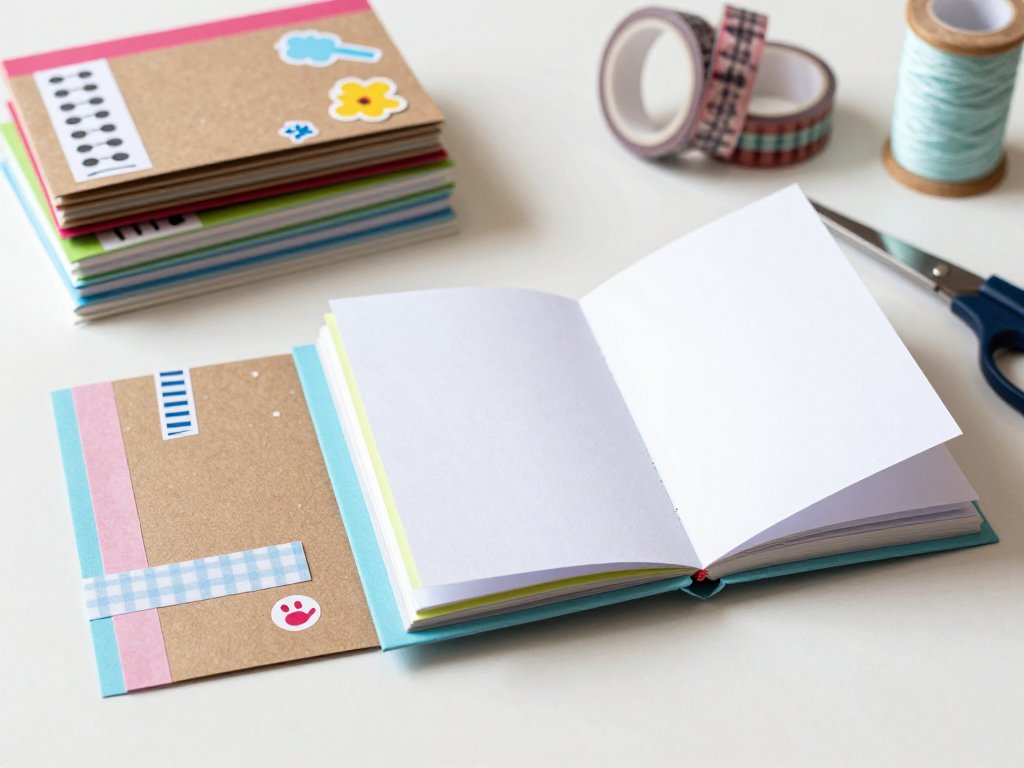
- Decorating supplies. Markers, stickers, washi tape, and stamps for the covers.
That is it. No special bookbinding tools, no glue gun, no fancy equipment.
Choosing Sizes and Paper
Mini notebooks come in whatever size you want them to be, which is half the fun.
A full sheet of printer paper folded in half makes a notebook around 5.5 by 8.5 inches.
That is a comfortable size for writing practice, lists, and journaling. A half sheet makes a true pocket notebook that fits in a jacket or pencil case.
A quarter sheet makes the cutest tiny books, perfect for word lists and party favors.
For the one-sheet folded booklet, remember that your finished book is one quarter of the original sheet. A standard letter sheet gives you a book of about 4.25 by 5.5 inches, while a sheet of scrapbook paper gives you a slightly larger square-ish book.
Mix paper types in one notebook for a playful feel. Use lined paper for writing pages, plain paper for drawing, and a colored sheet in the middle as a surprise divider. Kids love flipping through to find the section they need.
Cardstock pages make sturdy books that stand up to heavy use, while thin printer paper keeps the notebook slim and easy to fold. Let the purpose of your notebook guide the paper you choose.
Method 1: The One-Sheet Folded Booklet
This is the magic trick of paper crafts. One ordinary sheet of paper becomes a tiny eight-page book, and the only tool you need is a pair of scissors.
Step-by-Step
- Fold your paper in half the short way, like a hamburger. Crease firmly, then unfold.
- Fold it in half the long way, like a hot dog. Crease firmly, then unfold. You should now see a cross of crease lines.
- Fold the paper in half the long way again and keep it folded.
- With the folded edge facing you, snip along the short center crease. Cut from the folded edge to the exact middle of the paper. Do not cut past the center.
- Unfold the paper completely. You will see a small slit running from the edge to the center.
- Now fold the paper in half the short way, so the slit runs along the top. Gently push the two ends toward each other.
- The center will open like a diamond, and the paper will collapse into a little book with pages that fan out.
- Press the book flat and crease the spine. Fold the front and back pages around the cover, and you are done.
If the first attempt feels fiddly, try again with a fresh sheet. The motion clicks quickly, and children often master it faster than adults.
For a sturdier version, make the booklet from a single sheet of cardstock or scrapbook paper. The pages will be thicker and the book will last longer.
Method 2: The Staple-Bound Mini Notebook
This is the classic pocket notebook, and it could not be simpler. Stacks of paper, a folded cover, and a few staples are all it takes.
Step-by-Step
- Stack five to ten sheets of paper. Fewer sheets are easier for little hands to fold and staple.
- Cut a piece of cardstock one inch taller and one inch wider than your paper stack. This will become the cover.
- Fold the cardstock in half, then slide the paper stack inside the fold so all edges line up.
- Fold the whole stack in half together, pressing firmly along the spine.
- Open the notebook to the middle and staple along the center fold. Two or three staples spaced evenly work best.
- Close the notebook and trim any pages that stick out past the cover with your scissors.
A long-arm stapler lets you staple right down the middle of the open notebook. If yours is a standard stapler, staple from the outside along the spine instead, then press the staple ends flat from the inside.
This method is wonderfully forgiving. Even a slightly crooked staple still produces a perfectly usable notebook, which is exactly the energy we want for a kids' craft.
To make a whole set of notebooks quickly, set up an assembly line. Cut all the covers first, then fold all the paper stacks, then staple everything in one go. Kids can decorate their own covers while you handle the stapler.
Method 3: The Elastic Band Notebook
What if you do not have a stapler handy? A rubber band can hold a notebook together just as well, and it lets you swap pages in and out.
Step-by-Step
- Fold your paper stack in half, then fold a slightly larger cardstock cover around it.
- Cut two small slits in the cover, about one inch from the top and one inch from the bottom, close to the spine.
- Thread a wide rubber band through each slit from the outside, so the band wraps around the folded pages.
- Stretch each band over the spine and settle it into place.
- Check that the cover closes neatly and the pages stay put when you open the book.
The bands act like a flexible spine, so the notebook lies flat when open. That makes this a great choice for sketchbooks and journals.
Because nothing is permanent, you can also use this method to make a reusable notebook. When the pages are full, slip in a fresh stack and pass the old paper to the recycling bin.
Method 4: The Sewn Pamphlet Notebook
This method sounds advanced, but it is actually the oldest trick in bookbinding, and it is lovely to teach older kids. All you need is a needle, thread, and a folded paper stack.
Step-by-Step
- Fold four to six sheets of paper in half to make your pages. Fold a cardstock cover around them.
- Open the booklet to the middle page. Mark three points along the spine: one at the center, one an inch from the top, one an inch from the bottom.
- Push a blunt needle through the center point from the inside out, leaving a short thread tail inside.
- Bring the thread around the outside of the spine to the top hole, and push the needle back in through the top hole.
- Run the needle along the inside to the bottom hole, and push it out through the bottom hole.
- Bring the thread around the outside of the spine back to the center hole, and push the needle in through the center hole.
- Tie the two thread ends together snugly inside the center of the book, then trim the tails.
The result is a sturdy little book with a neat stitch visible along the spine. Choose a contrasting thread color, and the stitch becomes a decorative detail.
This sewn notebook is the most durable of the four methods, which makes it perfect for journals that will get carried in a backpack all year.
Decorating Your Notebooks
Half the fun of a mini notebook is making it feel like yours. Here are the best ways to decorate, in order of messiness.
- Decorate before binding. Color the cover or write a title before you fold and staple. It is much easier to draw on a flat sheet.
- Washi tape. Tape strips along the cover edge for instant color. Washi tape also reinforces the spine on stapled notebooks.
- Stickers. The ultimate low-effort decoration. Let kids raid the sticker stash and go to town.
- Rubber stamps. A few stamps and a washable ink pad turn plain covers into something special.
- Name labels. Write the owner's name on the cover with a marker or a printed label, so notebooks do not get lost at school.
If you are making these as gifts, add a simple tag that says who the notebook is for and what is inside. Kids love knowing a notebook was made just for them.
Ideas for Using Mini Notebooks
Once your family discovers how fast these come together, you will want a purpose for every one. Here are tried-and-true ideas.
- Word lists. Spelling words, vocabulary words, or new words from library books.
- Nature journals. Tiny enough to tuck in a pocket during a walk, perfect for sketching leaves and bugs.
- Habit trackers. Let kids check off reading minutes, chores, or water glasses.
- Gift toppers. Tie a mini notebook onto a present with ribbon instead of a bow.
- Thank-you notes. Have kids decorate the cover and write a message inside.
- Party favors. Make a stack before a birthday party and send each guest home with one.
- Doodle books. For waiting rooms, car rides, and quiet time.
The best part is that the notebook itself becomes a gift with the stationery already included.
Common Mistakes and Easy Fixes
Even the simplest paper craft has its tricky moments. Here is how to handle the ones that come up most.
The one-sheet booklet will not fold together. Your snip probably did not reach the exact center. Unfold, check that the cut reaches the middle crease intersection, and try again.
Staples do not reach the spine. Open the book fully and staple from the outside along the fold. Press the staple ends flat against the inside pages.
Pages stick out past the cover. Fold the stack carefully before stapling, then trim the edges with scissors afterward. A slightly smaller paper stack also helps.
The rubber band slips off. Use a wider band, or cut your slits a little closer to the spine so the band grips more of the cover.
The sewn stitch looks messy. Pull each loop gently taut before moving to the next hole, and keep the thread from twisting. Practice on a scrap booklet first.
The notebook will not lie flat. Run a spoon handle or a bone folder firmly along the spine to sharpen the crease. A sharper fold makes a happier book.
Conclusion
Mini notebooks are the perfect first paper craft for kids and a genuinely useful one for adults. They use supplies you already own, take minutes to make, and need absolutely no glue.
Start with the one-sheet booklet if you want instant gratification, or the staple-bound version if you need a sturdy stack of notebooks before Monday morning.
Let the kids choose their paper, their decorations, and their first written page. A notebook they made themselves is far more likely to be used, treasured, and filled with good ideas.
Happy folding, friend. Your first mini notebook is one sheet of paper away.