Introduction
Somewhere in a drawer, most of us still have a card that made us gasp. You lift the front flap and something rises out of it: a paper bouquet, a tiny birthday cake, a row of balloons. Plain cards get recycled. Pop-up cards get kept.
That is the quiet magic of paper engineering. One flat sheet, creased in a few deliberate places, suddenly has movement in it. And the best part for a busy mom? You do not need special tools to make one.
You need cardstock, something to cut with, a ruler, and glue. That is honestly it. Every project below is beginner level and fits into one evening, even if bedtime runs late.
We will look at how pop-ups actually work, then build three cards together. If your first fold comes out a little crooked, that is completely normal. The card will still pop.
What Paper Engineering Actually Is
Paper engineering is folding with intention. Every cut and crease in a pop-up card is doing one job: storing a little energy inside the paper so the card can release it the moment you open the front.
Think of it as two parts. The base is the folded card itself. The mechanism is the piece you cut, score, and glue to the inside. Together they move as one unit.
A crease is a hinge. Fold cardstock along a scored line and the fibers bend in one narrow, predictable place. Fold without scoring and the paper buckles wherever it likes, which is why unscored folds look soft and tired.
Tabs and slots do the holding. A tab glued flat to a panel locks a piece at a fixed angle. A slot cut in the card face does the same job without glue, so shapes can be swapped out later.
When the card closes, the mechanism folds flat and sits quietly inside. When you open it, the panels spread apart, the folds straighten, and the piece swings up or out. That release is the whole trick.
This is why pop-ups are so forgiving to beginners. The movement comes from the fold geometry, not from your cutting being perfect. A slightly wobbly edge is nearly invisible once the card pops open.
Paper and Tools
The Right Paper
Use cardstock in the 65 to 110 lb range. That weight holds a crease, stands upright, and still closes cleanly. A 65 lb cardstock is the friendliest starting point; 110 lb is sturdier but harder to crease by hand.
Thin printer paper collapses. Standard 20 to 24 lb copy paper has almost no body, so a mechanism cut from it droops the moment you let go. Keep copy paper for test folds only.
Stick to one weight throughout the card. Mixing a heavy card base with a flimsy mechanism is the most common reason a first pop-up sags and refuses to stand.
Patterned paper is lovely for the decoration layer, but glue it onto a cardstock backing first. On its own it is too soft to hinge or hold a folded edge.
The Tools That Actually Matter
- A bone folder. This smooth tool presses a scored line into a crisp, permanent crease. If you buy one thing for this craft, buy this one.
- A craft knife and a cutting mat. Clean inside corners are far easier with a knife than with scissors, especially on a V-fold.
- A steel ruler. Use it as a straight edge for both cutting and scoring. A plastic ruler will get nicked along the edge within a week.
- A scoring tool or an empty ballpoint pen. Drawn along a steel ruler, either one makes the dent that guides every fold.
- A pencil and a soft eraser. You will mark placement lines, so choose a pencil you can remove cleanly afterward.
Glue Matters More Than You Think
Use liquid white glue or PVA for anything structural. It soaks slightly into the paper, dries hard, and creates a join that will not peel apart later.
A glue stick is fine for flat decorative layers and wonderful with kids. It is not strong enough for a hinge or a tab that has to hold tension.
Apply a thin bead and spread it with a scrap of card. Too much glue soaks the paper and leaves a lump that keeps the card from closing flat.
Double-sided tape is a good middle ground for attaching flat panels quickly. Foam pads add height between layers when you want real depth in a scene.
The Four Folds You Need to Know
Four folds cover almost every beginner pop-up. Learn these and you can build nearly anything in this article, plus most of what you find in books.
Valley Fold
A valley fold is the ordinary fold you have made your whole life. The paper dips down in the middle and the two sides rise up, like a valley between two hills. This is your default.
Mountain Fold
A mountain fold is a valley fold flipped over. The ridge points up and the sides fall away. Make one by folding the paper backward along the scored line, or by flipping the piece over and folding.
Accordion (Concertina) Fold
An accordion fold is a row of valley and mountain folds alternating down a strip. Score every line first, then fold them one at a time. This is the fold behind pop-up springs, fences, and folded-paper spacers.
V-Fold
A V-fold starts with a shape still attached to the spine of the card. You cut two lines away from the fold, lift the flap, and crease it forward. It stands on its own when the card opens.
Score First, Always
Scoring means running a hard, blunt edge along a line to crush the paper fibers before you fold. Score on the outside of the fold you are about to make, against a steel ruler, on a cutting mat.
Press firmly enough to leave a visible dent, but never hard enough to cut through. A scored fold lands exactly where you put it, and it stays crisp for years.
Project 1: The Basic Pop-Up Box Card
Make this one first, because the box becomes a stage for everything else. You will need one 8.5 x 11 inch sheet of 65 lb cardstock for the base and a leftover strip for the box.
- Fold the 8.5 x 11 inch sheet in half so it becomes a 5.5 x 8.5 inch card. Press the spine with your bone folder; this crease is the hinge everything else works around.
- Cut the box strip. From the same cardstock, cut a rectangle 5 inches long and 2.5 inches tall.
- Score the strip into panels. Along the 5 inch length, score at 1.25, 2.5, and 3.75 inches, plus one more score at 4.5 inches for a half-inch gluing tab.
- Crease every line. Fold the three panel scores and the tab score so the strip begins to form a flat tube. Press each fold with the bone folder before moving on.
- Glue the tab inside the first panel to close the tube. Slide the tab under the panel edge, hold for thirty seconds, and keep the glued seam on one face.
- Flatten the tube into a packet. Fold it so the seam sits along one long edge, then press the packet flat with the heel of your hand.
- Position the packet inside the folded card. The seam should run along the card spine, with the packet's folds about an eighth of an inch clear of the crease.
- Glue the first outer face. Run a thin bead of white glue on one outer face, press it against the left inside panel, and hold the card closed for a full minute.
- Attach the other side. Glue the opposite outer face to the right inside panel, close the card, and press it under a heavy book for fifteen minutes.
- Test the pop. Open the card slowly. The packet should spring open into a raised box shape standing inside the card.
- Decorate the box. Add one small cut shape to the box front with a foam pad, then add your greeting to the inside panel beside it.
Keep the decorations light. The box rises with the card, so heavy embellishments will drag it forward when you open the front. One foam pad is plenty.
Project 2: The V-Fold Pop-Up
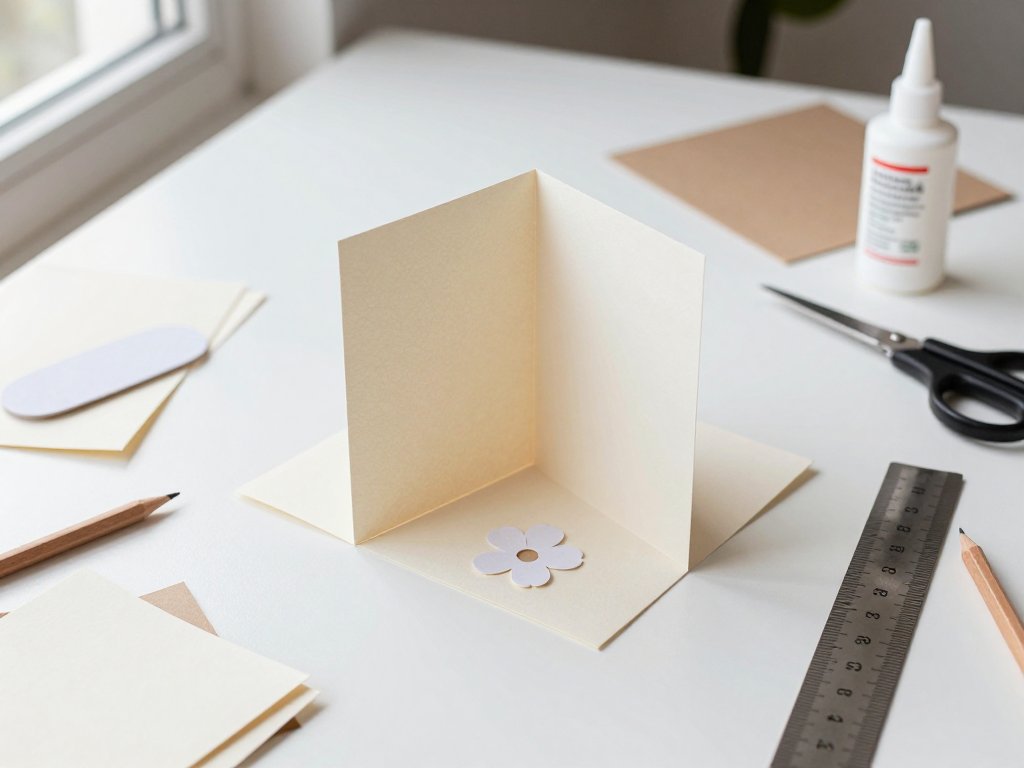
The V-fold is the simplest working mechanism there is, and it teaches the core idea fast. One flap, one crease, and a shape that stands up when the card opens.
You will need a folded card base and a scrap of cardstock for the shape you plan to raise. A flower, a balloon, a slice of cake, or a single letter all work beautifully.
- Fold and score your card base, then open it flat on the cutting mat with the inside facing you.
- Mark two dots on the spine, about 1.5 inches apart. These dots form the base of your V.
- Cut from each dot diagonally inward, angling away from the spine, until the two cuts meet at a point. You are left with a triangle still attached along the fold.
- Lift the triangle and valley-fold it forward, toward you, so it stands out of the card. Crease it firmly with the bone folder.
- Fold the triangle the other way as well. Press it flat against the inside panel, crease, then stand it back up. Teaching paper both directions makes it hinge cleanly later.
- Close the card and press it shut. The triangle should fold flat without buckling or pushing the panels apart.
- Cut your shape from cardstock and check that it is a little wider than the triangle at its base.
- Glue the shape to the front of the triangle only. Do not let glue reach the spine or the inside panels.
- Open the card to test. The shape should rise and stand at a slight angle, tipped gently toward the reader.
If the shape leans too far forward, cut the next one slightly smaller or from thinner stock. If it lies flat and refuses to stand, the fold was never creased in both directions.
Once this works, add a second V above or below the first. Two V-folds holding different shapes is the beginning of a real scene.
Project 3: A Layered Pop-Up Scene
This is where a pop-up card starts to feel like a tiny stage. Start with a box or a wide V-fold as the engine, then build the scene in front of and behind it.
Choose a theme you can cut in simple shapes. A botanical card with stems, leaves, and three flower heads. A birthday card with a cake tier, candles, and balloons. A seasonal card with a pumpkin, a row of leaves, and a bare little tree.
Grade the Pieces by Size
Decide what belongs in front, middle, and back before you cut anything. Cut the smallest pieces for the back layer, medium pieces for the middle, and the largest for the front.
Our eyes read small shapes as far away, so the size order does the perspective work for you. A one-inch flower behind a three-inch one looks like distance, not like a mistake.
Cut the same shape twice at two different sizes when you want repetition. It reads as a flower bed rather than a single lonely flower.
Build the Depth
Glue the smallest pieces to the back of the mechanism first. Work forward, layer by layer, so nothing you add gets crushed by the side of your hand.
Use foam pads or double-sided foam squares for the middle layer. They lift a piece about an eighth of an inch, which is enough to cast a soft, believable shadow.
For a lighter lift, fold a strip of cardstock into a small accordion and glue it between the piece and the base. A quarter-inch zigzag acts like a spring and keeps the layer airy.
Hide the Mechanism
Once the scene works, cover the flat mechanism with a background panel. This is the step that turns paper with folds in it into an actual picture.
Cut the background panel about a quarter of an inch narrower than the card on each side, so it never touches the spine or the outer edges.
Test the card with the panel held in place before you glue it. If the card closes flat, glue it down, keep the card shut, and press it under a book for twenty minutes.
Techniques That Make It Look Professional
These small habits separate a card that works from a card that looks handmade on purpose. None of them takes extra supplies.
Test-Fold on Scrap Paper
Before you cut cardstock, cut the same shape from copy paper and fold it. You will see exactly where the mechanism lands and how far it travels, for almost no cost.
Keep It Closed While the Glue Dries
Close the card and press it flat for fifteen to twenty minutes after every structural join. Glue that dries with the card open locks the mechanism in the wrong position.
Don't Glue Over the Fold
Stop every bead of glue about an eighth of an inch short of the spine and of any fold line that has to move. Glue on a hinge is what makes a pop-up stick shut.
Match the Paper Weight
Cut the mechanism from the same cardstock as the card base. Heavier paper is usually fine; lighter paper rarely is. Matching weight means the folds move in step with each other.
Train the Folds
Open and close the finished card ten or twelve times before you write in it. Each cycle loosens the creases, and the card becomes noticeably smoother to open.
Cut with a Fresh Blade
Change your knife blade or snap off a new segment before cutting any visible edge. A dull blade tears the cardstock fibers and leaves a fuzzy white edge that no amount of pressing will fix.
Mark in Pencil
Draw placement lines in pencil rather than pen. A soft eraser removes the marks neatly, and pencil lines will not bleed or show through under a thin layer of glue.
Troubleshooting Common Pop-Up Problems
Almost every beginner problem comes down to glue in the wrong place or too much paper in one spot. Here are the four you are most likely to meet.
The Mechanism Sticks When the Card Opens
This usually means glue reached the spine. Slide a craft knife carefully along the crease to free it, then re-crease with the bone folder and press the card shut again.
If the spine is clean, check the thickness of your stack. Too many layers folded between the panels will jam. Remove one layer, most often a foam pad.
The Card Won't Close Flat
Something inside is too thick or sitting too far from the spine. Measure the tallest part of the mechanism against the thickness of the card's own folded edge.
Trim a sixteenth of an inch off the mechanism's height, or move it slightly farther from the spine. Both changes give the folds room to collapse completely.
Glued Pieces Fall Off After a Day
This is nearly always a glue stick on a structural join, or a glossy surface that never absorbed the glue. Peel the piece off gently and scuff the back with fine sandpaper.
Reglue with PVA or liquid white glue and press it flat under a book for twenty minutes. Liquid glue needs pressure as much as it needs time to cure.
The Pop-Up Stands at the Wrong Angle
A flap that lies flat was never folded both ways. Open the card, fold it backward and forward again, and crease firmly in each direction before closing.
A flap that tips forward too far is usually carrying too much weight. Cut the shape smaller, switch to a lighter cardstock, or shorten the V by half an inch.
Conclusion
Pop-up cards reward patience more than precision. You mark, you score, you fold, and a flat sheet becomes something with movement in it. It will still work if your lines are a little off.
Start with the box card tonight, then try the V-fold tomorrow with a single shape. Two cards in, you will start seeing pop-up possibilities in every piece of cardstock in the house.
When you are ready for a next project, a seasonal card is the natural step. The same layering skills, a pumpkin or a snowflake, and a good reason to send it within a few weeks.
And if fold-based paper craft has you hooked, folded book art is a lovely next step. It uses the same scoring instinct on a completely different material.
Keep the first one you make, even the crooked one. In a few years it will be the card you cannot bring yourself to throw away, and that is the whole point.
