Introduction
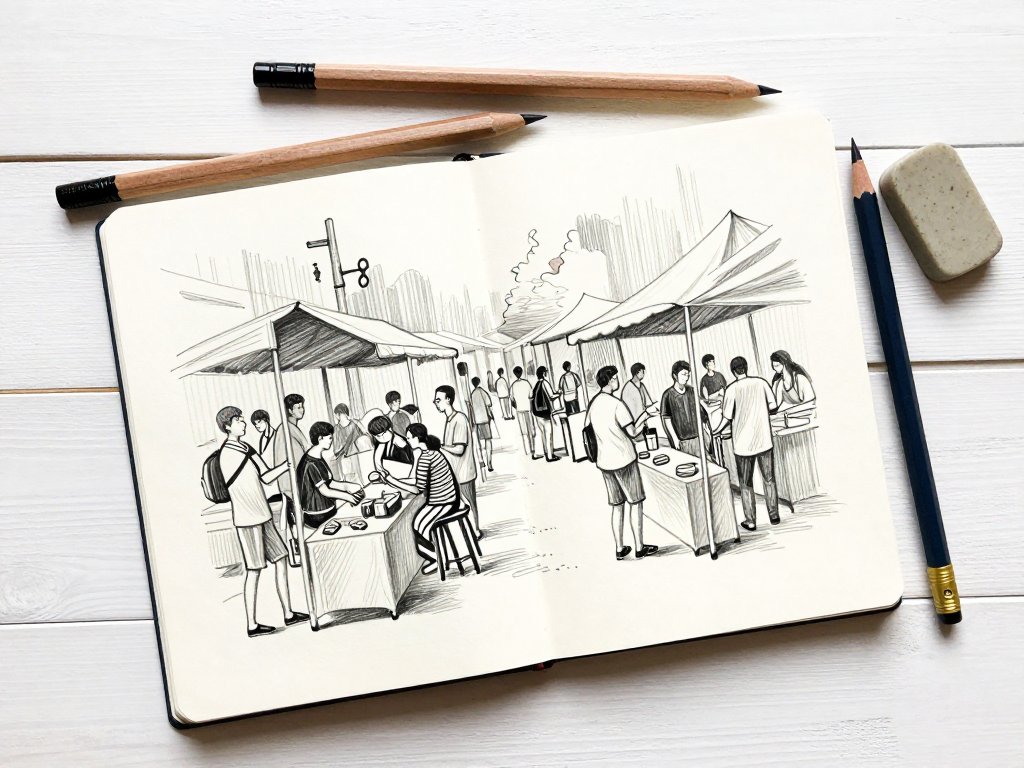
I remember the first time I tried to draw a crowded market scene. I was sitting in a café near the entrance of a busy outdoor market, sketchbook open, pencil ready.
And then I froze. There were too many people, too many stalls, too many things happening all at once.
My brain could not decide where to start, so I closed the sketchbook and ordered another coffee instead.
Drawing a crowded scene feels intimidating because we think we need to capture everything. But the secret is that you do not.
A successful crowded drawing is not about including every single detail — it is about suggesting enough detail to create the illusion of a busy space.
Your viewer's brain will fill in the rest.
This guide will walk you through five approaches to drawing crowded scenes, from simple layering techniques to using value and contrast. Each method builds on the one before it, so you can start with the easiest approach and work your way up as your confidence grows.
Why Drawing Crowded Scenes Matters
Learning to draw crowded scenes is one of the most valuable skills you can develop as an artist. It teaches you to edit, to prioritise, and to see the big picture rather than getting lost in details. These skills transfer to every other type of drawing you will ever do.
Crowded scenes also make wonderful subject matter for sketchbooks and finished pieces. A busy street corner, a festival crowd, a farmers market, a subway car at rush hour — these scenes are full of life and storytelling potential. They capture moments that single-figure drawings cannot convey.
And there is a practical benefit too. When you learn to draw groups of people and objects efficiently, you can create richer, more complex compositions without spending significantly more time. What once took an hour of painstaking detail can be suggested in minutes with the right techniques.
Method One: Start with the Background
The most common mistake beginners make with crowded scenes is trying to draw from the front to the back. You draw the person closest to you first, then the person behind them, and then the next person, and soon you run out of space or the proportions stop working.
The solution is simple: draw from back to front.
Step 1: Establish the background. Lightly sketch the farthest elements first — buildings, trees, the horizon line, or whatever forms the backdrop of your scene. Keep these marks very light and simple. You are building a stage on which the rest of the scene will sit.
Step 2: Add the middle ground. Sketch the mid-distance figures and objects. These should be slightly darker and more detailed than the background but still fairly simple. At this stage, you are placing the main groups of people or objects that give the scene its character.
Step 3: Draw the foreground. Finally, add the closest figures and objects. These should have the most detail, the darkest values, and the clearest outlines. The foreground figures anchor the composition and give the viewer a point of entry into the scene.
This back-to-front approach naturally creates depth. Each layer overlaps the one behind it, and the increasing detail from back to front guides the viewer's eye through the drawing.
Method Two: Use Silhouettes and Shapes
You do not need to draw every face, every expression, and every piece of clothing. In a crowded scene, most people are far enough away that you can represent them with simple shapes and silhouettes.
Step 1: Look for the overall shape. Instead of seeing individual people, see the collective shape they create. A crowd is a mass with a certain height, width, and density. Sketch this mass as a simple outline first.
Step 2: Break the mass into layers. Within the crowd mass, identify where the heads form horizontal bands. People in the back are partially hidden by those in front, creating a stepped silhouette. Draw these bands of heads as simple rounded shapes.
Step 3: Add individual figures sparingly. Pick two or three people in the foreground and draw them with slightly more detail. A shoulder line, a hat, a raised arm — these small details are enough to make the viewer read the rest as people too.
Step 4: Use negative space. The gaps between people are just as important as the people themselves. Pay attention to the shapes of empty space in your crowd — between arms, between heads, between bodies. Drawing these negative shapes accurately will make the crowd feel natural and unforced.
This method works especially well for large crowds at concerts, parades, or public squares where individual features are not visible anyway.
Method Three: Build Value Layers
Value — how light or dark something is — is one of the most powerful tools for creating the illusion of depth and density in a crowded scene. By organising your values into clear layers, you can make a crowd look large and complex with very little detail.
Step 1: Plan three value zones. Divide your scene into background (lightest), middle ground (mid-tone), and foreground (darkest). This three-value structure is the foundation of almost every successful crowded drawing.
Step 2: Block in the mid-tone. Using a soft pencil or a light wash of ink, fill in the middle ground area with an even mid-tone. This is the bulk of your crowd. Do not worry about individual figures yet — just cover the area evenly.
Step 3: Lift or add highlights. If you are working in pencil, use an eraser to lift small highlights from the mid-tone area to suggest individual heads and shoulders.
If working in ink, leave small white gaps when applying the mid-tone. These highlights create the illusion of people without drawing them.
Step 4: Add the darkest values. In the foreground, use your darkest pencil or densest ink to add a few distinct figures. Keep them as silhouettes or near-silhouettes with minimal internal detail. The contrast between these dark foreground figures and the lighter mid-tone crowd behind them creates powerful depth.
Value-based drawing is fast and forgiving. If a figure does not work, you can erase it or ink over it without losing the overall structure of the scene.
Method Four: Focus on a Focal Point
Not every part of a crowded scene needs equal attention. In fact, a drawing is more interesting when some areas are detailed and others are suggested. This technique is called selective focus, and it is used by artists across every medium.
Step 1: Choose your focal point. Decide what the most interesting part of the scene is.
It might be a street performer in the middle of the crowd, a striking piece of architecture in the background, or a particular interaction between two people.
This focal point will receive the most detail.
Step 2: Surround the focal point with suggestion. Everything outside your focal area should be drawn with less detail.
Use simpler shapes, lighter lines, and fewer internal marks. The contrast between the detailed focal point and the suggested surroundings will naturally draw the viewer's eye where you want it to go.
Step 3: Use lines of direction. Look for lines within the scene that point toward your focal point.
The angle of a building, the direction people are walking, the curve of a street — these directional lines act as arrows guiding the viewer to the most important part of the drawing.
Step 4: Let the edges fade. As you move away from the focal point, let your marks become lighter and less defined.
The edges of your drawing can fade almost entirely, with just a few marks suggesting the continuation of the crowd beyond the frame.
This creates a sense that the scene extends beyond what you have drawn.
Selective focus is not just a practical shortcut — it is a sophisticated artistic choice that many professional illustrators use in their work.
Method Five: Use Repetition with Variation
Crowds are made of repeating elements: heads, shoulders, arms, legs. The brain naturally groups these repeated shapes together, which means you can draw a crowd efficiently by repeating a basic figure shape with small variations.
Step 1: Establish a basic figure shorthand. Develop a simple, quick way to draw a person from a distance — an oval for the head, a rounded rectangle for the torso, simple lines for arms. Practice this shorthand until you can draw it in a few seconds.
Step 2: Repeat with variations. Draw this basic figure shape over and over, changing one or two things each time.
Vary the head angle, the arm position, the height. Add a hat to one, a bag to another, a child next to the third.
These small variations make the crowd feel organic rather than copied.
Step 3: Cluster your figures. People in crowds naturally form small groups. Draw clusters of three to five figures, leaving small gaps between clusters. This grouping creates a more natural rhythm than evenly spacing everyone out.
Step 4: Add overlap. Overlap your figure clusters so that some people are partially hidden behind others. Overlap is the single most effective way to create the feeling of a dense crowd. When figures overlap, the brain automatically reads depth and density even with very simple shapes.
Repetition with variation is the technique used by illustrators who draw large crowd scenes for books, comics, and editorial work. With practice, you can populate a busy street scene in minutes using this method.
Putting It All Together: A Practice Exercise
The best way to internalise these five methods is to practise them together. Here is a structured exercise that walks you through a complete crowded scene drawing.
Step 1: Find a reference photo. Look for a photo of a crowded street, market, or public event. A photo with clear light and shadow will be most helpful for value-based drawing.
Step 2: Start with the background (Method 1). Sketch the background elements — buildings, sky, distant trees — using very light pencil marks. Keep these marks simple.
Step 3: Block in the crowd mass (Method 2). Using the silhouette approach, sketch the overall shape of the crowd. Do not draw individual figures yet. Just capture the mass.
Step 4: Add value (Method 3). Apply a mid-tone to the crowd area using the side of your pencil or a soft graphite stick. Lift highlights with an eraser to suggest individual heads and shoulders.
Step 5: Choose a focal point (Method 4). Identify the most interesting area of the scene and add more detail there. Darken the values around it to create contrast.
Step 6: Populate with repeated figures (Method 5). In the foreground, add individual figures using your figure shorthand. Overlap them and vary their positions. Darken these foreground figures to create separation from the mid-tone crowd behind them.
This six-step exercise takes about twenty to thirty minutes on your first try and noticeably less with practice. Do it three times with different reference photos, and you will see real improvement in your crowded scene drawing skills.
Common Pitfalls and How to Avoid Them
Even with these methods, a few common issues can trip up beginners. Here is what to watch for.
Over-detailing. The most common problem is adding too many details too early. Remember that a crowded scene is about the overall impression, not individual accuracy. If you find yourself drawing every shirt pattern, take a step back and simplify.
Flat composition. If your crowd drawing looks flat, you are probably not using enough value contrast. Darken your foreground figures and lighten your background. The difference between the two will create the depth you are missing.
Even spacing. Real crowds are not evenly spaced. People cluster together, leave gaps, move in groups, and stand alone. Look at your reference and notice where the natural clusters are. Replicate those uneven groupings in your drawing.
Stiff figures. If your individual figures look stiff, try capturing the gesture first before adding any detail. A quick gesture sketch captures the energy and movement of a person, and you can build the figure on top of that foundation.
Giving up too soon. Crowded scenes take practice. Your first few attempts will not look the way you want them to. That is normal and expected. Each drawing teaches you something new, and the progress from one attempt to the next is often surprisingly large.
Conclusion
Drawing crowded scenes is a skill that opens up a whole new world of subject matter.
Once you learn to see a crowd as a collection of shapes, values, and repeating patterns rather than a thousand individuals you need to draw one by one, the process becomes not just manageable but genuinely enjoyable.
Start with the back-to-front method and a simple reference photo. Practice the silhouette approach on small sketches.
Experiment with value layers in your sketchbook. And the next time you find yourself at a busy market or a crowded event, pull out your sketchbook and give it a try.
You might surprise yourself with what you can create.
And if you freeze at first, that is all right. You can always order another coffee and try again.
