Introduction
There is a moment in a first firing when a dull gray dust turns to glass. You are holding a small torch, the copper has gone faintly pink, and then the surface softens, glosses, and moves like liquid. Ninety seconds earlier it was powder.
That transformation is vitreous enamel. It is not paint, and it is not resin. It is glass, melted onto metal and cooled hard, and it will outlast most of the jewelry you own.
You do not need a kiln for this. A butane or propane hand torch reaches fusing temperature easily on a small copper blank, which is why enamel is one of the few jewelry techniques you can learn at the kitchen table.
This guide walks the whole arc: cleaning the metal, counter-enameling the back, sifting thin coats, firing, layering color, and finishing a wearable pendant. Expect a scar or two. That is part of it.
What Vitreous Enamel Really Is
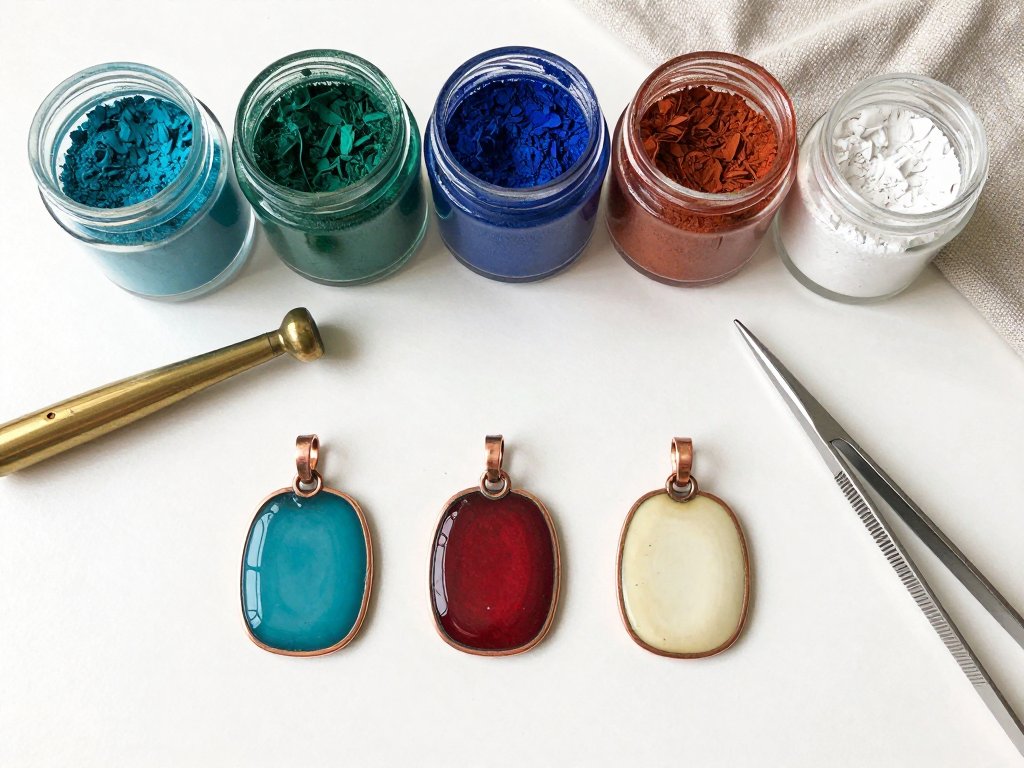
Enamel begins as crushed glass. Manufacturers grind it to a fine powder and add metal oxides for color: cobalt for blue, copper for turquoise and green, iron for rust and amber. Nothing in it is plastic.
That powder fuses to metal between roughly 1,450 and 1,550°F, about 790 to 850°C. At that temperature the glass softens, wets the metal, and grips it. When it cools, it is a thin sheet of glass fused to the surface.
The word "vitreous" simply means glassy. Jewelers use it to separate true enamel from cold enamel, the epoxy and resin products that cure at room temperature. Cold enamel is faster. It also scratches, yellows, and looks flatter.
Because fired enamel is glass, its color sits inside the surface rather than on top of it. It will not peel at a corner the way paint does, and it does not fade in sunlight. It can chip if struck, the way a stoneware mug chips.
It also has a particular look. Light enters a transparent layer, meets the copper beneath, and comes back warmer. That glow is why enamel has held its place in jewelry for centuries.
Why Copper Is the Beginner's Metal
Copper is inexpensive, and that matters when you are learning. A handful of 20-gauge blanks costs less than a single silver one, so a failed firing becomes a lesson rather than a loss.
It is also an excellent conductor of heat. A small hand torch can bring a copper blank to fusing temperature quickly, which is exactly what torch firing asks of you. Silver pulls heat away faster and demands more from the flame.
Enamel takes to copper reliably. The oxide that forms as the metal heats gives the glass something to hold, and 80-mesh powder flows smoothly across it without crawling.
Best of all, copper's warm tone glows under transparent colors. Turquoise over copper reads greener than turquoise over white. Amber deepens. A clear cap over bare copper turns a soft honeyed rose.
Copper is softer than silver, though, and it bends. Keep blanks flat, store them between cloth, and avoid gripping a fired piece with pliers. If silver eventually tempts you, silver metal clay for beginners follows a different path, though the finishing instincts carry over.
Gather Your Supplies
The list is short, and most of it lasts for years. Buy one good torch rather than three cheap ones, and start with fewer colors than you think you need.
- Copper blanks, 20 to 24 gauge, in circles, ovals, or rectangles
- 80-mesh enamel powder in a few colors: clear, turquoise, cobalt, rust, cream
- A small butane or propane hand torch with a steady flame
- A fireproof surface, such as a kiln shelf or a honeycomb soldering board
- A mesh trivet or a small screen to raise the piece
- Fine steel tweezers for moving hot metal
- A steel or tungsten pick for sgraffito and small adjustments
- A fine 80-mesh sieve for sifting powder
- An alundum stone for stoning back and smoothing edges
- Safety glasses, plus good ventilation
Two optional extras are worth having. Klyr-Fire, a binding liquid, lets you wet-pack powder into deliberate patterns. Fine silver foil, laid under a clear cap, adds a bright accent without changing your firing schedule.
Choose transparent and opaque colors in roughly equal number. Opaques give you a base that hides the copper. Transparents give you the depth that makes enamel look like enamel.
Preparing the Metal
Clean metal is not a suggestion. Nearly every failure described later traces back to a fingerprint, a film of oil, or an edge left sharp.
Anneal and Flatten
If a blank has been cut or bent, it is work-hardened and may not sit flat. Heat it to a dull red with the torch, then let it cool or quench it in water. Copper tolerates quenching before enameling.
Check flatness against a bench block. A blank that rocks will fight you through every coat, and enamel stress will exaggerate the curve rather than flatten it.
File and Bevel the Edges
Run a fine file around the perimeter at roughly 45 degrees. This does two things. It removes burrs that catch powder, and it gives the glass a slight lip to grip instead of a sharp edge to pull away from.
Sharp corners are where enamel lifts first. Round them slightly, even on a rectangular blank. The fired glass will soften the shape further.
Degrease, Then Stop Touching
Wash the blank with a metal cleaner such as Penny Brite, or with hot water and dish soap, then rinse and wipe with alcohol. Dry it on a lint-free cloth.
From this point, hold the blank with tweezers or by its edges. Skin oil is the enemy of enamel. It burns away during firing and leaves a void that pops later, sometimes after the piece already looks finished.
Counter-Enameling the Back
Enamel on one side of a thin blank shrinks as it cools and pulls the metal with it. The result is a curled pendant that will not sit flat against a collarbone. Coating both sides balances that stress.
The back coat does not need to be beautiful. A plain opaque color, rust or cream or black, is enough. It also hides fire scale and gives the piece a finished, satisfying weight.
Sift a thin coat on the back first and fire it, then turn the blank over and work on the front. Handling a back-fired blank is easier because the tweezers have something safe to grip.
On 24-gauge blanks, counter-enameling is close to mandatory. On heavier 18 or 20-gauge stock you have more leeway, but the habit is worth keeping from the start.
Sifting, Packing, and Pattern
Sift thin and even. Hold the sieve close to the metal, tap the rim lightly, and let the powder fall in a soft veil. A heavy dump traps air and fires unevenly.
Two or three thin coats, fired between each one, beat a single thick coat every time. Thick enamel cracks, pops, and pulls away at the perimeter.
Never touch the powder with your fingers. Use the sieve, a small spoon, or the tip of a pick. Powder pressed down by a fingertip holds oil and fires with a crater.
Wet-Packing for Deliberate Pattern
For shapes and lines, mix powder with distilled water and a drop of Klyr-Fire until it looks like thin cream. Paint it into place with a small brush.
Let it dry completely before firing. Wet enamel in a hot flame steams, spits, and lifts away from the metal. A dry packed coat fires just like a sifted one, only with sharper edges.
This is also how you fill a small area without dusting the whole blank. It is slower and far more controllable, and it is the technique behind most patterned torch-fired work.
Torch Firing, Step by Step
Set up before you light anything. Trivet on the fireproof board, powder containers capped and pushed to the far side of the bench, torch upright, glasses on, window open or fan running.
- Place the blank on the trivet, powder side up, and hold it with tweezers if it is small.
- Light the torch and adjust to a steady blue flame with a short inner cone.
- Bring the flame under the blank, moving in slow circles, and let the metal heat through.
- Work the flame around the edges as well, so the whole piece climbs in temperature together.
- Watch for the surface to turn glossy and fluid. It will look like orange peel, then like liquid glass.
- Hold for a few seconds at that stage, then draw the torch back and let the gloss settle.
- Turn off the torch and leave the piece on the board to cool. Do not move it, and do not quench it.
Heat From Below, Not From Above
Blasting the powder directly is the most common firing mistake. The top surface fuses while the metal beneath is still cold, and the glass beads up or blows sideways.
Heat the copper, and let the copper melt the glass. That is the whole principle. The flame works underneath and around, and the powder softens from the bottom up.
Reading the Surface
Under-fired enamel looks sugary. The surface is grainy and matte, like wet sand, and individual particles are still visible. It needs more heat, not more powder.
Properly fired enamel is smooth and glassy, and the edge of the piece looks slightly rounded, as if the glass relaxed over the metal. That rounded edge is the clearest sign of a full fuse.
Over-fired enamel goes the other way. Colors muddy, the edge pulls back from the rim, and the surface may sink or blister. It cannot be undone, but it can be stoned off and refired.
Cooling matters as much as heating. Let the piece sit on the fireproof surface until it is cool to the touch, several minutes at least. Quenching a hot enameled piece cracks the glass instantly.
Layering Color
Enamel is built in passes. Fire a coat, let it cool, add another, fire again. Two or three passes give depth that no single coat can reach.
Transparent colors change with what lies beneath them. Turquoise over white reads bright and clean. The same turquoise over rust reads deep and slightly green. Plan the base before the top layer.
Opaques make reliable grounds and reliable accents. Use them to block out an area, then cap with a transparent to give the surface life. Cream under amber gives warm honey. White under cobalt gives a clear, cold blue.
Cobalt is strong and will dominate anything beneath it. Rust and amber are forgiving and blend softly. Clear is a finish rather than a color, and it deepens everything it covers.
Keep each layer thin. Total enamel thickness on a small pendant should stay modest, a few tenths of a millimeter. Thick stacks crack as they cool, usually a day later.
Adding Contrast
A single color can be lovely, but contrast is what makes a piece read as designed rather than decorated. Three techniques are easy to learn on copper and hard to overdo.
Stoning Back to Copper
Fire a colored coat, let it cool, then rub an alundum stone or a diamond file across the surface in one direction. The stone cuts through the glass and exposes bare copper beneath.
The exposed metal can be left bright or oxidized dark, and the contrast against the remaining enamel is sharp and graphic. Work slowly near the edges, where the glass is thinnest.
Foil Under a Clear Cap
Fine silver foil placed on clean copper, then covered with a clear or transparent cap, fires into a bright reflective patch. It brightens transparents dramatically, especially blues and greens.
Keep the foil small and flat, and make sure the cap covers it fully. Exposed foil oxidizes and dulls along the edges after a few firings.
Sgraffito in Unfired Powder
Sift a coat, then draw into it with a tungsten pick or a sharpened skewer before firing. The lines expose the copper below and fill with color as the glass flows.
Work lightly. Pressing too hard scrapes the metal and leaves a burr that shows through the fired surface. A shallow line is enough to hold a clear edge.
Finishing and Attaching a Bail
After the final firing, stone the edges lightly to remove any glass that crept over the rim. Then clean the copper with a fine abrasive or a metal cleaner to lift fire scale.
Polish gently by hand with a soft cloth and a mild compound. Heavy buffing generates heat, and heat plus pressure is exactly how a finished enamel surface cracks.
For a pendant, the simplest attachment is a hole drilled before enameling and a jump ring threaded through it. Open the ring sideways, thread it, and close it flush.
If you prefer a glued bail, use a two-part epoxy and clamp only on bare metal, never on the enamel. A wire-wrapped bail around a necked blank also works well and needs no adhesive at all.
Check the join before you wear the piece. A bail that twists will eventually work the enamel loose at the contact point, and that is a repair you cannot easily make.
When Something Goes Wrong
Almost every enamel failure has a cause you can name, and most are corrected on the next attempt. Here are the ones you will meet first.
- Spalling and popping. Usually dirty metal, a coat that is too thick, or heat applied too quickly. Clean again, sift thinner, and warm the piece slowly.
- Blackening and fire scale. Copper oxidizes when held in the flame too long or heated in a soft flame. Shorten the firing and keep the torch moving.
- Warped blanks. Enamel on one side only, a thin gauge, or uneven heating. Counter-enamel the back and bring the whole piece up together.
- Cracked enamel. A thin blank, an overheated piece, a coat that is too thick, or quenching while hot. Cool on the board, always.
- Muddy colors. Too much heat, or too long at fusing temperature. Transparents go cloudy when they are cooked past the gloss stage.
- A second coat fired too hot. The most common mistake of all. The base layer re-flows, the new layer sinks into it, and the pattern blurs into a smear.
Keep a small notebook beside the torch. Write the flame setting, roughly how long the piece stayed glossy, and what the surface looked like. Heat control is learned from records, not memory.
Safety at the Bench
Torch work is safe when the bench is set up properly, and the setup takes two minutes. Do it every time, even for a quick firing.
- Work with ventilation: an open window, a range hood, or a small fan pulling air away from you. Metal fumes and burned flux residue are not things to breathe.
- Wear safety glasses, ideally didymium or shade 3, which cut the sodium flare and let you judge the enamel's color as it fires.
- Keep water away from hot enamel and hot metal. No quenching cup on the bench while you are firing.
- Clear the surface of paper, cloth, and anything flammable. The fireproof board is the only thing under the work.
- Keep the torch upright in its stand, and keep it away from the powder containers. Fine enamel powder is not something to expose to an open flame.
- Tie back hair and roll loose sleeves. Never leave a lit torch unattended, even for a moment.
Set each fired piece on the board and step away while it cools. Most small burns happen to people reaching for a piece that looked cooler than it was.
A First Pendant, Scars and All
Your first fired pendant will probably have a scar. A pit where a fingerprint burned away, a corner where the glass pulled back, a patch that went slightly cloudy. Keep it anyway.
Those marks are a record of heat control, and heat control is the entire skill. The second piece will be better because you watched the first one gloss and then watched it go too far.
Start with a small round blank, one opaque base, and one transparent cap. Fire it, cool it, and look at the edge in good light. When the edge is rounded and the surface is smooth, you have done it.
Then try a second color, or a stoned-back line, or a sgraffito mark. The torch is small, the copper is cheap, and the glass will teach you something every time you light it.