Introduction
There is a moment, somewhere in your first hour of filigree, when a piece of wire stops behaving like wire. It curls into a small scroll, holds its shape, and suddenly looks like something drawn rather than bent.
That is the whole appeal of filigree. It is jewelry making with the delicacy of penwork, built from the finest wire you can hold without losing it.
If you have done any wire wrapping, you already own the muscle memory for half of this. Filigree asks for a lighter touch and a little more patience, not a different personality.
This is a beginner guide. We will cover what filigree is, how fine wire behaves, which few tools matter, and a small pendant project to build from start to finish.
What Filigree Really Is
The word comes from the Latin filum, thread, and granum, grain. It describes metalwork built from tiny beads of metal and twisted threads of wire, soldered together or onto a base of the same metal.
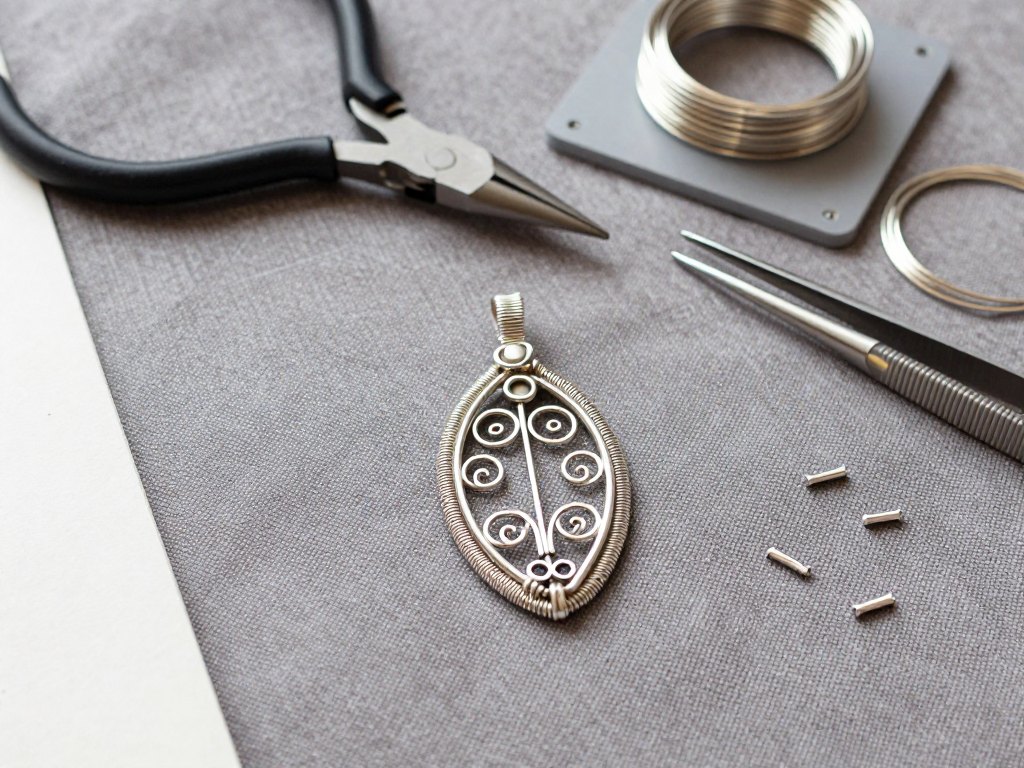
Two forms exist side by side. Backed filigree lays the scrollwork onto a sheet of metal. Openwork filigree is self-supporting, held only by its own frame. Openwork is the one that looks like lace held up to a window.
Filigree is often confused with pierced work. That technique drills holes through sheet metal to create a pattern. Filigree is built up from wire, never cut away from a sheet.
Knowing the difference helps you shop, read patterns, and admire museum pieces with a sharper eye.
A Short History You Can Feel in Your Hands
Filigree is old enough to be humbling. Archaeological finds from ancient Mesopotamia show the technique in jewelry as early as 3,000 BC.
Greek and Etruscan goldsmiths brought it to a high point between the sixth and third centuries BC, laying impossibly fine wire onto gold grounds. Much of that work now rests in the Louvre and the British Museum.
In upper Mesopotamia, the town of Midyat in Mardin Province developed its own silver and gold wire tradition called telkari. Craftsmen there still produce it, and the town keeps a filigree museum.
Italian, French and Portuguese metalsmiths carried the style through the seventeenth to nineteenth centuries. When you coil a scroll today, you are joining a very long conversation.
Why Fine Wire Behaves the Way It Does
Filigree wire is usually 28 to 30 gauge for the scrollwork, with 16 to 18 gauge holding the outer frame. At those sizes, wire stops acting like a solid and starts acting like a fiber.
Two properties matter. Annealing softens metal so it bends without cracking. Work hardening stiffens it again every time you bend, straighten or twist it.
Fine silver, which is 99.9 percent pure, is the friendliest metal for a first attempt. It anneals easily, does not build firescale the way sterling does, and fuses forgivingly.
Sterling silver is stronger and cheaper, and it will work. It simply needs more careful annealing and a proper pickle after soldering. Start with fine silver if you can, or practice on copper.
The Small Kit That Makes It Possible
Filigree has a reputation for needing a full bench. In practice, a beginner kit is modest, and most of it you may already own.
- Round-nose pliers, fine chain-nose pliers and flush cutters
- A pin vise or small hand drill for twisting wire
- Fine tweezers with a good grip
- A steel block, a small ball-peen hammer and a bench pin
- Solderite board or a charcoal block for soldering
- Easy solder paste, flux, a fine brush and a pickle pot
- Brass brush, burnisher and fine emery paper
Two consumables deserve a note. Easy solder paste flows at a low temperature, which protects fine wire. Citric acid pickle is a gentle, kitchen-friendly way to clean metal after heating.
Add a good light and a tray with a lip. Fine wire pieces launch themselves off a flat table with startling enthusiasm.
Making Your First Twisted Wire
Twisted wire is the signature texture of filigree, and it is the easiest place to begin. Cut two equal lengths of 30 gauge wire, roughly a hand span each.
Clamp one end of both wires together in a vise or hold them in pliers. Hook the other ends into a pin vise.
Turn the pin vise steadily in one direction. The two strands will braid into a neat rope. Keep the tension even, and stop before the twist becomes tight enough to kink.
To make a four-ply rope, twist two of these two-ply sections together in the opposite direction. Anneal briefly between steps if the wire stiffens.
You can also roll a twisted section flat between two steel plates. Flat twisted wire catches light differently and reads as woven rather than braided.
Shaping Scrolls: C, S and Spirals
Almost all filigree is built from three shapes. A C-scroll is a simple curve. An S-scroll is two curves in opposite directions, joined at the middle. A spiral curls inward on itself.
Form them over round-nose pliers, working from the middle of the pliers toward the tip to control the radius. Use the smallest section for tight curls.
Make each scroll slightly larger than you think you need. Fine wire springs back less than thick wire, but it still relaxes, and a scroll that fits exactly on the bench will rattle in the frame.
Practice pairs. Filigree reads as intentional when curves mirror each other, and pairs are the fastest way to train your hand toward symmetry.
Building a Frame That Holds
The frame is the spine of an openwork piece. Bend 16 gauge wire into your outline, close the ends, and solder the join with hard solder so it survives later heating.
Draw the design on paper first, at actual size. Lay the frame over the drawing, then place scrolls inside it.
Work from the center outward. The middle scrolls define the rhythm, and the outer ones only need to fill the gaps that remain.
Leave a visible margin between the scrollwork and the frame. That sliver of empty space is what makes filigree look airy instead of crowded. For a gentler introduction to wire structures, see these simple pendants and rings.
Lashing Before Soldering
Traditional filigree is tied before it is soldered. A length of very fine binding wire, around 32 gauge, wraps each scroll to its neighbour and to the frame.
Lashing feels fussy and is quietly essential. It holds every piece exactly where you placed it, so heat cannot nudge the design out of alignment.
Tie loosely enough that the binding wire does not cut into the filigree. Work in a spiral around the piece so the ties do not cross each other.
Once the piece is soldered and pickled, the binding wire lifts away. A little patience here saves an entire rebuild later.
Soldering Fine Wire Without Melting It
Fine wire melts faster than thick wire, so heat control is the whole game. Work on a solderite board, which reflects heat back into the piece rather than drawing it away.
Apply easy solder paste sparingly at each join. A grain of paste is enough. Excess solder wicks up fine wire and erases the detail you just built.
Heat from below with a small, soft flame, moving constantly. The board warms the whole piece gently, and the solder flows when the metal reaches temperature rather than when the flame touches it.
Watch for the bright flash of flow, then pull the heat away immediately. If a join refuses, let the piece cool, add a little flux, and try again rather than holding the torch on it.
Pickle, Brass Brush and the Finish
After soldering, quench the piece in water and drop it into warm pickle. Five to ten minutes usually lifts the dull grey oxide left by heating.
Rinse thoroughly, then scrub with a brass brush and a little soap. The brush burnishes the wire and brings the twist back into view.
A gentle tumble with steel shot hardens fine wire and polishes into the crevices where a cloth cannot reach. Twenty minutes is plenty for a small pendant.
If you plan to antique the piece, darken the recesses first, then polish the high spots. Contrast is what makes scrollwork legible from a distance.
Your First Project: A Filigree Pendant
This pendant is small enough to finish in an evening and rich enough to wear. It uses one frame, three mirrored scroll pairs and a single center spiral.
Step one. Draw a teardrop outline about one inch long on paper, and a matching teardrop inside it.
Step two. Bend 16 gauge wire around the outer line, solder the join with hard solder, and pickle.
Step three. Twist two lengths of 30 gauge wire into a rope and cut three short sections.
Step four. Form three pairs of C-scrolls and one small spiral from the twisted sections.
Step five. Arrange everything inside the frame, working from the center spiral outward, and check the mirroring.
Step six. Lash each scroll to its neighbour and to the frame with 32 gauge binding wire.
Step seven. Solder with easy paste, heating gently from below, then pickle and brush.
Step eight. Add a jump ring at the top, tumble briefly, and thread it onto a chain.
Adding a Stone Without Losing the Lace
Most beginner filigree ends up holding something. A small cabochon, a pearl or a flat bead gives the eye a resting place and turns scrollwork into a finished piece.
Build the setting first. Bend a bezel or a simple four-prong basket, then design the scrollwork around it rather than fitting the stone in at the end.
Leave a ring of empty metal immediately around the stone. Solder will not flow across a gap, and the gap keeps the setting from becoming one solid mass.
Set the stone after all soldering, pickling and tumbling is finished. Heat and steel shot are unkind to soft stones, and a finished piece is far easier to polish without one.
For a deeper look at holding a stone with wire, the gemstone setting guide covers the same structural thinking in a wrapped style.
Troubleshooting the Five Things That Go Wrong
If the wire melted into a bead, the flame was too large or held too long in one place. Use a smaller tip, keep the torch moving, and heat the board rather than the joint.
If solder sits in fat blobs, too much paste went on, or the piece was not hot enough when it flowed. Remove the excess with a file and try a lighter touch next time.
If scrolls shifted during soldering, the lashing was too loose. Tie more contact points, especially where two curves meet.
If the metal turned dull yellow or black, that is firescale from sterling heating in air. More flux and a proper pickle will handle it.
If the finished piece warped, it was heated unevenly or quenched while hot. Let it air cool for a few seconds before quenching.
Design Notes: Negative Space and Rhythm
Filigree succeeds or fails on the gaps. A piece with uniform scrolls in uniform sizes reads as texture. A piece that varies its curves reads as a drawing.
Work with three sizes, roughly small, medium and large. Use the largest in the center, the medium shapes around it, and the smallest to soften the edges.
Keep one clear focal point. A single spiral, a set stone or one open area gives the eye somewhere to land.
Symmetry is a reliable beginner tool. Mirror your scrolls, and even a simple design looks composed. Later, you can break symmetry on purpose.
Aim for one clear rhythm per piece. Repeating a single curve at three scales, small, medium and large, reads as deliberate design far more reliably than mixing many shapes.
Finally, hold the piece up against a dark fabric as you work. Fine wire disappears against a pale bench, and the silhouette is what a wearer will actually see at a distance.
A Practice Path and a Gentle Next Step
Begin with copper. It costs little, anneals easily and behaves almost exactly like fine silver at the bench.
Make ten scrolls before you make anything else. Then make ten more, in pairs, until your hand starts to predict the curve.
Your first finished piece does not need to be perfect. It needs to be worn, so you can feel how the weight sits and see which details catch the light.
When you are ready to add colour, the same wire skills carry into sea glass jewelry, where a soft stone sits inside a filigree frame beautifully.
Filigree rewards the quiet kind of attention. Ten minutes at the bench, a few scrolls, one small win. That is how lace gets made from wire.