Introduction
There comes a moment in every wire wrapper's journey when the simple wrapped loop no longer feels like enough.
You hold a beautiful cabochon in your palm — maybe a mossy green jasper from a rock shop, maybe a deep blue labradorite that flashes when it catches the light — and you want the wire to do it justice.
Not just hold the stone, but frame it, cradle it, and set it so securely that the piece feels destined for years of wear.
Advanced wire wrapping is where jewelry making turns into a quiet kind of sculpture. The good news?
The leap from beginner to advanced is not about buying expensive new tools or memorizing dozens of knots.
It is about understanding a handful of core principles — how wire behaves under tension, how a frame distributes pressure around a stone, and how a few practiced moves create settings that look professionally finished.
Every technique in this article builds on skills you already have, and each one is achievable in an evening with a cup of tea and a good lamp.
Whether you are making a gift for someone special or treating yourself to a piece that no store could stock, the techniques ahead will change how you look at every pendant you make from now on.
Choosing Your Materials With Intention
Advanced work begins before the first bend. The wire you choose determines what your hands will be able to do, so it is worth a few minutes of consideration.
Wire Gauge and Hardness
For framed pendants and secure settings, you will want a backbone wire of 18 or 20 gauge, and a weaving or binding wire of 26 or 28 gauge.
Think of the heavier wire as the skeleton — it carries the structural load and defines the silhouette of the piece.
The fine wire is the muscle and skin; it wraps, weaves, and locks everything together.
Hardness matters more than most beginners realize. Dead-soft wire is a pleasure to bend and is ideal for intricate weaves, but a piece made entirely of dead-soft wire will lose its shape over time as it is handled.
Half-hard wire holds its form beautifully and is the workhorse of advanced wrapping. Many makers use half-hard for the frame and dead-soft for the fine binding wire, which gives you both structure and flexibility where you need it.
If you are working with copper, consider a dead-soft copper frame that you will work-harden with a nylon hammer at the end — copper responds beautifully to this treatment and becomes surprisingly rigid.
Gemstone Shapes and Their Personalities
Different stone shapes call for different setting strategies, and understanding this relationship is what separates advanced work from random wrapping.
Round and oval cabochons are the friendliest — their smooth curves allow wire to sit evenly around the entire perimeter.
Teardrops and pear shapes have a point that needs special attention, because the wire naturally wants to slide off the taper.
Freeform stones are the artist's playground, but they demand that you study the stone's unique silhouette before you commit to a design.
Drilled beads and briolettes open up a completely different approach. Instead of building a cradle around the outside of the stone, you thread wire through the hole and build the design outward from the stone's own anchor point.
Both approaches are valid; the right one depends on the stone you hold and the look you want.
The Foundation: Frame and Wrap Basics
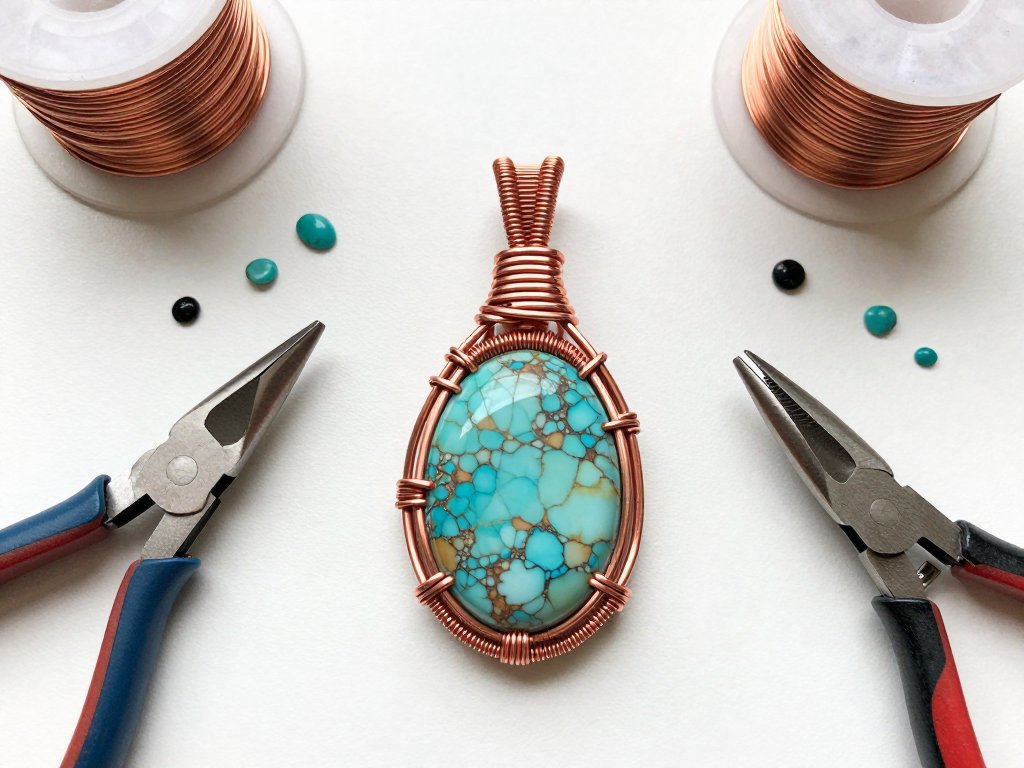
Every advanced setting is built from the same fundamental move — the frame wrap. Master this with intention, and every other technique in this article becomes an extension of it.
The Frame Wrap, Done Deliberately
Cut two pieces of half-hard 20-gauge wire, each about four times the length of your finished pendant.
Lay them side by side, and with your flat-nose pliers, bend both wires sharply at their midpoint — this creates the V where your stone will rest.
Place your cabochon into the V, with the front face of the stone facing you.
Now bring the four wire tails up around the stone and cross them over the top.
Hold the stone snugly between your thumb and forefinger so it cannot shift, and begin wrapping one of the tails around the bundle of wires just above the stone's apex.
Three tight, even coils are enough to establish the frame. This first wrap is the moment of truth — if the stone is not snug here, every subsequent wrap will fight you.
Do not be afraid to undo it and start again; experienced wrappers redo their first coil more often than they admit.
Once the top is locked, use your fingers to coax the wire tails down the sides of the stone, following its contour.
The wires should hug the stone like a gentle embrace — not pinching, not floating.
When the tails meet at the bottom, cross them and add another set of tight coils to close the frame.
You now have a secure cradle that will hold the stone while you decide how to finish it.
Binding and Weaving: The Art of the Fine Wire
The fine 28-gauge wire is where your personal style emerges. A simple binding wrap — neat, parallel coils laid side by side — reads as clean and modern.
A figure-eight weave, where the wire crosses itself between frame wires, adds texture and visual interest.
A spiral weave, which travels diagonally across the frame, gives the piece a sense of motion.
Whichever you choose, keep your coils even. The secret is to maintain steady tension and to advance the wire in small increments, letting the coil build naturally rather than forcing it.
When you finish a section, tuck the wire end under the last few coils and pull firmly — a loose end will catch on clothing and unravel over time.
Most advanced pieces use a combination: a smooth binding along the top of the frame, a decorative weave down one side, and a clean finish at the bottom.
Let the stone's personality guide your choices. A quiet, earthy agate might suit a simple binding that lets the stone speak, while a vibrant labradorite can carry a more elaborate weave.
Setting Styles for Different Stone Shapes
Once the frame concept is comfortable, you can match your setting style to the stone in front of you.
The Classic Frame Setting
The classic frame is the technique described above, refined for symmetry. Its beauty lies in restraint — two or four frame wires, evenly spaced, with the stone held in a clean geometric cradle.
To keep the wires evenly spaced, hold the bundle together with a binder clip or a spare pair of hands while you work the first coils.
Symmetry is achieved through small adjustments, not force; nudge a wire a millimeter at a time until the spacing pleases your eye.
The Basket Setting
For deep or dome-shaped cabochons, a basket setting offers security and elegance. Instead of a simple frame, you weave a lattice of fine wire beneath the stone, creating a basket that cups the stone from below.
Start with four frame wires arranged like the spokes of a wheel beneath the stone, then weave the fine wire over and under the spokes in a circular pattern, working from the center outward.
The basket catches the light in interesting ways and gives the pendant a sense of depth that a flat frame cannot match.
The basket setting is also wonderfully forgiving: because the stone rests in a woven cup rather than against rigid frame wires, minor variations in stone thickness are absorbed by the give of the weave.
Securing Teardrops and Points
Pointed stones demand one extra consideration. When a teardrop's point sits at the bottom of a frame, the wire has a tendency to creep upward over time, loosening the hold.
The fix is simple: add a locking coil at the point. After your frame wires cross beneath the point, wrap them together with several tight coils of fine wire, then bend one of the frame wires back up over the point itself.
This creates a tiny wire cap that prevents the stone from sliding, and it looks intentional when done neatly.
Working With Drilled Stones and Briolettes
Briolettes — teardrop stones drilled horizontally through the top — are a favorite for advanced wrappers because they hang with beautiful natural movement.
Thread a length of 26-gauge wire through the hole, center it, and bring both ends up and around the stone's shoulders.
From there, build a decorative cage: wrap the two wires around each other in a spiral down the sides of the stone, then gather them at the bottom into a neat twist.
The stone will swing freely from its bail, and the wire cage adds sparkle without hiding the gem.
Building Bails That Balance
A pendant is only as good as its bail — the loop that connects the stone to the chain. A poorly balanced bail makes the stone hang crooked, and a thin bail will wear through over years of daily wear.
The Wrapped Bail
The wrapped bail is the classic choice and the most secure. After your frame is complete, gather the top wires into a neat bundle and bend them upward to form a loop.
Hold the loop with your round-nose pliers at the widest point of the pliers' taper — this determines the finished loop size.
Wrap the tail wires around the bundle just below the loop, three or four times, and trim the ends flush.
The result is a bail that sits centered over the stone's balance point and distributes the pendant's weight evenly.
The Bail as Design Element
Do not think of the bail as an afterthought. Advanced makers use the bail to complete the composition — a long, elegant loop for a delicate stone, a wide hammered bail for a chunky freeform piece, a double-loop bail for stones that deserve a little drama.
If your pendant hangs crooked, check the bail first; the fix is usually a small adjustment to where the loop sits relative to the stone's center of gravity.
Finishing: What Separates Handmade From Handcrafted
The final fifteen minutes of a project make the difference between a piece that looks homemade and one that looks heirloom. Finishing is not optional polish — it is the step where your work becomes jewelry.
Work-Hardening for Strength
If your frame wire is dead-soft, work-harden it now. Place the pendant on a steel bench block and tap it gently with a nylon hammer, working from the outside edges inward.
A few light taps are enough — you are not trying to flatten the design, just to compress the wire's crystal structure so it resists bending.
Copper and silver both respond beautifully to this treatment, and the pendant will feel noticeably more solid in your hand afterward.
Tucking and Trimming
Go over the piece and tuck every wire end. Use your flat-nose pliers to press any stray tail firmly against the frame, and trim flush with a flush cutter so no sharp edge remains.
Run your fingertip over the entire pendant — every surface should feel smooth. A wire end that catches on a sweater will eventually catch on the wearer's skin, and no one wants to gift that.
Cleaning and Patina
Wash the finished piece in warm water with a drop of mild dish soap, using a soft toothbrush to reach the crevices of the weave.
Rinse thoroughly and pat dry with a soft cloth. If you want an antique look, apply liver of sulfur according to the manufacturer's instructions, then gently buff the high spots with fine steel wool or a polishing cloth.
The contrast between darkened crevices and bright highlights gives the piece a depth that plain polished wire cannot achieve.
Troubleshooting Your Settings
Even experienced wrappers produce pieces that refuse to cooperate. Here are the most common problems and the fixes that actually work.
The stone wiggles. This usually means the frame is not snug at the apex. Add a few more binding coils at the top of the frame, or carefully tighten the existing coils with your flat-nose pliers.
If the stone still moves, the frame wires are too large for the stone — remake the frame with a smaller gauge.
The pendant hangs crooked. Check the balance point. The bail should sit directly above the stone's center of gravity; if it is off to one side, unwrap the bail and reposition it. A heavy stone may also need a slightly larger bail loop to hang properly.
The weave looks uneven. Uneven coils almost always come from inconsistent tension. Slow down, and advance the wire in smaller steps. If one section is beyond saving, cut the weave out and redo it — the fresh section will blend in if your tension is consistent.
Wire kinks appear. Kinks happen when you bend wire in the wrong place or pull it through your fingers too fast.
Straighten the wire by pulling it through a nylon-jawed pliers or between your thumb and forefinger before you begin.
If a kink appears mid-project, cut it out and splice with a neat wrap — the join will disappear into the design.
Conclusion
Advanced wire wrapping is not about following a rigid recipe. It is about building a quiet conversation with your materials — learning how a particular stone wants to be held, how a length of wire responds to your hands, and how small deliberate choices accumulate into a piece that feels complete.
The techniques in this article — the deliberate frame wrap, the basket weave, the locking coil for pointed stones, the balanced bail, and the finishing rituals that make work feel like jewelry — are tools you will reach for again and again.
Start with a stone you love and a frame you can wrap with confidence. The first piece may not be perfect, and that is exactly how it should be.
Wrap it, wear it, study how it hangs, and let it teach you what to do differently next time.
Every pendant you make from here will carry a little more intention than the last, and that is the whole point of the craft.
When you are ready for your next project, consider pairing your wrapped pendant with a simple handmade chain, or practice your new basket setting on a collection of beach pebbles before investing in premium stones. The skills transfer, and your jewelry box will thank you.
