Introduction
There is a moment in entrelac knitting when the fabric stops looking knitted. The stitches are still ordinary knit and purl, but the surface has become a lattice of small woven squares, tilting first one way and then the other.
It looks complicated from the outside. It is not. Entrelac asks you to work one small block at a time and to trust that the blocks will meet.
This guide is for the knitter who has made a scarf or two and would like something with more architecture. We will go slowly, in the order the technique itself demands.
No chart is required. No wrapping, no short-row turns in the middle of a block. Just patience and a willingness to look at what your hands have made.
What Entrelac Actually Is
Entrelac is knitting worked side to side rather than bottom up. Instead of one long continuous row of stitches, you knit small blocks — usually squares, read as diamonds because of their tilt — one at a time.
Each block is joined to its neighbour as it is made. You pick up stitches along the finished edge beside it, then work a decrease at the join, drawing the two blocks together as you go.
Nothing is sewn afterwards. The joins are structural, not decorative, which is why the fabric holds together so well and why the back looks almost as tidy as the front.
The blocks sit at an angle to one another. One row of blocks leans left, the next leans right, and the eye reads the result as basket weave.
Most entrelac is stockinette: smooth on the right side, purled on the wrong. The weave comes from direction and shadow, not from texture.
Because each block is small, the work stays portable. A single diamond is a few minutes of knitting, which makes entrelac unusually friendly to a life with interruptions.
A Short History of Woven-Look Knitting
The word comes from the French entrelacs, meaning interlacing — the same word used for the carved ribbon patterns in stonework and manuscript borders. Knitters borrowed it because the fabric genuinely resembles weaving.
Woven-look knitting is old and widely scattered. Scandinavian and wider European traditions carry small worked blocks — often in garter stitch, sometimes called basket or woven knitting — that appear in Danish, Norwegian and German pattern collections well before the technique had a settled English name.
The paper trail is genuinely patchy, and I would rather say so than invent a birth date. What can be said is that the idea travelled with pattern books, not with any single inventor.
The technique reached a wide modern audience through Barbara Walker. Her pattern treasuries of the late 1960s and 1970s set entrelac down in clear, systematic instructions, and English-speaking knitters took it from there.
What survived is the part that works. Entrelac has never needed special tools, only a willingness to knit in small units and let them build.
What You Need Before You Cast On
The list is short, and none of it is specialist. Entrelac rewards ordinary materials used deliberately.
- Worsted or DK weight wool in two or more colours. Smooth, evenly spun yarn shows the block structure best; a heavy halo blurs the diagonals.
- Self-striping yarn, if you want the classic beginner shortcut. Each block is short enough that the colour changes on its own, and the stripes do your colour planning for you.
- Needles one or two sizes smaller than the yarn label recommends.
- A crochet hook in a similar size to your needles, for picking up stitches along block edges when your needle tip is too blunt to slide under a ridge.
- Stitch markers — several. They are not optional for a first attempt.
- A tapestry needle for the ends, which in entrelac are many.
Why Smaller Needles Matter
This is the one instruction I would ask you not to bend. Entrelac needs a firmer fabric than the yarn label suggests.
Each block is a short run of rows joined to its neighbour by picked-up stitches. If the gauge is loose, those joins open into visible gaps, the corners soften, and the diagonal lines that create the weave go fuzzy.
A denser gauge holds the geometry. The blocks keep their crisp points, the picked-up edge sits flat, and the woven illusion survives blocking and wear.
Going down one or two sizes usually gives a fabric that feels almost woven between the fingers. That slightly stiff hand is the point, not a fault.
The Core Mechanics, Plainly Put
You begin with a row of base triangles along the cast-on edge. They turn a straight line of stitches into a series of sloped edges to build on.
From there, each row of blocks is worked across the fabric. The first row builds rectangles that lean one way; the next row builds rectangles leaning the other.
Every rectangle begins with picked-up stitches along the sloping edge of a finished block. Those picked-up stitches become the working stitches of the new block.
Each right-side row of the block ends by joining one stitch to the waiting block beside it. That join, repeated, is what slants the rectangle.
Apart from the cast-on triangles, no block is ever turned mid-way. No wraps, no short rows inside a block — just full-width rows back and forth until the block closes.
Before You Begin: Casting On and Counting Blocks
Decide your block width first. Six stitches gives small, tight diamonds; eight is a comfortable, readable square; ten makes a bold, chunky weave.
Cast on a multiple of that number. Four blocks of eight means thirty-two stitches. The arithmetic matters more than it seems: a partial block at the end of a row will throw off every row above it.
Place a marker every eight stitches as you cast on. Those markers tell you where each base triangle ends, and later they tell you where each rectangle should stop.
Slip the first stitch of every row purlwise. A chain edge along each block makes picking up dramatically easier, and it is the single habit that most improves a first entrelac piece.
Step One: Base Triangles
The base triangles are built with a series of turns — the one place in entrelac where you turn inside a shape. Each triangle grows by one stitch per row until it is the full block width.
- Working with the first eight stitches only: knit two, turn.
- Purl two, turn.
- Knit three, turn. Purl three, turn.
- Continue in this way, adding one stitch each row, until you have worked all eight stitches and end on a wrong-side row.
- Do not turn. Leave those eight stitches resting and begin the next triangle in exactly the same way.
- Repeat across the cast-on edge until every stitch belongs to a triangle.
You should now have a saw-tooth edge: four triangles, each with a sloping side facing left and a straight side at the cast-on. This is the foundation the whole fabric stands on.
Step Two: Left-Leaning Rectangles
Turn so the right side faces you. The first rectangle is built onto the leftmost triangle, picking up along its slope.
- Pick up and knit eight stitches along the sloping edge of the first triangle, one stitch in each ridge, working from the point up to the wide edge.
- Purl eight back across those stitches.
- Knit seven, then slip-slip-knit the eighth stitch together with the first stitch of the next waiting triangle.
- Turn and purl eight.
- Repeat the last three steps until the waiting triangle's stitches are all used up and the block closes into a rectangle.
That slipped-together stitch is the join. Worked at the right-hand edge of the block as you face it, it pulls the rectangle into a leftward lean.
Continue along the row, picking up eight stitches on the next triangle's slope and repeating. When you reach the end of the row, turn.
Step Three: Right-Leaning Rectangles
The next row of blocks leans the other way, and the decrease moves to the opposite edge. This is the whole of the difference between the two rows.
- With the wrong side facing, pick up and purl eight stitches along the top edge of the last block in the row below.
- Turn, then knit the first two stitches together — the first of your block with the last stitch of the block to its right.
- Knit to the end of the block, turn, and purl eight back.
- Repeat until the block beside it is fully consumed and your rectangle is complete.
Work across the row, block by block, then turn again. Alternate these two rows of rectangles for as long as the piece needs to be.
Each row of blocks is offset by half a block from the one beneath it, which is what produces the staggered basket weave rather than a plain grid.
Step Four: Top Triangles
The final row squares off the top edge. Without it the fabric ends in a staircase of half-blocks, which is fine for a seam but wrong for a visible edge.
- Pick up and knit eight stitches along the top edge of the last block.
- On each right-side row, knit two together at the beginning and knit to the end.
- Purl back on every wrong-side row.
- Continue until one stitch remains. That single stitch is the point of the triangle.
- Repeat across the row, then bind off the points loosely, or graft them to a matching edge.
The result is a straight top edge with a gentle scallop of triangles beneath it. Many knitters come to like this edge so much that they plan for it rather than hide it.
The Order of Operations, Without a Chart
Charts are useful, but entrelac is easier to follow as a sequence. This is the order to hold in your head.
- Cast on a multiple of the block width, with markers every block.
- Base triangles, left to right, ending on a wrong-side row.
- Turn. Left-leaning rectangles, left to right, decreasing at the right-hand edge.
- Turn. Right-leaning rectangles, working back across, decreasing at the left-hand edge.
- Repeat steps three and four until the piece is as long as you want it.
- Top triangles across the final row, then bind off.
If you lose the thread, look at the last block you finished. Its direction tells you which row you are in, and the waiting edge tells you where the next pick-up belongs.
Tension and Tidy Edges
The picked-up edge is where entrelac is won or lost. Those stitches want to be snug — firm enough to close the join, loose enough to lie flat.
Pick up one stitch per ridge, and be consistent about it. Two stitches in one ridge here and a skipped ridge there will show as a wobble three rows later.
Gaps at the corners usually mean you picked up beside the corner instead of in it. Take the stitch in the corner itself; that single stitch closes the hole.
If your first block looks loose and open, don't rip it out yet. Try going down one needle size for the pick-up only, then working the block on your usual needle.
Blocking helps more than it does in most knitting. A gentle wet block opens the diamonds evenly and settles the joins into straight lines.
Colour Planning
Entrelac changes colour for you at block boundaries, which is why it suits knitters who dislike stranding and carrying yarns.
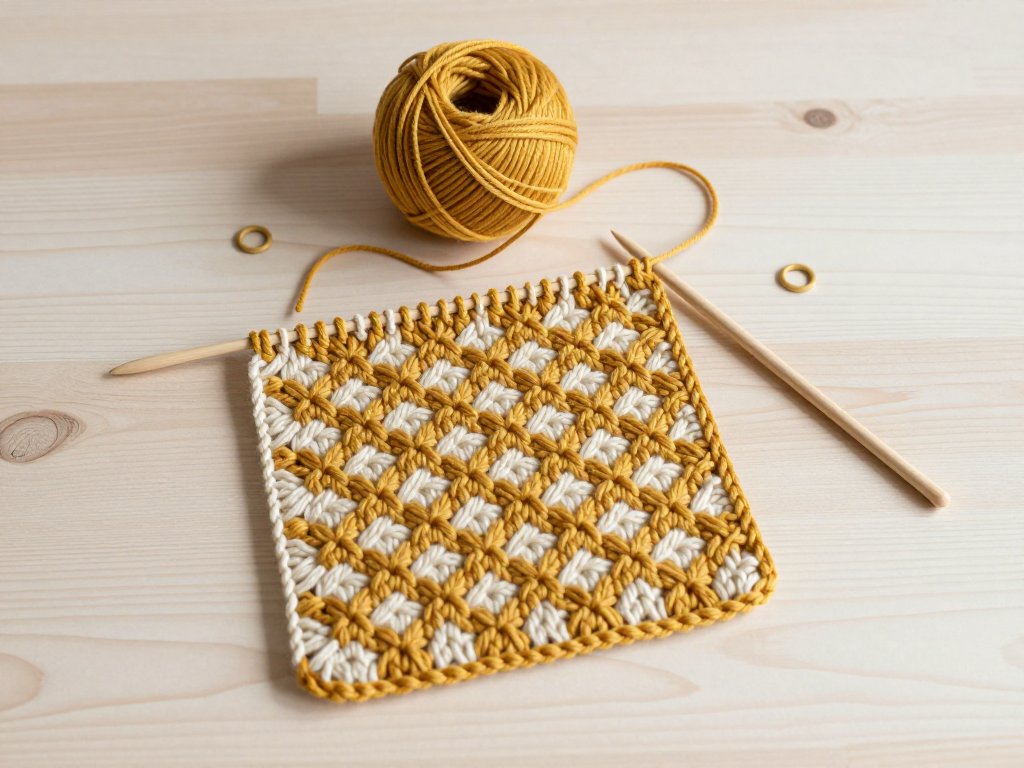
The classic is two colours alternating by row of blocks: mustard then cream, then mustard again. The joins read as a woven grid, and the effect is unmistakably basket-like.
Self-striping yarn is the beginner's shortcut. Choose a stripe repeat roughly the length of one block, and every diamond will change colour on its own without a single decision.
Scrappy entrelac uses one colour per block from whatever the stash offers. Keep to a family of tones — warm reds and ochres, or cool blues and greys — so the weave reads clearly rather than dissolving into noise.
Weave the ends in along the diagonal ridge on the wrong side, not across a straight line. Ends follow the direction of the fabric that way, and they stay put through washing.
Troubleshooting
Three problems account for almost every first attempt that goes wrong.
- Blocks leaning the wrong way. The decrease edge sets the lean. If a block tilts against its neighbours, you have worked the decrease on the wrong side — or turned the work and are looking at the wrong face. Check which edge you decreased into, not how the block looks.
- Fabric pulling in. Pick-ups that are too tight draw the whole piece into a curve. Pick up with a needle two sizes larger than your working needle, then knit the block with your usual one.
- Losing your place in the sequence. The commonest beginner confusion, and the least serious. Count blocks rather than rows, keep a marker at each boundary, and remember that a block always decreases into the block already finished beside it.
None of these is a disaster. Entrelac is unusually forgiving of a single bad block, because the surrounding blocks pull it into line.
Project Ideas to Aim For
A first swatch of four blocks by four is enough to learn on. Then choose something where the weave does the decorative work for you.
- A cushion cover. Six blocks across and four rows, joined into a square, backed with a plain knitted panel. The most satisfying first finished object.
- A scarf. Three blocks wide, worked until the yarn runs low. Self-striping yarn makes it look far more complicated than it is.
- A baby blanket. Entrelac squares worked separately and joined, so the project travels and can be finished in short sittings.
- Felted hot pads. Work a small entrelac square in non-superwash wool and felt it in hot water. The fabric thickens into something dense and genuinely useful.
Each of these rewards the same habit: firm gauge, tidy pick-ups, and a willingness to work one block at a time.
Conclusion
Entrelac is one of the few knitting techniques that looks like a secret and turns out to be arithmetic. Blocks of stitches, joined at the edges, leaning in turn.
Your first square may be a little uneven at the corners. That is normal, and it will be invisible once the next row of blocks grows over it.
If you enjoy the logic of building fabric from small units, another block-based technique is worth your time: C2C crochet graph patterns works diagonally from corner to corner in the same spirit, and the two crafts teach each other.
For now, cast on a multiple of eight, pick a mustard and a cream, and knit the first triangle. The rest is repetition, and repetition is where the calm lives.