Introduction
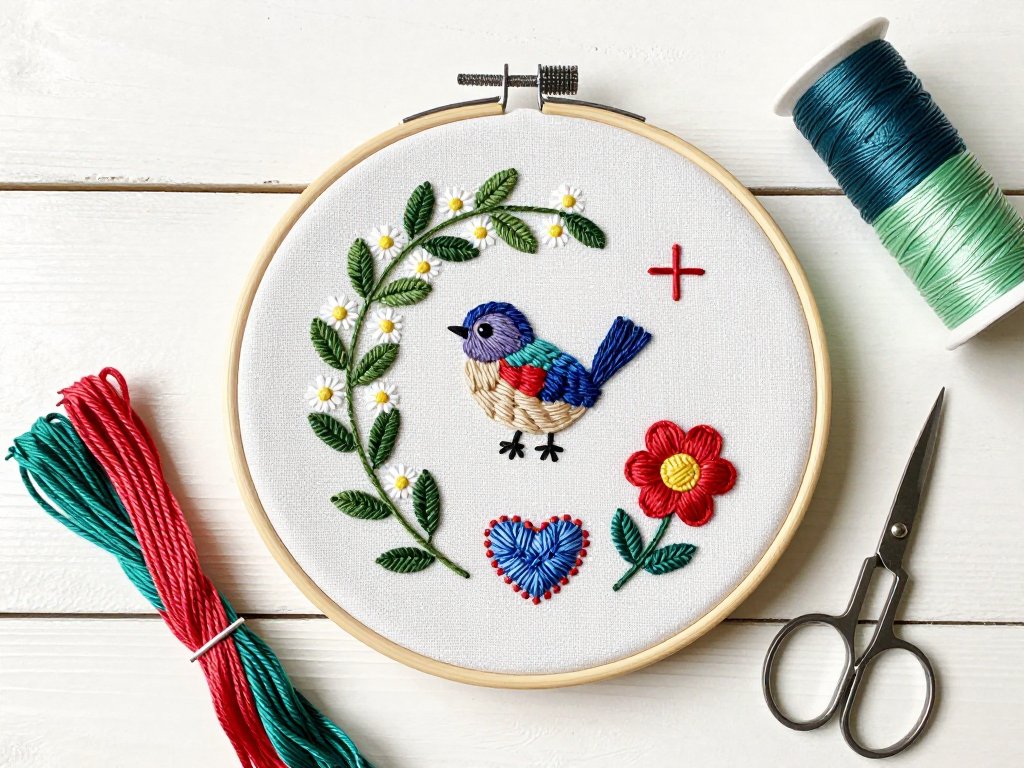
There is a small wooden hoop hanging in my kitchen, and on the fabric inside it a little orange bird sits on a sprig of green leaves.
It is not a perfect bird — one wing is a little wobbly, and the French knot that should be its eye has become a cheerful dot with a mind of its own.
But I made it, thread by thread, in the quiet evenings after the children went to bed, and somehow that makes it the most beautiful thing in the room.
That is the promise of hand embroidery. It asks for almost nothing — a needle, some thread, a scrap of fabric — and gives back something that no store-bought thing can match: the slow pleasure of watching a design appear under your fingers, one stitch at a time.
If you have never picked up an embroidery needle, this guide is for you. We will learn eight of the most useful stitches in the craft, from the humble running stitch to the beloved French knot, and then put them all together in a simple sampler you can finish in an evening.
No experience needed, no fancy supplies, no pressure. Just you, a hoop, and a few quiet hours.
A Short History of Hand Embroidery
Before we thread our needles, let us pause and honor how old this craft truly is. People have been decorating fabric with needle and thread for thousands of years — long before there were books, or cameras, or even written language in many parts of the world.
Think of the Bayeux Tapestry, that remarkable eleventh-century embroidery that tells the story of the Norman conquest in nearly seventy meters of stitched wool.
Think of the exquisite silk embroideries of China, the mirror-work of India, the geometric beauty of Palestinian cross stitch, the running-stitch patterns of Japanese sashiko.
Every culture that ever made cloth also learned to embellish it, and every one of those traditions is part of your needle's lineage.
In Europe, embroidery became the language of the sampler. From the sixteenth century onward, young girls stitched alphabets, numbers, and moral verses onto long rectangles of linen, learning their letters and their needlework at the same time.
A girl's sampler was often her only schoolbook — and the only record of her name and her year that survived.
Historians still study these humble pieces to learn about the lives of ordinary women who left no other trace.
So when you pick up your hoop, you are joining a sisterhood of makers that stretches back centuries.
The stitches we are about to learn are the very same ones those girls stitched by candlelight, and the same ones embroiderers use today to add a handcrafted touch to jeans, tea towels, and wedding gifts.
Tradition, it turns out, is simply the sum of many patient evenings just like the ones ahead of you.
Gathering Your Supplies
One of the delights of embroidery is how little it demands. Most of these things cost a few dollars each, and you may already own half of them.
The fabric. For your first project, choose a plain, firmly woven cotton or linen. Quilter's muslin, a cotton tea towel, or an old cotton shirt all work beautifully. Avoid stretchy knits for now — they fight the stitches. A light or medium color makes your thread easy to see.
The hoop. An embroidery hoop holds your fabric taut so your stitches lie flat and even.
Wooden hoops are classic and inexpensive; plastic ones with a screw adjustment are even easier to tighten.
A six or eight inch hoop is the perfect size to start. If you do not have a hoop yet, you can absolutely practice without one — just hold the fabric firmly — but a hoop makes everything feel more professional.
The needle. Embroidery needles, also called crewel needles, have sharp points and large eyes, which makes threading them much kinder than a sewing needle.
A pack of assorted sizes costs very little. For most beginners, a size 5 or 7 needle is comfortable to hold and easy to thread with two or three strands of floss.
The thread. Six-strand cotton embroidery floss is the classic choice, and it comes in every color you can imagine.
For your first sampler, choose two or three colors that make you happy — a warm red, a soft green, and a sky blue are a lovely combination.
You will usually work with two or three strands out of the six, separated gently before threading.
The extras. Small, sharp scissors with a pointed tip, a water-soluble fabric marker for transferring your design, and a thimble if your fingers are tender. That is all. Arrange your little kit in a basket, and you are ready to stitch.
Setting Up Your Hoop
Before the first stitch, take three minutes to set up your fabric properly. Good setup is the secret to fabric that stays taut and stitches that lie flat.
Step 1: Prepare your fabric. Cut a square of fabric a few inches larger than your hoop on every side. If the fabric is wrinkled, press it first — smooth fabric makes even stitches.
Step 2: Draw your design. Trace a simple design onto the fabric with your water-soluble marker.
For your first sampler, keep it truly simple: a straight line, a gentle curve, a small circle, and a flower with five petals.
You can also draw freehand — a wobbly hand-drawn design has its own charm. The water-soluble lines vanish with a splash of water when you are done.
Step 3: Hoop it up. Separate the two rings of your hoop. Place the inner ring on a flat surface, lay your fabric over it, and press the outer ring down over the top, sandwiching the fabric between.
Gently tug the fabric from all sides until it is drum-tight — like the skin of a small drum.
Tighten the screw, and check the tautness again. Fabric that sags makes stitches that sag.
Step 4: Thread your needle. Cut a comfortable length of floss — about the length from your fingertips to your elbow. Separate the number of strands you want, thread the needle, and knot the tail. You are ready.
Now, the stitches themselves. We will take them in order, from the simplest to the ones that need a little more practice. Work each one a few times in a row — not to be perfect, but to let your hand learn the motion.
Stitch 1: The Running Stitch
Every embroidery journey begins with the running stitch, and it is so simple that you already know how to do it — you just have not named it yet.
How to work it. Bring the needle up through the fabric at your starting point.
Take a small stitch forward, pushing the needle down through the fabric a short distance ahead, then bring it up again the same distance beyond.
Continue in this in-and-out rhythm, like a tiny sewing machine, keeping your stitches and the spaces between them roughly equal.
Where to use it. The running stitch is the workhorse of embroidery. Use it for simple outlines, for dashing borders, for gathering fabric, and — in the form of sashiko — for whole fields of geometric pattern.
It is also the stitch you will use to attach buttons and to baste layers together.
A gentle tip. For a neater running stitch, you can "load" several stitches onto your needle at once, weaving the needle in and out of the fabric, then pull the thread through.
This is faster and creates beautifully even spacing. Do not worry if your first few rows are uneven — evenness is a matter of practice, not talent.
Stitch 2: The Backstitch
If the running stitch is the whisper, the backstitch is the clear, confident voice. It creates a solid, unbroken line that looks like it was drawn with a pen.
How to work it. Bring the needle up at point A. Take a small stitch backward, going down at a point behind A and coming up again ahead of A.
Then insert the needle back down at A — the very spot where you began — and bring it up ahead of your last stitch.
Each new stitch ends where the previous one began, which is why the line looks continuous.
It feels a little like walking backward to move forward, and the logic clicks the moment you try it.
Where to use it. Backstitch is the go-to stitch for lettering, for fine outlines, and for any line that needs to look crisp and deliberate. It is also the stitch used to outline counted cross stitch designs, giving them a finished, professional edge.
A gentle tip. Keep your stitches small — about two millimeters — for a smooth curve.
On curves, take slightly shorter stitches than you do on straight lines; the line will bend more gracefully.
Stitch a few letters of your name in backstitch and you will see why it is the embroiderer's favorite pen.
Stitch 3: The Stem Stitch
The stem stitch is the quiet artist of the embroidery world. It makes a twisted, rope-like line that is perfect for stems and vines — hence the name — and it follows curves more gracefully than almost any other line stitch.
How to work it. Bring the needle up at the start of your line. Take a small forward stitch, coming up again halfway back along that stitch, on the same side each time — always keeping the thread below the needle if you are working a stem going up, or above it if you are working downward.
Consistency is everything: the twist appears only when you keep the thread on the same side for every stitch.
Where to use it. Flower stems and vines, of course, but also curving borders, delicate lettering, and the outlines of leaves. It is the stitch that gives botanical embroidery its lovely, organic feel — a line that looks like it grew rather than one that was drawn.
A gentle tip. If your stem stitch looks like a straight line with no twist, check that your thread is consistently below the needle.
If it looks lumpy, take smaller stitches. Once the rhythm clicks, you will find yourself using stem stitch everywhere, just for the pleasure of watching it twist.
Stitch 4: The Satin Stitch
Now we move from lines to shapes. The satin stitch fills an area with smooth, closely packed straight stitches, like a tiny bed of silk.
How to work it. Outline your shape first if you like — a leaf, a petal, a small heart.
Then bring the needle up just outside one edge of the shape and down just outside the opposite edge, laying a straight stitch across the shape.
Bring the needle up again right beside the first stitch, and lay another stitch beside it.
Continue until the shape is completely filled, keeping the stitches parallel and close together, like fence pickets with no gaps.
Where to use it. Satin stitch is for solid areas: leaves, petals, lettering, small fruit, and any shape that needs a smooth, shiny surface. A satin-stitched strawberry or a cluster of satin-stitched leaves is a tiny work of art.
A gentle tip. Satin stitch loves small shapes. Keep each shape under about half an inch across, because long satin stitches tend to loosen and snag.
If your shape is larger, split it into sections or outline it with a backstitch first to give the satin stitches a neat edge to lean against.
Work slowly, and let the thread lie flat — do not tug it tight.
Stitch 5: The French Knot
The French knot is the stitch that beginners love to fear and experts love to use. It is a tiny coiled knot on the surface of the fabric — the perfect dot, the perfect flower center, the perfect polka dot texture.
How to work it. Bring the needle up where you want the knot. Wrap the thread around the needle once or twice, close to the fabric.
Still holding the wraps in place with your thumb, push the needle back down very close to where it came up — almost the same hole — and gently pull the thread through.
The wraps gather into a small knot on the surface.
Where to use it. Flower centers, little dots in patterns, the eyes of animals, seeds, berries, and texture fields. A scattering of French knots in contrasting colors can turn a simple leaf into a berry branch or a plain circle into a sunflower.
A gentle tip. The two most common frustrations are knots that pull through to the back (the needle went down too far from the exit point) and knots that unravel (the wraps loosened).
Keep the wraps snug against the fabric, and push the needle down as close to the exit hole as you can.
One wrap makes a small dot; two wraps make a plump knot. Practice five knots in a row — by the fifth, your hand will have it.
Stitch 6: The Chain Stitch and Lazy Daisy
Chain stitch is the showman of embroidery — a linked row of loops that looks like a delicate chain. And its little cousin, the lazy daisy, is simply a single chain stitch worked as a petal.
How to work the chain stitch. Bring the needle up at the start of your line.
Hold the thread down with your thumb in a small loop, insert the needle back down at the same hole, and bring it up a short distance ahead — inside the loop.
Pull gently until the thread forms a loop around the emerging needle. Then repeat: anchor the new loop with your thumb, go down at the exit point, come up ahead inside the loop.
How to work the lazy daisy. Work exactly one chain stitch, but instead of continuing the chain, take a tiny securing stitch over the bottom of the loop to anchor it in place.
The result is a petal. Arrange five or six lazy daisies around a French knot and you have a flower.
Where to use them. Chain stitch makes lovely borders, curved outlines, and decorative lettering. Lazy daisies make flowers, leaves, and little decorative clusters. Together they are the heart of countless folk embroidery traditions around the world.
A gentle tip. Keep your loops uniform in size by pulling the thread the same amount every time. If a loop looks lopsided, simply pull the thread out of that stitch and try again — chain stitch is one of the most forgiving stitches in embroidery.
Stitch 7: The Blanket Stitch
The blanket stitch is the practical one — the stitch that finishes edges, secures appliqué, and gives felt crafts their cozy, handmade look.
How to work it. Bring the needle up along the edge of your fabric or appliqué piece.
Insert the needle down a short distance away, then bring it up directly below that point, on the edge line, with the working thread looped under the needle tip.
Pull gently to form a little "T" shape along the edge. Repeat along the edge, spacing the stitches evenly.
Where to use it. The blanket stitch secures the edges of felt toys and coasters, attaches appliqué shapes to fabric, and finishes the raw edges of blankets — hence the name. It is also the stitch used for decorative buttonhole edging on heirloom linens.
A gentle tip. Consistency of spacing matters more than speed. Some stitchers like to mark even dots along the edge with a water-soluble pen before they begin. Keep the loop of thread under the needle every time, and your edge will look tidy and professional.
Stitch 8: The Cross Stitch
And now the stitch that has its own entire world of crafters: the cross stitch. It is a simple X made of two diagonal stitches, and yet it can build pictures of astonishing detail — from a single heart to a full landscape stitched one square at a time.
How to work it. Bring the needle up at the bottom left of your X.
Take a diagonal stitch up to the top right. Bring the needle up at the bottom right and stitch diagonally to the top left, crossing the first stitch.
For rows of cross stitches, work all the bottom-left-to-top-right diagonals first, then come back and cross them all — this keeps the direction of every X consistent, which is the secret to a smooth, even surface.
Where to use it. Cross stitch shines on counted fabric, where the weave gives you a grid of little holes, but it also works beautifully on plain fabric for scattered accents.
Samplers, bookmarks, monograms, and framed pictures all wear cross stitch well. It is the stitch that started many an embroiderer's journey — perhaps yours as well.
A gentle tip. Consistency is everything: make every X cross in the same direction, with the same bottom leg on top.
If you are working from a chart, follow it one square at a time and count carefully.
And remember that even a slightly wandering X adds character — samplers were never meant to be machine-perfect.
Your First Sampler
Now that you have met all eight stitches, let us put them together in a project you can finish this evening: a small sampler of practice motifs.
This is the same exercise young embroiderers have used for centuries — a way to practice every stitch and keep a record of what you have learned.
What to stitch. On your hooped fabric, draw eight small boxes or sections, or simply scatter your motifs across the fabric.
In one area, work three rows of running stitch. In another, backstitch your initials. Draw a small wavy line and stem-stitch it into a vine, then add lazy daisy leaves and a French knot flower.
Fill a small heart with satin stitch. Cross stitch a tiny star in a corner, and blanket-stitch around the edge of a small felt shape if you have one.
How to finish. When every section is stitched, hold the finished work under cool running water to dissolve your marker lines, then press it flat with a warm iron over a towel.
Trim the fabric to fit your hoop, or frame it in a slightly larger hoop with the excess fabric gathered and trimmed at the back.
Add a ribbon to the top of the hoop, and hang your sampler where you will see it every day.
What comes next. Keep your sampler. In a year, you will look at it and remember exactly how it felt to learn each stitch — the first wobbly backstitch, the triumphant second French knot.
Then, when you are ready, choose a small project: embroider a flower on a plain tea towel, add your child's initial to a sweater, or stitch a name onto a birthday gift.
Every one of those projects will use the eight stitches you learned tonight.
Caring for Your Embroidered Work
A finished piece deserves a little care, so it can be enjoyed for generations. Hand embroidery is surprisingly sturdy — after all, some of it has survived for a thousand years — but a few small habits will keep your work beautiful.
Wash embroidered pieces gently, by hand, in cool water with a drop of mild soap.
Do not scrub or wring; just swish and rinse. Roll the piece in a clean towel to remove excess water, and dry it flat, away from direct sunlight, which can fade the thread.
Press on the wrong side with a warm iron while the fabric is still slightly damp.
Store finished pieces flat or rolled, never folded in a way that creases the stitching.
If you frame your work, keep the glass away from the fabric itself — a small mat or spacer prevents the threads from being flattened against the glass.
With this simple care, the little bird in your hoop will still be bright and cheerful when someone else inherits your kitchen.
A Closing Word
We have covered a great deal tonight — eight stitches, a bit of history, and a whole evening of making.
Look at your hands. They have done something that human hands have done for thousands of years: taken a needle and thread and turned them into a small piece of beauty.
Do not be surprised if your first sampler is not perfect. Mine was not, and my kitchen bird still wobbles a little on one wing.
That is not a flaw; it is the signature of a hand, the record of a beginner learning to trust herself.
Every expert embroiderer you admire was once exactly where you are now, holding a needle and wondering if they would ever get the hang of it.
So keep your hoop close. Stitch a little every few days, even if it is only five minutes while the kettle boils.
Try a new stitch when you are ready, and do not be afraid to pull out the ones that do not please you.
The fabric forgives; the thread is patient; and the craft, like all good crafts, will meet you exactly where you are.
Happy stitching, and welcome to the long, lovely tradition of the needle.
