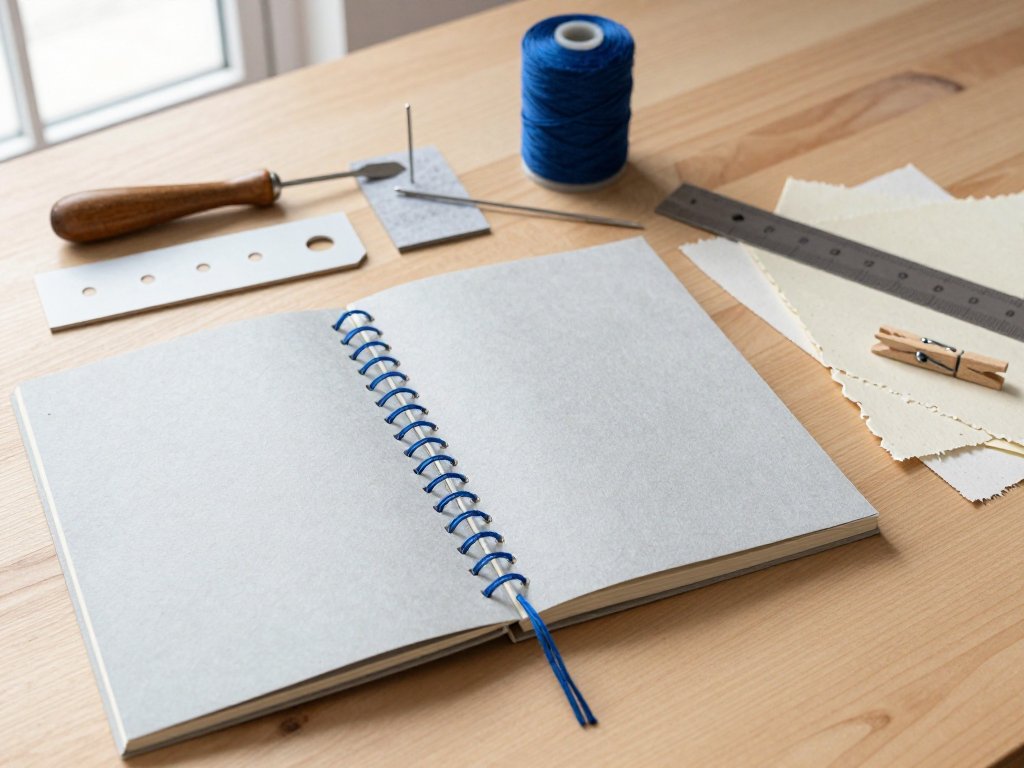
Introduction
There is a particular pleasure in a book that holds itself together with nothing but thread. No glue, no press, no waiting overnight beneath a tower of encyclopedias. Just paper, a needle, and a pattern you can learn in an afternoon.
Japanese stab binding is the simplest of the side-stitched bindings, and the four-hole version is where nearly every book artist begins. The Japanese name is yotsume toji, which translates plainly as "four holes."
The stitch runs along the binding edge, straight and deliberate, and it becomes the book's strongest ornament. I have bound journals from fine printmaking paper and from a stack of recycled envelopes, and the same four holes worked for both.
This tutorial walks through the entire process, from choosing paper to tying the final knot inside the spine, with the small details that separate a book that opens well from one that fights you.
What Japanese Stab Binding Actually Is
Most Western bookbinding binds through the fold, sewing sections together at the spine. Stab binding does something different. It pierces the whole stack at once, a few millimetres from the binding edge, and stitches everything to itself.
That single design decision changes what the binding can do. Because nothing depends on folded sections, you can bind loose single sheets, torn paper, offcuts, envelopes, printed pages, or any combination of them.
The technique belongs to a long East Asian lineage of stitched thread bindings, the final phase of traditional bookbinding in China, Korea, Japan, and Vietnam before the modern codex arrived. Side-stitched books were made throughout the Edo period in Japan, roughly 1603 to 1867.
The four-hole pattern is the shared basic form. Chinese binders used four holes as standard and six on important volumes. Korean binders favoured odd numbers, commonly five. Japanese binders settled on four as the beginner's pattern and built every elaborate variant on top of it.
Why This Is the Binding I Recommend to Beginners
Every bookbinding method asks for something difficult. Coptic binding, for example, demands a consistent sewing tension and a good deal of patience. Stab binding asks for almost nothing except accuracy in one measurement.
There is no glue anywhere in the structure. That matters more than it sounds. Glue is the source of most first-book disasters: warped covers, wrinkled endpapers, a spine that cracks the first time someone opens it.
You also never need a press. A bulldog clip or two holds the stack steady while you sew, and the finished book goes straight into use. Nothing needs to dry.
The stitched spine is also visually generous. Leave the cover plain and the thread becomes the design. Choose a contrasting colour and the same book reads as modern rather than traditional, which is why the technique keeps turning up in contemporary journals and zines.
If you want to compare approaches before committing, coptic bookbinding is the other beginner-friendly method worth knowing. Coptic gives you a book that lies completely flat but requires folded sections. Stab binding lets you use any loose paper you like.
The Materials You Actually Need
You can buy a bookbinding starter kit, but you do not need one. Everything below is either already in a craft drawer or costs very little.
Paper for the pages
Choose a paper that takes the medium you plan to work in. Printmaking paper has body and suits drawing, painting, and collage. Sketch paper is cheaper and perfectly good for a practice book.
Mixed stacks work beautifully here. Copier paper, tracing paper, printed pages, and recycled envelopes can all go into the same book, which makes stab binding an excellent way to use up paper you cannot bring yourself to throw away.
A rough guide: 80 to 120 gsm for everyday pages, and up to 200 gsm for a book you intend to paint in.
Paper for the covers
The cover needs to be heavier than the pages. Heavy cardstock is the simplest choice. Binder's board, about 2 mm thick, wrapped in decorative paper, gives a sturdier book that feels more like a real volume.
If you use board, you have a choice. Either wrap the boards before binding, or bind first and cover the boards afterwards. Wrapping first is easier for a beginner.
Thread
Waxed linen thread is the traditional choice and still the best. The wax reduces friction, helps the stitches sit flat, and stops the thread from fraying as it passes through the paper repeatedly.
Embroidery floss works well too, especially for the visual punch of a strong colour. Pull a length of floss across the side of a candle to wax it. Perle cotton is another good substitute, and several strands of ordinary sewing thread twisted together will do in a pinch.
Needle and awl
Use a large sewing needle with a round eye, sometimes sold as a bookbinder's needle. The eye has to be wide enough that the thread passes through without stripping, and the shaft thin enough to follow your punched holes.
For the holes themselves, a bookbinding awl is ideal. A Japanese screw punch is faster if you have one. A sturdy needle pushed through with a cork or a nail and hammer will also work.
Everything else
You need a ruler and pencil for marking, a cutting mat or a piece of board to punch into, a sharp knife for trimming, and clips to hold the stack. Bulldog clips are perfect; wooden clothes pegs are a fine substitute.
A bone folder is worth owning if you plan to make more than one book. It presses folds crisp and burnishes edges without the shine a fingernail leaves behind.
Grain Direction: The One Detail That Decides Everything
Here is the detail that quietly ruins first books. Paper has a grain, set by the direction the fibres ran through the paper mill. It bends easily along the grain and resists bending across it.
For stab binding, the grain of every sheet must run parallel to the spine, that is, in the same direction as the sewing edge. Pages cut this way open smoothly and lie flat. Cut the other way and the whole stack fights the stitch.
Test it in five seconds. Bend a sheet gently one way, then the other. The direction that gives less resistance is the grain direction. If your paper is the wrong way, cut it down and re-trim rather than hoping for the best.
It is worth doing this test on the cover material too. Board has a grain as well, and a cover whose grain runs against the pages will bow as the book settles.
Cutting and Stacking Your Text Block
Decide on a size and cut every page and both covers to exactly the same dimensions. Consistency here saves you from endless trouble later, because nothing hides a ragged edge quite so visibly as a stab-bound spine.
Trim with a sharp knife against a metal ruler on a cutting mat. Several firm passes cut more cleanly than one heavy pass that swings off course.
When the pages are cut, tap the stack on a table until the binding edge is perfectly square, with every sheet flush. Then place the front cover on top, the back cover on the bottom, and check again.
Clip the stack together with two bulldog clips, one near the top and one near the bottom. Tight enough that nothing shifts when you press an awl through, loose enough that nothing marks.
A stack of 20 to 40 sheets is a comfortable first book. Much thicker than that and the awl needs real force, which is the point at which beginners start bending holes out of line.
Making the Covers
If you are covering binder's board, cut two boards to the page size and wrap each one in decorative paper. Cut the paper about 2 cm larger than the board on all four sides, then fold and glue the overhang to the inside.
Take care at the corners. Trim the paper diagonally at each corner, leaving roughly one board thickness of paper beyond the point, then fold the sides in and the corners last. Press everything under a weight while it dries.
If you would rather keep the process glue-free, use heavy cardstock and let it be. A stab-bound book with a plain card cover and a striking thread is a complete piece of design, not an unfinished one.
Some binders add a spine strip, a narrow piece of paper or cloth that runs down the binding edge beneath the stitches. It reinforces the spine and it disappears almost entirely under the thread, which is part of its charm.
Marking the Four Holes
Make a paper template the same height as your book. It will be your guide for every copy of this book you ever make, so keep it.
Rule a line parallel to the short binding edge, about 15 mm in. Working on that line, make a dot 15 mm down from the top edge and another dot 15 mm up from the bottom edge.
Measure the distance between those two dots and divide it by three. That measurement is your spacing. Mark it up from the bottom dot and down from the top dot, and you have four evenly placed holes.
For a small book, roughly 5 inches tall, the spacing works out to about an inch, which is a useful sanity check. If your marks end up much closer together than that, re-measure before you punch anything.
Fold or clip the template to the front cover and align it carefully. Once the holes are punched, that alignment is permanent, and a template that slipped shows up in every stitch.
Piercing the Holes
Put your cutting mat or board under the stack and hold the template firmly in place. Punch through all the layers, one hole at a time.
Keep the awl perpendicular to the book. Holes that go in at an angle emerge somewhere else entirely on the bottom layer, and the needle will not find them. Push steadily and let the point do the work.
If a hole resists, withdraw the awl and turn it slightly before trying again rather than forcing it. Paper fibres part around a turning point far more willingly than they part around a shove.
When the four holes are done, check them from the other side. Hold the stack up to a window and look down each hole. You should see a clean opening running straight through with the paper margin intact all around.
Remove the template only after you have confirmed all four holes. If anything looks off, punch a fresh hole in the correct place and accept the small ghost of the old one. A crooked stitch is harder to live with than a stray hole.
The Four-Hole Sewing Sequence
Number the holes from the top: hole 1, hole 2, hole 3, hole 4. Cut a length of thread about five times the height of your book, thread the needle, and tie a small knot at the far end so the thread cannot slip out of the eye.
Open the stack roughly in the middle so you can see the inside. This is where the thread will be tied off at the end, and keeping track of the tail from the start saves a genuinely fiddly rescue later.
Step 1. Push the needle through hole 2 from the inside, out through the front cover, and leave a tail of about 10 cm lying inside the book. Clip the tail down with a peg so it does not wander.
Step 2. Take the thread around the spine, that is, over the binding edge, and bring it back through hole 2 again, this time going all the way through the stack to the inside. You now have two stitches at hole 2, one on each side of the spine margin.
Step 3. On the front, carry the thread down to hole 3 and stitch through it. Wrap around the spine and return through hole 3 exactly as you did at hole 2.
Step 4. Carry the thread down to hole 4. Stitch through, then wrap around the spine and around the bottom corner of the book, and re-enter hole 4.
Step 5. Now work back up the spine. Pass the needle from hole 4 up through hole 3, then hole 2, then hole 1, so the return stitches sit beside the ones you already made.
Step 6. At hole 1, wrap the thread around the spine and around the top corner of the book, then re-enter hole 1. This corner wrap is what makes the head of the book look finished rather than abruptly stopped.
Step 7. Finally, take the thread back down the inside from hole 1 through hole 2, and meet the tail you left in Step 1.
The pattern is now complete. Each of the four holes has a stitch on both faces of the spine margin, the two end holes have their corner wraps, and the thread is waiting patiently inside the book.
Tying Off and Finishing
Pull both thread ends snug but not tight. Tension is where beginners overshoot. The thread should sit on the paper, not bite into it.
Tie a square knot between the two ends, then a second knot on top of the first for security. Before pulling the second knot tight, work it down into hole 2 with the needle so the knot disappears inside the paper stack.
Trim the tails to about 2 cm. Do not cut them flush; a little length prevents the knot from unravelling and gives you something to grip if you ever need to untie it.
Press the finished book under a weight for an hour or so. Nothing needs to dry, since there is no glue, but the weight settles the pages and encourages the stitch to lie flat.
Then open the book all the way and look at the spine. The stitches should be even, the wrap at each hole consistent, and the four holes in a straight line. If your first attempt is slightly uneven, that is entirely normal and entirely invisible to anyone but you.
Common Mistakes and How to Fix Them
Holes that wander off the line. This almost always means the template moved, or the awl was not vertical. Tape the template down next time instead of relying on a steady hand.
Pages that shift while punching. Two clips become three clips. Place one in the middle as well, and rest your free hand flat on the stack.
Thread that frays and breaks. Unwaxed thread is the usual culprit, followed by a needle eye that is too small. Wax the thread, and check that it slides through the eye without scraping.
Stitches that sit loose. You are pulling the thread on the return pass rather than the outgoing one. Take up the slack as you pass through each hole, not at the end.
A book that will not lie flat. Nine times out of ten the grain direction is wrong. Bend-test your paper before cutting, and cut the pages again if needed.
A cover that closes into a telephone dial shape. The board grain runs against the pages. Re-cut both boards so their grain follows the spine.
Variations Once You Have Four Holes
The four-hole pattern is a foundation, not a limit. Every other stab binding is a variation on the same principle: same stack, same margin, different thread road.
The five-hole pattern, goyo toji, spaces the holes differently and gives the spine a slightly more formal rhythm. The Korean tradition uses odd numbers for the same reason, five being the common standard.
The hemp leaf pattern, asa-no-ha toji, is the dramatic one. It adds diagonal wraps that create a leaf shape across the spine margin, and it is the pattern most likely to make someone ask how the book was made.
Noble binding, kokki toji, is the elegant alternative, stitching a single clean line down one side of the spine margin and returning along the other, leaving the holes themselves visible as part of the design.
There are also three-hole and six-hole versions, and any of them can be combined with a spine wrap, a different cover material, or a contrast thread. The structure is infinitely willing.
What to Make With This Binding
Sketchbooks are the natural first project, because a stab-bound book of printmaking paper takes charcoal, gouache, and collage without complaint.
Journals and guestbooks suit the technique's formality. Use a dark board cover, a spine wrap, and a neutral linen thread, and the finished object looks considerably more expensive than it was.
Zines and printed booklets are where stab binding earns its keep in a practical sense. It turns a stack of loose printed sheets into something with a spine in under an hour, with no equipment beyond an awl.
It is also a genuinely good way to use paper you have been hoarding. Seed catalogues, sheet music, maps, wallpaper samples, and old envelopes all become pages the moment they are cut square and stacked.
Small books make thoughtful gifts, too. A pad of twenty pages bound in a colour that suits the recipient takes an evening, and a handmade book has a way of being kept.
Final Thoughts
Four-hole stab binding is one of those crafts that rewards you on the first attempt. The materials are cheap, the equipment is minimal, and the pattern is short enough to memorise after two books.
Make your first one from plain copier paper and scrap card. Make the second one properly, from paper you actually like, with a thread colour you chose on purpose. By the third you will be marking your own hole positions and thinking about hemp leaf patterns.
There is something quietly satisfying about a book that owes nothing to adhesive and everything to a needle, a length of waxed thread, and the willingness to make eight small holes in a straight line. That is the whole trick, and it has held books together for centuries.
