Introduction
My first melt-and-pour batch died in a microwave. I dropped two pounds of glycerin base into a glass jug, set it for four minutes, and walked away to answer a text.
What came back was a scorched, rubbery disc with a burnt smell that never left the kitchen. Two pounds of base, plus a bottle of lavender fragrance oil, straight into the trash.
Call it fourteen dollars and an evening gone. Not a catastrophe, but annoying — and completely avoidable.
The fix is embarrassingly simple. Melt in short bursts, stir between them, and never let the base climb past the temperature window it likes. That's the whole trick.
Melt-and-pour soap has no lye, no curing, and no special equipment. You can make your first batch tonight with a microwave, a jug, and a silicone mold.
This guide covers the base, the supplies, the temperatures, and the real proportions for scent and color. By the end you'll know your cost per bar.
Why Melt-and-Pour Instead of Cold Process
Cold process soap is the traditional route. You mix lye with water, blend it into oils, and hope the trace behaves while you work.
It's a wonderful craft. It's also a rough first project if you're short on time, counter space, or patience for safety gear.
Lye is sodium hydroxide. It burns skin, it damages eyes, and it calls for gloves, goggles, and a well-ventilated room. That's a lot of ceremony for a hobby you haven't decided you love yet.
Then comes curing. Cold process bars typically sit four to six weeks before they're mild enough to use well. That's six weeks of waiting before you know whether your recipe worked.
Melt-and-pour skips both problems. The soap is already saponified when you buy it. You're melting and reshaping a finished product rather than doing chemistry from scratch.
That means your bars are usable the same day. Cool them, trim them, wrap them, hand them out.
Start-up cost is lower too. No lye, no scale-accurate oil calculations, no curing racks taking over a shelf for a month. A beginner cold process kit often costs more than a pound of base and a mold.
Is melt-and-pour "real" soap making? It's real soap, made your way, with your colors and your scent. Plenty of small sellers built a first product line exactly this way.
Choosing Your Soap Base
Base comes in blocks, usually one, two, or five pounds. Most beginners start with a one- or two-pound block of clear glycerin and branch out after that.
Here's what each common base is actually good for.
- Clear glycerin: see-through, so it's the one for embedding shapes and layering colors. It also takes dye vividly.
- White or opaque: creamy and solid. Best for clean, even color and a classic bar look.
- Goat milk: opaque and gentle, popular for sensitive or dry skin. Slightly creamier feel in the finished bar.
- Shea butter: rich and moisturizing. A good pick for winter bars and hand soap.
- Olive oil: mild and low-lather, closer to a castile feel. Nice for facial bars.
- Oatmeal: exfoliating and soothing. Often sold with oats already suspended in the block.
- Hemp: a slightly darker, earthy base. Good for uncolored, natural-looking bars.
You can blend bases too. A fifty-fifty mix of clear and white gives you a soft translucence without losing color payoff.
Now the math. One pound of base makes roughly four to six bars, depending on mold size. A standard cavity mold usually lands closer to four.
At typical base pricing, that works out to somewhere near a dollar or two per bar before you add scent and color. Boutique bars run six to ten dollars each.
Add a fragrance or essential oil at a modest rate and your per-bar cost stays low. That's the number that matters if you gift in volume or sell at a market.
Your Supply List (and What You Can Skip)
You need less than you think. Here's the real list.
- A microwave-safe glass measuring jug, four-cup size, or a double boiler if you'd rather work on the stove.
- Silicone molds. They flex, they release cleanly, and they don't need a release spray.
- A digital thermometer. This is the one item I'd argue with you about — reason below.
- Fragrance oil or essential oil for scent.
- Mica powder or liquid soap colorant for color.
- 91% isopropyl alcohol in a spray bottle, for popping surface bubbles.
- A sharp knife for trimming edges.
- Cling film for wrapping finished bars.
The digital thermometer is non-negotiable for beginners. Melt-and-pour has a narrow happy window, and guessing by feel burns batches.
Mine cost less than a coffee. It has saved several batches since, which is more than the coffee ever did.
So what can you skip on batch one? Not the thermometer. You can skip the fancy bar cutter, the beveler, loaf molds, glitter, and multiple bases.
Start with one base, one scent, one color, and one mold. Two pounds of base is a comfortable first run with a little room for error.
If you enjoy making your own kitchen and bath goods, DIY beeswax food wraps are the next easy win — same short supply list, same no-chemistry setup.
Melting the Base Without Ruining It
Cut first. Chop the block into small, even cubes, roughly half an inch across. Even pieces melt evenly; a whole block melts unevenly and scorches on the outside.
Here's the sequence I use now.
- Cut the base into half-inch cubes and drop them into your glass jug.
- Microwave in 30-second bursts.
- Stir between every single burst.
- Stop while a few small pieces remain, then stir them in — residual heat finishes the job.
- Check the temperature before you add anything at all.
Thirty-second bursts with stirring is the whole method. A long continuous melt is how you get a scorched center and soap that smells like burnt sugar.
Your target window is roughly 130 to 140 F, or 55 to 60 C. That's warm enough to pour smoothly and cool enough to behave.
Go above that window and things go wrong quietly. A skin forms across the surface, the base discolors, and fragile fragrance notes burn off before they ever set.
Go too cool and the base starts setting in the jug. You'll pour half a bar, then watch the rest turn to sludge while you scramble.
If it sets early, don't panic and don't crank the microwave to compensate. Another short burst and a stir brings it right back.
Keep your thermometer in the jug between bursts. Reading the temperature takes two seconds and tells you more than any visual cue will.
Adding Scent and Color the Right Way
Two ounces of fragrance oil per pound is far too much. That was my mistake on batch three, and it left a bar that smelled like a candle store.
Over-scenting does real damage. Excess oil weeps out of the finished bar, the soap feels greasy, and the scent turns sharp instead of clean.
The working range is roughly one to three percent of the base weight. For a one-pound block, that's about 0.3 to 0.5 ounces of fragrance.
A kitchen scale that reads in tenths of an ounce is worth having. Fragrance is measured by weight, not by drops, and guessing overshoots every time.
Fragrance oils or essential oils? Fragrance oils are cheaper, hold their scent better, and come in hundreds of scents. Essential oils are natural but pricier and often fade faster.
For a first batch, fragrance oil is the forgiving choice. Essentials like lavender or peppermint work too — just confirm they're undiluted and skin-safe.
For color, mica powder gives you pearlescent, opaque tones. Liquid colorant gives you cleaner, brighter results and mixes faster into the base.
Here's the clumping fix. Never dump powder straight into the main jug. Spoon a little mica into a separate cup with a tablespoon of melted base and stir it into a smooth paste first.
Then add that paste back to the jug and stir gently. Gentle matters — aggressive whisking whips in air bubbles you'll be fighting at the pour.
Make both additions after the base is off the heat and at temperature. Added to a too-hot base, scent burns off and color dulls immediately.
Pouring, Unmolding, and Finishing
Pour slowly and steadily into the mold. A slow pour from a low height keeps bubbles out; a fast pour from high up invites them in.
Then spray the surface lightly with alcohol. This breaks surface tension and pops the bubbles that already formed. One or two passes is plenty.
Let the soap set at room temperature, two to four hours for standard bars. Smaller molds set faster; thick loaf molds take longer.
In a hurry, the fridge works — twenty to thirty minutes usually firms things up. Be aware the temperature swing can cause sweating on the surface once the soap comes back out.
When the soap is firm and cool, flex the silicone mold and press from the bottom. It should release in one clean piece.
If a bar fights you, it isn't ready or it sat too long. Give it ten more minutes, or a short chill, before you resort to prying at it.
Trim the edges with a sharp knife while the bar is still slightly soft. Small shavings come off cleanly, and square edges photograph far better than rounded ones.
Now, glycerin dew. That's the beaded moisture that appears on humid days. It's the glycerin in the base pulling water out of the air, and it's harmless.
Wipe it off with a soft cloth, or gently steam the surface and pat it dry. Then wrap the bar tightly in cling film so air can't reach it.
Tight wrapping is the actual fix. Unwrapped bars will keep beading no matter how many times you wipe them down.
Making It Gift-Worthy
A plain bar looks homemade. A layered or embedded bar looks intentional, and it's barely more work.
For layering, pour one color, let it set firm, then spray it with alcohol and pour the second color on top. The alcohol makes the layers bond.
Skip that spray and you'll get layers that separate when the bar is cut. It's the single most common layering mistake I see.
For embeds, pour a thin base layer, let it set, place small shapes on top — hearts, stars, tiny cubes of a contrasting color — then pour over them.
Clear glycerin is the base for embeds. White base hides whatever you put inside it.
Texture is the other cheap upgrade. A tablespoon of rolled oats or poppy seeds per pound adds scrub and looks deliberate rather than accidental.
Add them after the base is off the heat and at temperature, then stir briefly. Added while too hot, they sink straight to the bottom of the mold.
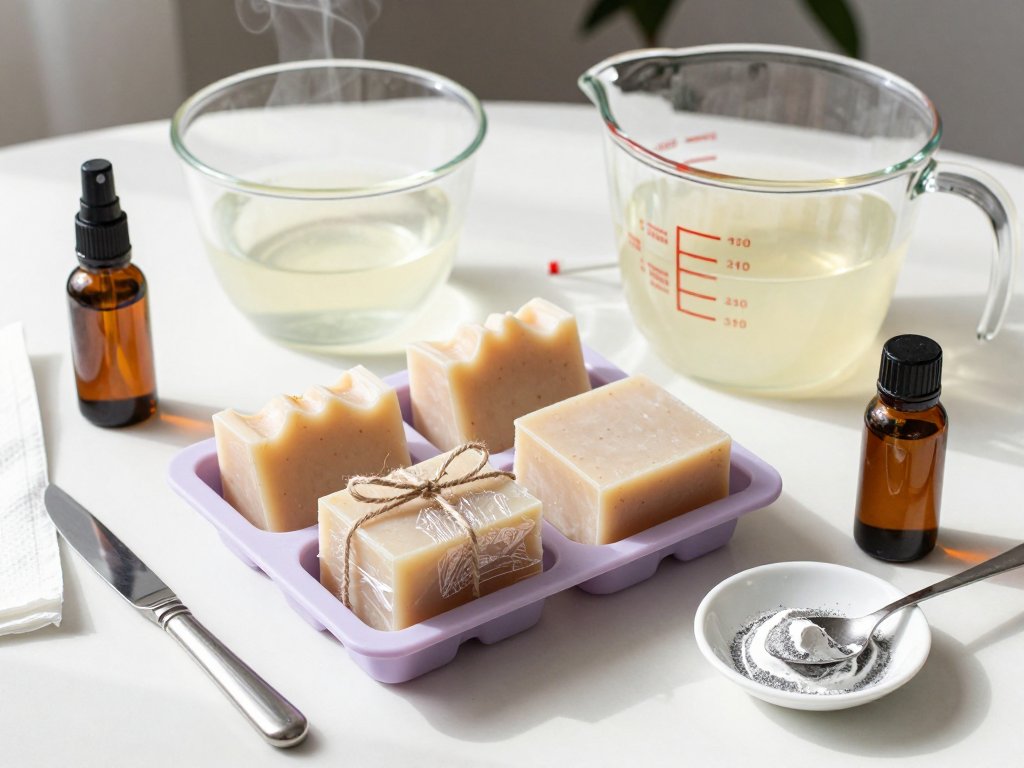
Wrapping is where a gift gets made. Cling film, a paper band, and a length of twine around a kraft label looks like a boutique bar.
Run the math on a five-pound block. That's roughly twenty to thirty bars depending on mold size — enough for a full holiday list from one purchase.
Compare that to three or four boutique bars bought retail. Base, scent, and color together cost less than that, with wrapping and a spare evening on top.
Your cost per bar drops further the bigger the block you buy. Keep batch one small anyway and get the process right before you scale up.
Troubleshooting: When Things Go Wrong
Most first-batch problems come back to temperature or proportions. Here are the four you're most likely to hit.
Greasy or sweating bars. Usually over-scenting. Oil the base can't hold weeps to the surface. Cut the fragrance back toward one percent, then wipe and wrap finished bars.
Scent fading after a few weeks. Some fragrance notes are simply volatile. A higher-quality fragrance oil holds longer, and tight wrapping slows the loss noticeably.
Layers separating. Almost always a missing alcohol spray between pours, or pouring the second layer before the first was firm enough to hold it.
Soap sticking in the mold. Silicone rarely sticks unless the soap is still warm or the mold is textured and stiff. Chill it briefly, then flex the mold from the outside in.
One more: a white film or fine cracks on the surface. That's usually a too-hot pour or a fast cooldown. It's cosmetic — wipe it or steam it and carry on.
None of these ruin the soap. A bar that looks imperfect still cleans, and batch two will look better than batch one did.
Conclusion: Your Cost per Bar and Your Next Batch
Here's the math that matters. A pound of base makes four to six bars. Add a modest amount of fragrance and color, and your cost per bar stays well under a boutique bar's price.
Once you move to five-pound blocks, that number drops again — and the only real input left is your evening.
So make the first batch simple. One base, one scent, one color, one mold, short bursts in the microwave, and a thermometer in the jug.
Your next project should be layered or embedded soap. Layering teaches you the alcohol trick and what a firm set actually feels like. Embeds teach you molding order.
Both are the same skills that make a bar worth selling, and both are more forgiving than they look from the outside.
Melt-and-pour has a reputation as the easy version of soap making. Take it from someone who torched a batch in a microwave: easy is exactly what you want while you're learning.
Get one clean batch on the counter tonight. Trim it, wrap it, and hand a bar to somebody — then tell them what it cost you.

