Introduction
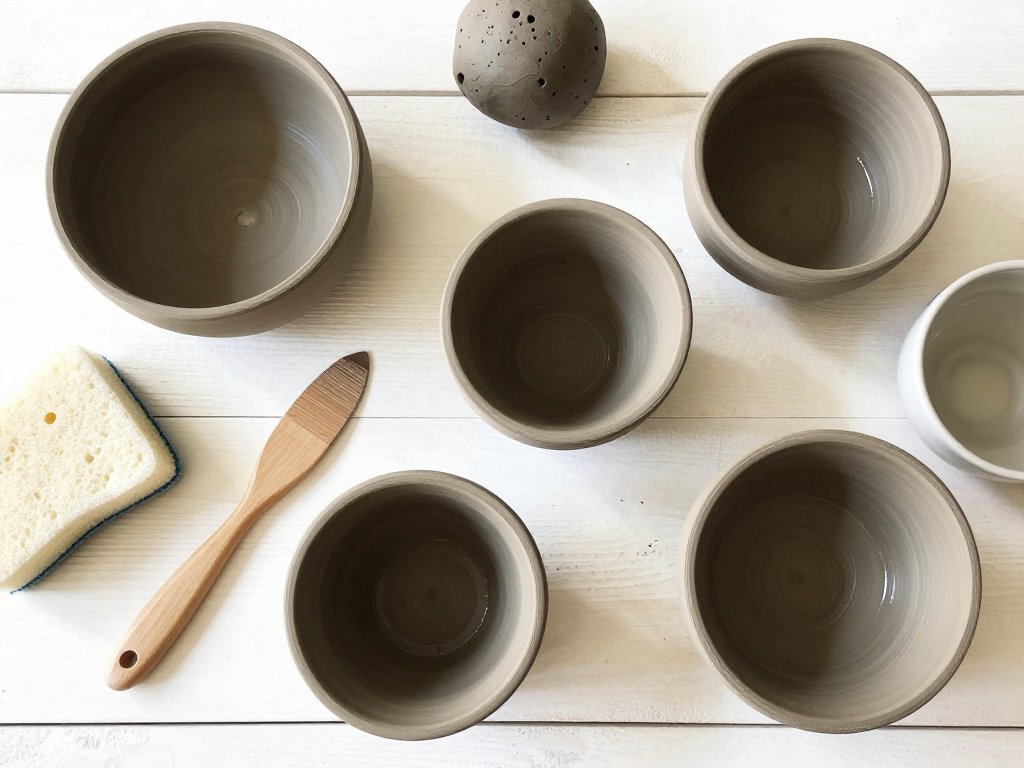
A ball of clay, one thumb, and about ten minutes. That is honestly all a pinch pot asks of you.
It is the oldest pottery technique we know of, older than the wheel and older than the kiln, and it is still the one teachers reach for first.
In this guide you will make a small bowl from start to finish, then branch out into cups, spoon rests, and little dishes.
You will learn how to wedge clay, how thick to pinch a wall, how slowly to dry a pot, and what to ask a studio that owns a kiln.
Your first pot will be lopsided. That is not a flaw in your technique. It is simply what a first pot looks like.
What Makes Pinch Pots So Beginner-Friendly
A pinch pot is what it sounds like: a vessel opened by pressing your thumb into a ball of clay and widening the walls between thumb and fingers.
No wheel, no slab roller, no extruder, no press. The only tool you truly need is your own hand.
Archaeologists have found pinch-formed vessels in nearly every early pottery culture, which is reassuring. The technique is gentle enough to have survived several thousand years of beginners.
The reason it forgives is simple. There are no seams, no joins, and no attachments to fail, because a pinch pot is one continuous piece of clay.
Compare that with a slab box, which has corners to score and slip, or a coil pot, which carries a dozen joins that can crack as it dries.
Pinching also teaches the two habits everything else in pottery rests on: even wall thickness and patient drying.
Once you can feel a quarter inch of clay between your fingers without measuring it, you can hand-build almost anything.
Choosing Your Clay
Three clay bodies are realistic options for a beginner: stoneware, earthenware, and air-dry clay.
Stoneware is the middle path most hand-builders choose. It is dense, plastic, and comfortable in the hands, and it tolerates a wall that wanders a little thin.
Mid-fire stoneware usually matures near cone 6, about 2,232 F (1,222 C), which calls for a real kiln and usually means a community studio.
Earthenware is softer and more porous, and it fires lower, commonly around cone 04 to cone 06. It is easier on kilns and often less expensive.
Earthenware chips a little more readily than stoneware, which matters most for pieces you use every day.
Air-dry clay hardens with no firing at all. It is the honest kiln-free choice, and it lets you practice every step in this guide this afternoon.
Be clear-eyed about it, though. Air-dry pieces are brittle, not waterproof, and not food safe. Sealed, they hold keys, jewelry, or a small candle.
So what should you actually buy? A 25 lb bag of stoneware from a craft supplier costs about ten dollars, and it makes dozens of pinch pots.
If you have no kiln access yet, a small pack of air-dry clay runs a few dollars and teaches your hands the movements first.
Skip anything labeled porcelain for now. It is beautiful and famously fussy, and it slumps and cracks under slow hands.
Wedging Clay (The Step Everyone Skips)
Clay straight from the bag looks ready. It is not. It was packed under pressure and it holds trapped air in pockets you cannot see.
In a hot kiln those pockets turn to steam and expand. The result is a blowout, a piece that bursts apart somewhere around two thousand degrees.
Wedging is kneading. You are evening out moisture and pushing trapped air to the surface, the way you would work bread dough.
Spiral wedging is the version most hand-builders use. Press the heel of your hand down and forward, roll the mass away from you, then bring it back and turn it a quarter turn.
Repeat for two or three minutes, rotating every time. The clay is ready when it feels uniformly soft and slightly springy, with no hard lumps inside.
Rams-head wedging is the same idea with alternating hands and a rocking motion: press, rock, fold, press again. In plain words, you fold the clay over itself until the mass is even.
Do not wedge on bare wood or a rough bench. Clay picks up grit from the surface, and grit embeds itself in your finished pot.
A canvas-covered board or a plaster bat is ideal, because it grabs the clay without shedding into it.
If you are working with air-dry clay, wedge it anyway. Trapped air cracks air-dry pieces too, no kiln required.
Wedging is the cheapest kiln insurance you will ever buy. Two minutes of work prevents most beginner blowouts.
The Basic Pinch, Step by Step
- Roll the ball. Cup a lump the size of a small tangerine, roughly half a pound, between both palms and roll in circles until it is round and smooth. If cracks appear on the surface, the clay is slightly dry; a drop of water fixes it.
- Open the center. Hold the ball in your non-dominant hand and press your thumb straight into the middle, stopping about a half inch from the base. Do not push through the bottom.
- Pinch in small increments. Pinch the wall between your thumb inside and your fingers outside, taking small bites of clay, no more than a quarter inch at a time. Rushing thins one spot fast.
- Rotate in your hand. Turn the pot a little after every few pinches. Working evenly around the rim is what keeps one wall from ending up half the thickness of the other.
- Check wall thickness. Stop often and feel the wall between thumb and forefinger. It should feel like a pinky finger, about a quarter inch, with no thin patches near the base.
- Compress the rim. When the shape pleases you, run a damp fingertip around the rim to smooth and compress it. This one habit prevents most rim cracks later.
- Level the base. Set the pot down and gently press the inside floor flat, so it sits level instead of rocking on the table.
Work slowly and stop while the clay still feels cool and damp. A pot that feels warm or stiff is asking for a rest, so cover it with plastic and return in twenty minutes.
One ball of clay makes one small pot. Set the first one aside to firm up rather than fussing over it, and start a second.
Shaping Beyond the Bowl
A straight-walled pinch pot is a bowl. Change the angle of your fingers and you change the object entirely.
- Bowls. Pinching upward and slightly outward gives an open, generous shape. Keep the rim even or the bowl will read as tipped.
- Cups and mugs. Pinch taller and narrower, curving the wall inward as you rise. Add a handle later, at the leather-hard stage.
- Spoon rests. Flatten a shallow pot and press a spoon into the damp surface to make a cradle. It earns its place beside the stove.
- Tiny dishes. A golf-ball lump pinched thin becomes a ring dish, a tea bag rest, or a soap dish for the sink.
- A candle holder. Pinch a small, thicker-walled cup and press a tea light into the base to set the size, then remove it before firing.
- Pinch-pot animals. Build a body from one pot and a head from a smaller one, join them, then add ears, tails, and sturdy legs.
With children, the animal version wins every time. Two pots, a bit of joining, and a creature appears on the table.
Join attachments properly: scratch both surfaces with a fork, paint on slip, press firmly, then blend the seam with your finger.
Slip is simply clay mixed with water to the consistency of yogurt. Keep a small jar of it covered on the table.
Skip the scoring and slipping and the ears will pop off in the kiln. It is the most common heartbreak in beginner hand-building.
Adding Texture and Pattern
A pinch pot already has texture. The soft ridges left by your fingers are a record of the making, and many potters leave them deliberately.
Thumbprint texture is the simplest decoration of all. Press a thumb, a fingertip, or a pencil eraser into the damp wall in a repeating row.
Stop while the pattern still reads as intentional. A single neat row of dents looks considered; a wall covered in them looks busy.
Impressing means pressing an object into the clay and lifting it cleanly away. Small leaves, lace, a doily, and coarse burlap all leave lovely marks.
Press leaves vein-side down and roll gently with a wooden rib, so the whole image transfers instead of one deep spot.
Roll or rock the tool rather than pushing it straight in. A wiggled impression smears the edges; a rolled one stays crisp.
Carving works best at the leather-hard stage, when the clay is firm enough to hold a clean line.
A pencil, a skewer, or a wooden modeling tool will draw lines that survive the kiln.
Carve lightly. Deep cuts weaken a thin wall, and a pot with a gouged groove will crack along that groove as it dries.
Burnishing is polishing the surface with the back of a metal spoon or a smooth stone, rubbed in small circles while the clay is still slightly damp.
Burnished pots come out of the firing with a soft sheen that almost looks glazed. It is an old technique, and it costs nothing but patience.
Drying and Firing Your First Pots
Drying is where beginners lose pots, and it is nearly always because the drying happened too fast.
Cover finished pots loosely with a plastic bag or a damp cloth and leave them for two or three days. The goal is even moisture loss, not speed.
A pot that dries on one side only will pull itself out of shape. Turn it daily and stand it on newspaper rather than plastic.
Between damp and bone dry sits the leather-hard stage. The clay is firm, it holds its shape under its own weight, and it still carves beautifully.
This is when you trim the base, refine the rim, and attach handles. Once it passes, the clay will no longer join reliably.
Rims crack because they dry fastest. They are the thinnest part and they meet the moving air first, so they shrink before the body catches up.
Wrap a strip of plastic around a rimmed pot to slow the top edge down, and check it each morning.
When the pot is bone dry and feels room temperature to the back of your hand, it is ready for the first firing, called bisque.
Bisque firing usually happens around cone 04, about 1,940 F (1,060 C). At that heat the clay becomes ceramic but stays porous, which helps glaze grip.
The second firing melts the glaze, typically at cone 6 for stoneware or cone 06 to cone 04 for earthenware. Your supplier prints the correct range on the bag.
If you have no kiln, ask at a community studio, a local college, or a nearby high school. Many studios fire outside work for a small fee by volume.
A kiln-share arrangement works too: several potters split the cost of one firing load and take turns running the kiln.
Ask a studio what temperature they fire to before you buy your clay, so your body and their schedule agree.
Food Safety and Finishing
An unglazed fired pot is porous. It absorbs liquid, holds onto flavors, and gives bacteria somewhere to settle.
So unglazed clay is fine for dry goods, such as garlic, loose tea, dried herbs, paintbrushes, and jewelry, and not fine for wet food.
If you want a bowl for soup or cereal, the surface that touches food must carry a food-safe glaze.
Look for the words food safe or dinnerware safe on the label, and check that the glaze is rated for your clay's firing temperature.
A glaze that never fully melts stays rough, and a rough surface is harder to clean and more likely to hold onto what it touches.
Commercial glazes sometimes carry warnings for certain colors, so read the label and ask the studio if anything is unclear.
Glaze chemistry is a study in itself. For your first pots, buying a known food-safe glaze from a reputable supplier is the calm choice.
Properly glazed stoneware and earthenware can go in the dishwasher, though hand-washing is kinder to a handmade rim.
Air-dry clay is a different creature. It is not food safe even after sealing, and it should never hold water.
Seal air-dry pieces with two or three thin coats of acrylic varnish, matte medium, or a dedicated clay sealer, letting each coat dry fully.
Sealing makes an air-dry dish wipeable and protects it from a spilled drink. It does not make it a waterproof vessel.
When Things Go Wrong
Almost every beginner problem has a cause and a fix, and knowing the cause saves the next pot.
Cracking rims
A rim that dries faster than the body will split. Wrap the rim in plastic, dry the pot under a loose cover, and compress the rim with a damp finger before it stiffens.
Uneven walls
Uneven walls mean uneven pressure. Slow down, pinch in smaller increments, and turn the pot after every few pinches so your dominant hand does not always work the same side.
Sagging pots
Clay that sags is usually too wet, or pinched too thin near the base. Let the pot firm up for fifteen minutes, then work the lower wall more gently.
Clay that dries too fast
If a pot stiffens before you finish it, wrap it in plastic for twenty minutes. Clay wants to be worked damp, and forcing it dry creates cracks you will only see after firing.
Pots that feel gritty
Grit means grog, the sand-like material many clay bodies contain. Grog strengthens clay and reduces warping, so it is not a fault.
If the roughness bothers your hands, choose a smoother body for small pots, and keep heavily grogged clay for planters and spoon rests.
Sticky, overly plastic clay usually means too much water was added. Let the clay absorb what it has, and use less next time.
If a pot cracks anyway, remember that clay is reusable. Bone-dry pieces can be broken up, soaked, and wedged back into workable condition.
Wear a dust mask when handling dry scraps or sanding bisque. Silica dust is a real health concern and worth respecting from your very first bag.
A Few Variations to Try Next
Once the basic pinch feels natural, the variations open quickly, and each one teaches something the others do not.
A small set of matched bowls is the most rewarding next step: same clay, same glaze, three sizes, pinched one after another.
A set teaches consistency in a way a single pot cannot, and a nested stack of bowls makes a genuinely good gift.
If you would rather use the same clay a different way, our guide to slab pottery for beginners walks through rolling and building a serving tray by hand.
A plate of pinch-pot animals with children is a fine rainy afternoon, and each creature gets better as they stop worrying about perfect.
A pair of tiny dishes by the kitchen sink, one for rings and one for a sponge, uses up leftover clay in twenty minutes.
Candle holders, incense trays, and shallow saucers for houseplants all come from the same gesture, pinched a little differently.
Final Thoughts
Your first pots are supposed to be wonky. That is not a polite consolation; it is what the process looks like from the inside.
Clay records every movement of your hand, including the hesitant ones. A thick wall and a leaning rim are evidence that a person made this object.
Most potters keep their first pot. Put yours on a shelf and give it a job, holding keys, a ring, or a few dried stems from the garden.
Then make a second one. Skill in pottery is not mysterious; it is simply the accumulation of pots, and the tenth one will surprise you.
The other lovely option is a pinch-pot night. Invite two or three friends, cover the table, and put out one bag of clay.
Beginners teach each other faster than any book does, and the conversation carries half the work.
So buy the clay, wedge it properly, pinch slowly, and dry it patiently. The rest is repetition, and repetition is where the pleasure lives.
