Introduction
There is a particular kind of quiet that settles over a kitchen table when you are rolling clay flat with a wooden pin. It is the same stillness as kneading bread, except what comes out of it is a tray.
Slab work — hand-building from rolled sheets of clay — is the friendliest doorway into pottery. No wheel, no throwing skills, no years of practice. Just clay, a pin, and a flat surface.
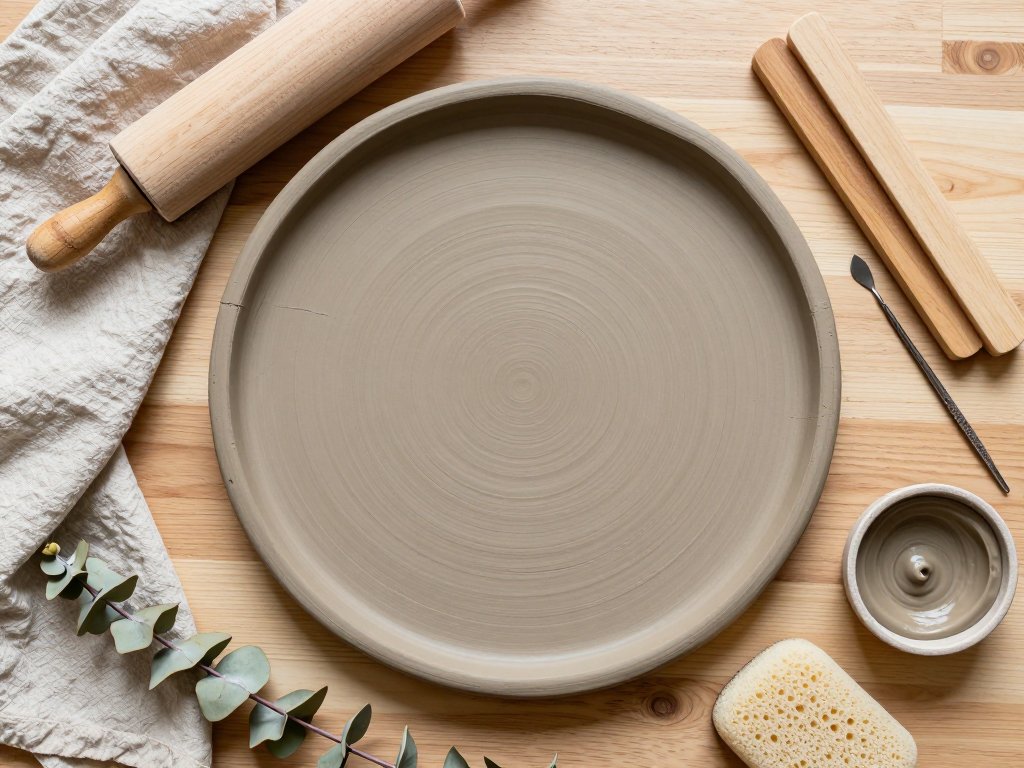
By the end of this guide you will have built a serving tray from a single rolled slab, with a rolled rim, a compressed surface, and a patient drying schedule.
You will also understand why each step exists. That matters more than the finished tray, because the same logic builds plates, trinket dishes, and coasters.
Some steps depend on kiln access, and we will be honest about that as we go. Readers working at a kitchen table with no kiln have real options too.
Your first tray will probably be slightly uneven. Mine was. That unevenness is part of the record of a handmade object.
What a Clay Slab Actually Is
A slab is simply clay rolled into an even sheet, the way you would roll pastry. It is the raw material for trays, plates, boxes, and mugs built from strips.
Evenness is the whole game. A tray rolled thick on one side and thin on the other will curl as it dries, and it will move again in the kiln.
Perfection is not the goal; consistency is. A slab that measures the same thickness from center to edge behaves far better than a lovely-looking slab with thin corners.
For a serving tray, aim for about 3/8 inch, roughly 6 to 9 millimeters. Thinner than that and the tray flexes when you lift it. Thicker and it is heavy, slow to dry, and prone to cracking.
The easiest way to hit that target is the two-dowel method. Lay two wooden dowels on either side of your clay, both exactly the same height, and roll with a pin whose ends ride on them.
The pin cannot press lower than the sticks, so the clay flattens to their height and stops. Simple, repeatable, inexpensive — a pair of dowels or rolling sticks costs a few dollars.
Roll in one direction, then rotate the slab a quarter turn and roll again. This keeps the clay from stretching in only one direction.
Choosing Your Clay
Three broad options face a beginner: stoneware, earthenware, and air-dry clay. Each one asks something different of you.
Stoneware is the forgiving choice for a tray. It is dense, plastic, and strong, and it fires into a durable body that handles everyday use well.
Mid-fire stoneware is typically fired near cone 6, which is about 2,232 F (1,222 C) — a temperature that calls for a real kiln, usually at a community studio.
Earthenware is softer and more porous, and it fires lower, commonly around cone 04 to cone 06. It is easier on kilns and often less expensive, but the finished piece chips more readily.
Grog is the gritty material added to clay to reduce shrinkage and give a slab structure. Clay with some grog, often labeled speckled or sculptural, holds its shape better and warps less.
Too much grog feels rough against your hands and can make a food surface scratchy. A mid-grog stoneware is a comfortable compromise for a beginner tray.
Air-dry clay is the honest kiln-free option. It hardens in air with no firing at all, and it lets you practice every step in this guide at your own table.
Be realistic about it, though. Air-dry pieces are not waterproof and not food safe, and they are brittle. A sealed air-dry tray can hold keys, jewelry, or a candle, but not sandwiches.
Preparing the Clay
Clay arrives in a sealed bag, and bagged clay is rarely ready to roll. It has held air during manufacture, and it is firmer in some places than others.
Wedging is the fix. Wedging means kneading the clay to even out moisture and press out trapped air, the way you would knead dough before baking.
The spiral wedge is the version most hand-builders use. Press the heel of one hand down and forward into the clay, roll the mass away from you, then bring it back with the other hand and turn it a quarter turn.
Repeat for two or three minutes, rotating as you go. The clay is ready when it feels uniform and slightly springy, with no hard lumps inside.
Air pockets matter more than beginners expect. Clay that has not been wedged can hide a bubble that becomes steam in the kiln, expanding enough to blow a piece out of your tray.
If you are working with air-dry clay, wedge it anyway. Trapped air causes cracks there as well, even without fire.
Rolling and Compressing the Slab
Place your wedged clay between two sheets of canvas, or on a fabric-covered board. Canvas keeps the clay from sticking and leaves a light texture you can smooth away later.
Flatten the lump with your palm first, then roll from the center outward, pushing away from your body. Long, even strokes work better than short, hurried ones.
Lift the slab and turn it often, and flip it over at least twice while rolling. Flipping releases tension that builds on the underside and helps the slab shrink evenly.
Roll to your dowel height, then stop. Rolling past the guides thins the clay and undoes the consistency you just worked for.
Now compress. Drag a rubber or wooden rib across the surface in firm, overlapping strokes, pressing the clay particles together.
Compression closes the tiny gaps that open as a slab dries, and it leaves a dense, smooth surface that resists cracking far better than an untouched one.
Compress both faces. Flip the slab onto a board or a sheet of rigid cardboard so it cannot stretch, and rib the second side.
Then let the slab rest for a few minutes. Freshly rolled clay is lively and will sag; a short rest firms it toward leather-hard — cool, firm, and no longer tacky.
Leather-hard is the stage where a slab becomes cooperative. It holds a shape, it cuts cleanly, and it can still be joined to other clay.
Making the Form
There are three approaches to turning a flat slab into a tray, and all three work at a kitchen table with ordinary kitchen equipment.
The slump mold
With a slump mold you drape the slab into a form. Use a baking dish or a large bowl, and line it with a piece of cloth first.
Cloth matters. It lets the clay settle into the curve while still allowing the piece to slide as it shrinks, instead of gripping the dish and tearing.
Lay the slab into the lined dish and press gently with a sponge or rib, letting the clay find the curve on its own. Do not force it into the corners.
The hump mold
A hump mold is the opposite. You drape the slab over an inverted bowl, so the tray curves upward at its edges into a shallow dish shape.
This is the classic way to form a tray with a gentle rise. Cover the bowl with cloth, center the slab on top, and let gravity do much of the work.
Free-form with a rolled rim
Free-form is the simplest path of all. Leave the slab flat on its board, cut your shape, then build the edges upward with a coil of clay.
Whichever route you choose, cut with a template. Draw the tray outline on paper, cut it out, lay it on the slab, and trace around it with a needle tool.
A rectangle about 10 by 14 inches is a good first tray — large enough to hold a snack board, small enough to dry in a week at home.
Joining Clay: Score, Slip, and Press
Clay does not stick to dry clay. It sticks to clay that is damp and scratched, which is why every join in hand-building follows the same three steps: score, slip, and press.
Scoring means scratching both surfaces where they will meet. Use a needle tool, a fork, or a scoring tool, and work in a crosshatch pattern so the scratches crisscross.
Slip is clay glue. Drop a small handful of your own clay into a cup of water and stir until it reaches the texture of heavy cream. Let it sit overnight if you can.
Press the pieces together firmly and hold for a moment, then weld the seam. Welding means pressing and smoothing, and often adding a thin coil along the join and blending it in with your thumb.
That reinforcing coil is not decoration. It is what keeps a tray rim from separating during drying and firing.
Work inside the leather-hard window. If the clay is too wet the join slumps; if it is bone dry the slip will not fuse. Mist dry areas and wait a few minutes before trying again.
Adding a Rim or Handles
A tray needs either a raised rim or a pair of handles, and both are made the same way: from a coil of clay.
Roll a coil roughly the thickness of your index finger. Keep the pressure even as you roll outward, working from the middle of the coil toward the ends.
Run the coil along the edge of your tray. Score the tray's edge and the underside of the coil, brush slip on both, and set the coil in place.
Press it down with your thumb, then blend the seam with a rib or a slightly damp sponge until you cannot see where the coil joined the slab.
Compress the join thoroughly from both sides. A rim that is pressed but not compressed looks convincing while wet and separates in the kiln.
If you prefer handles, shape two short coils into loops and attach them to the narrow ends, reinforcing each joint with a small ball of clay pressed into place.
Handles cut from flat slabs will crack at the bend. Coils bend without fighting the clay, and they carry a serving tray's weight much better.
Slow Drying
Drying is where more beginner trays are ruined than at any other stage. Not at the rolling pin, and not in the kiln — on the counter, overnight.
Clay shrinks as water leaves it. If the top surface dries faster than the underside, the tray twists. If the edges dry before the middle, a crack opens.
If the rim and the center dry at once, you get an S-crack: a hairline crack running from the middle of the base outward, the classic signature of a tray dried too quickly.
The plastic bag trick prevents most of this. Slide the tray, still on its board, into a clean plastic bag and close it loosely.
Leave one corner open for the first day or two so moisture escapes slowly, then close the bag fully. For a large tray, drape a damp towel over it for a day.
Expect the tray to take one to two weeks to dry completely. Days, not hours. A thin dish may be bone dry in five days; a thick, rimmed tray can take three weeks in humid weather.
Flip the tray once a day at first, and rest it on newspaper or a board so the underside dries at the same rate as the top.
Bone dry means cool to the touch with no hint of chill. Touch the tray to your cheek or lip — if it still feels cold, it is still holding water.
Bisque Firing
A bone-dry tray can go into the kiln for bisque firing. Bisque is the first of two firings, and its purpose is turning fragile greenware into sturdy, porous ceramic.
After bisque, the clay is no longer soluble in water, and it holds glaze instead of drinking it in unevenly.
Water boils and turns to steam, so never rush a damp piece into a kiln. Even a slightly wet tray will crack, or worse, explode and damage other people's work.
A typical bisque is fired slowly to cone 04, roughly 1,945 F (1,065 C), then cooled slowly. Many studios bisque earthenware to cone 06 instead, around 1,829 F (998 C).
Do not expect to run this yourself in your first months. Kilns need ventilation, correct wiring, and someone who understands the firing schedule.
Community studios are the usual answer. Many offer memberships, and many fire outside work for a per-piece fee, so ask about bisque rates before you start building.
A local kiln-share or a friend with a kiln is another route, and some ceramic suppliers collect work and fire it on a published schedule.
If none of these are available, air-dry clay still lets you make the whole tray. It will be decorative rather than functional and will need sealing, but the skills transfer exactly.
Glazing and the Glaze Firing
After bisque, your tray is ready for glaze. Glaze is a glassy coating that makes the surface waterproof, food safe, and colorful.
For a serving tray, choose a glaze labeled food safe or dinnerware safe, and look for lead-free and cadmium-free wording on the label. Never use a decorative glaze where food will touch.
A sensible habit is a liner glaze: a simple, known food-safe glaze on the eating surface, with a more dramatic glaze used on the underside or rim.
Dipping is the fastest, most even method. Pour glaze into a wide container, hold the tray with tongs or your fingers, and lower it in one smooth motion.
Brushing takes longer and shows strokes, but it uses less glaze and is easy with a large soft brush. Apply three thin coats, letting each one dry before the next.
Wipe the foot — the underside contact area — with a damp sponge before firing. Glaze left there will fuse your tray permanently to the kiln shelf.
The glaze firing runs higher than bisque. Mid-fire stoneware usually goes to cone 6, about 2,232 F (1,222 C), where the glaze melts into glass.
Earthenware is different. It stays low: a cone 06 glaze firing near 1,829 F (998 C) is typical, which is a gentler ask of a small kiln.
Studio firing service normally covers both bisque and glaze firings for one modest fee. Ask what the studio expects you to do, since many prefer to load the kiln themselves.
Troubleshooting and What Comes Next
Common problems and their fixes
Warping is the most common complaint, and it almost always traces back to uneven thickness or fast drying. Roll more carefully, compress more, and bag the tray sooner.
Cracked rims usually mean the rim was attached too dry, or was not compressed into the body. Score deeper, use fresh slip, and blend the seam thoroughly.
S-cracks in the base signal a tray that dried too quickly. Cover it earlier next time, and dry it on newspaper so the underside does not lag behind the top.
Pinholes are tiny holes in the fired glaze. They often come from dust on the bisque or glaze applied too thickly. Wipe the bisque with a damp sponge and thin heavy glazes.
Uneven thickness shows up as a slab that lifts at one corner while drying. Check that both dowels are the same height, and flip the slab more often as you roll.
If a tray cracks anyway, remember that the first one almost always does. Clay is reusable: bone-dry pieces can be broken up, soaked, and wedged back into workable condition.
Wear a dust mask when handling dry scraps or sanding bisque. Silica dust is a genuine health concern, and it is a habit worth building early.
Where these skills lead next
The skills you just used transfer directly into other projects. A shorter slab becomes a set of coasters; a smaller rectangle becomes a trinket dish.
Add a rolled rim to a square slab and you have a plate. Curve a slab gently in a bowl and you have a shallow serving dish for salad or fruit.
Once your technique steadies, explore texture. Our guide to whimsical hand-built ceramics shows how stamped, carved, and sculpted detail turns plain slab forms into pieces with real personality.
A matching set — one tray, four coasters, and a small dish in the same glaze — is one of the most satisfying first projects, and a genuinely good handmade gift.
Buy one bag of stoneware clay, about ten dollars at a craft supplier, roll your first slab this weekend, and let it dry slowly in its bag. The waiting is part of the craft.
