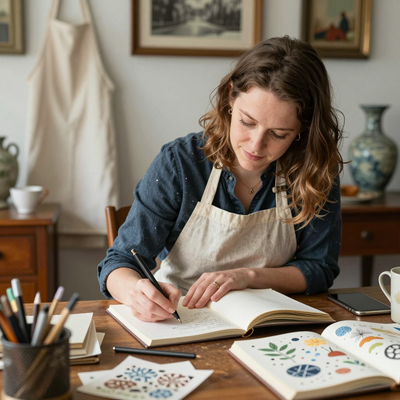
Introduction
There is a moment every potter remembers: the first time you open a kiln after a glaze firing and see what your piece has become. The clay body that left your hands rough and porous has been transformed into something glassy, luminous, and permanent. The colors are deeper than you imagined. The surface gleams like satin. And in that instant, you understand why potters have been chasing the perfect glaze for thousands of years.
Glazing is the art of applying a thin layer of glass-forming minerals to ceramic ware and firing it until it melts into a smooth, durable coating. It is part science, part intuition, and wholly satisfying. For the home potter, learning to glaze well opens up an entirely new dimension of creative expression. You can create surfaces that mimic ancient celadon, contemporary matte speckle, glossy jewel tones, or crackled volcanic textures — all from the same clay body, simply by changing your glaze approach.
If you are new to pottery and feeling uncertain about the glazing process, you are not alone. Glaze chemistry can seem intimidating, and the variables — thickness, application method, firing temperature, kiln atmosphere — can feel overwhelming. But the fundamentals are surprisingly straightforward. This guide will walk you through everything you need to know to begin glazing your pottery at home with confidence.
Understanding Glaze: What It Is and How It Works
A ceramic glaze is essentially a mixture of silica (glass former), alumina (stiffener), and a flux (melting agent), combined with metal oxides for color. When applied to bisque-fired clay and heated to the right temperature, these ingredients melt together and fuse to the clay body, creating a glassy surface that is waterproof, food-safe, and durable.
The magic of glaze lies in the interaction between its components. Silica alone melts at over 3,000 degrees Fahrenheit — far hotter than most pottery kilns can reach. Fluxes like feldspar, whiting, or dolomite lower the melting point to a range that home kilns can achieve, typically between 1,800 and 2,300 degrees Fahrenheit. Alumina controls the viscosity of the molten glaze, preventing it from running off the pot during firing. Colorants — iron oxide for rust and amber, copper carbonate for greens and turquoises, cobalt carbonate for deep blues, manganese dioxide for purples and browns — create the visual effects that make glazing so endlessly fascinating.
For the beginner, the most important thing to understand is that glaze is not paint. It does not behave like paint. A glaze that looks dull gray in the jar can emerge from the kiln a brilliant sapphire blue. A glaze that goes on smoothly can crawl and pool if applied too thickly. The transformation that happens inside the kiln is alchemical, and the only way to truly learn it is to experiment, take notes, and fire again.
Safety First: Essential Precautions for Home Glazing
Before we talk about technique, let us talk about safety. Glaze materials contain finely ground minerals and metal oxides that can be harmful if inhaled or ingested. This does not mean you should be afraid of them — it means you should treat them with respect.
Work in a well-ventilated area. If you are mixing dry glaze powders, wear a NIOSH-approved N95 respirator. Even when working with premixed liquid glazes, avoid creating airborne dust. Wipe surfaces with a damp sponge rather than a dry brush, and never eat or drink near your glazing area.
Wear gloves when handling glazes that contain toxic materials like barium, cadmium, or lead. Many commercial glazes are labeled food-safe when fired correctly, but the raw materials are still hazardous. Wash your hands thoroughly after glazing, and keep your glazing tools separate from kitchen utensils.
If you fire your own kiln, ensure it is properly vented to the outdoors. Kiln firing releases gases from the glaze and clay body that can be harmful in enclosed spaces. A simple vent system — a hood or a powered downdraft vent — makes a significant difference in air quality.
Choosing Your Glazes: Commercial vs. Mixed
As a beginner, you have two main options for obtaining glaze: purchase premixed liquid glazes or mix your own from powdered ingredients. Each approach has its advantages.
Commercial Liquid Glazes
Premixed glazes are the most accessible option for home potters. Brands like Amaco, Mayco, and Duncan offer extensive lines of cone 06 (low-fire) and cone 5-6 (mid-range) glazes in every color and finish imaginable. These glazes are tested for consistency, come with clear application instructions, and are generally food-safe when fired to the recommended temperature.
The main advantages of commercial glazes are convenience and predictability. You open the jar, stir thoroughly, and apply. The color on the bottle is a reasonable approximation of the fired result. If you are new to glazing, starting with a few reliable commercial glazes — a clear gloss, a white matte, and a colored glossy — will give you a solid foundation without the complexity of mixing your own.
The downside is cost. Commercial glazes typically run fifteen to twenty-five dollars per pint, and a single application on a medium-sized mug can use a quarter of that. If you plan to glaze many pieces, the cost adds up quickly. This is where mixing your own becomes attractive.
Mixing Your Own Glazes
Mixing glazes from dry ingredients is significantly more economical — a pound of raw glaze material costs two to five dollars and yields several pints of liquid glaze. It also gives you complete control over the final result. You can adjust the color, opacity, and texture to achieve effects that no commercial glaze can replicate.
The trade-off is that mixing glazes requires more equipment and a willingness to experiment. You will need a digital scale accurate to one gram, a set of sieves (80-mesh and 100-mesh), a mixing bucket, and a source for raw materials. You will also need to test each batch thoroughly before committing it to a finished piece.
For most beginners, the best approach is a hybrid: start with commercial glazes to learn application techniques and firing schedules, then gradually experiment with mixing your own as your confidence grows. Many potters continue using commercial glazes for certain effects while mixing custom glazes for others.
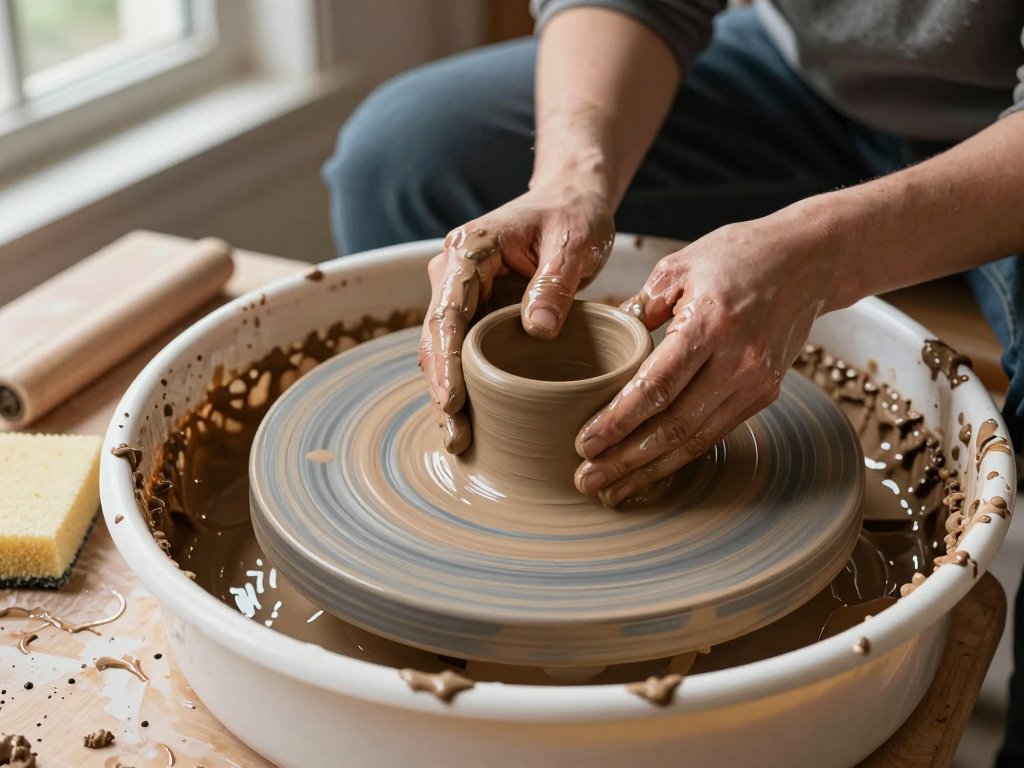
The Glazing Process: Step by Step
Whether you are using commercial or homemade glazes, the application process follows the same basic steps. Take your time with each one — rushing is the most common cause of glazing disappointments.
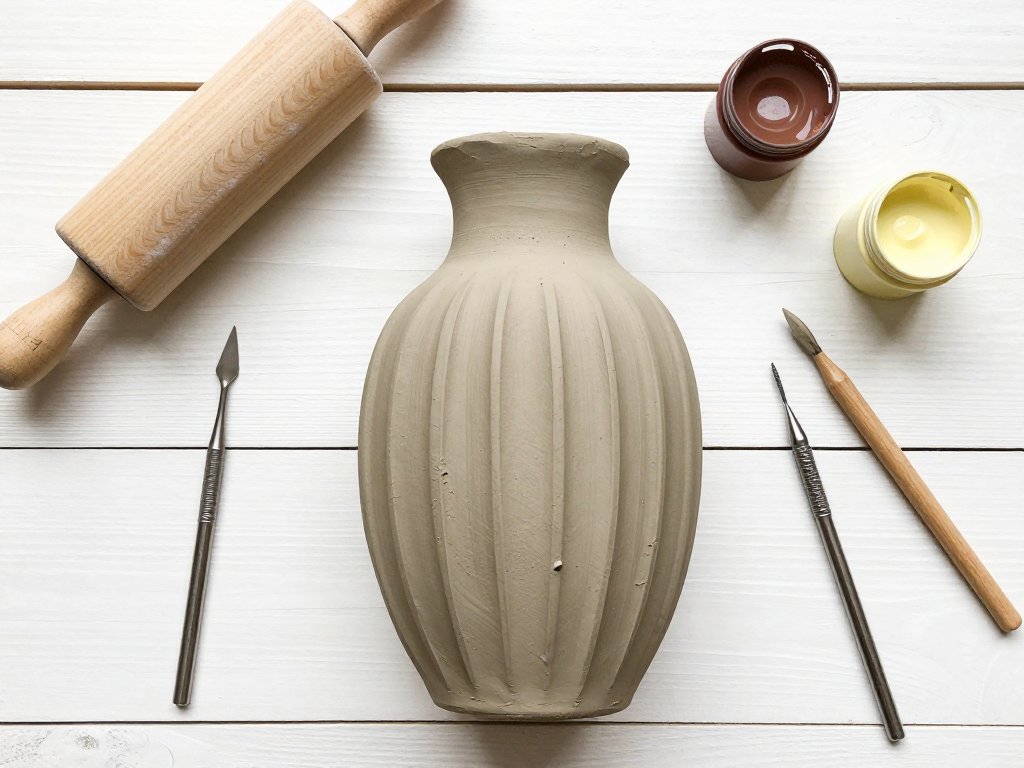
Step 1: Prepare Your Bisque Ware
Your pottery piece should have been bisque-fired — a first firing that transforms the clay from fragile greenware to a durable, porous state called bisque. Bisque ware is ready for glazing once it has been cleaned of any dust or debris.
Start by wiping the entire piece with a damp sponge to remove any loose particles. Pay special attention to the bottom edge and any crevices where dust accumulates. If there are sharp edges or rough spots, smooth them with a fine-grit sanding sponge. Be thorough — dust particles create pinholes in the fired glaze.
After cleaning, handle your bisque pieces only with clean hands or gloves. The oils from your fingers can repel glaze and create bare spots in the fired finish.
Step 2: Wax the Foot
Apply wax resist to the bottom of your piece — the foot ring that will sit on the kiln shelf. Glaze melts into glass during firing, and if it gets on the bottom of your piece, it will fuse permanently to the kiln shelf. Wax resist creates a barrier that prevents glaze from adhering to the foot.
Brush a thin, even layer of liquid wax onto the foot and about a quarter-inch up the sides. Allow it to dry completely before applying glaze. The wax will burn off during the firing, leaving the clay bare where it was applied.
Some potters prefer to use a wax pen for precision, but a small brush works just as well. Be careful not to get wax on areas you plan to glaze — it will repel the glaze and leave bare spots.
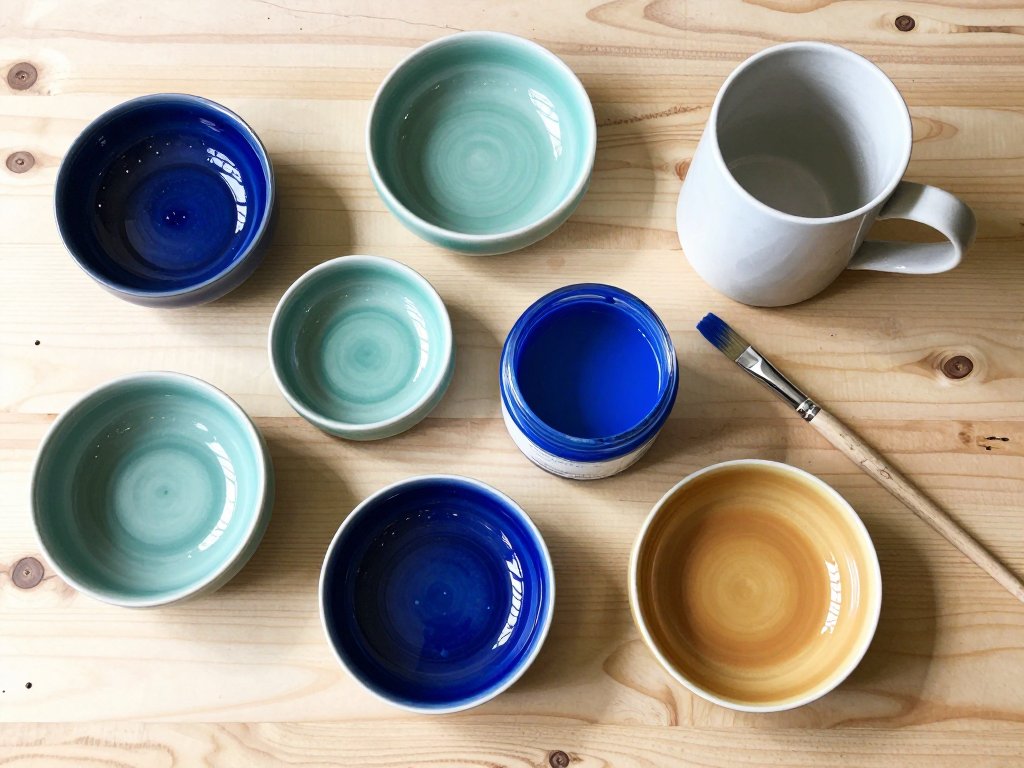
Step 3: Mix Your Glaze Thoroughly
Commercial glazes settle during storage. The heavy particles — the metal oxides and fluxes — sink to the bottom, while the lighter silica and water remain on top. If you dip your brush into the jar without stirring, you will apply a watery, under-pigmented glaze that fires to a pale, transparent version of the intended color.
Stir your glaze thoroughly with a wooden stick or a dedicated glaze mixer, scraping the bottom and corners of the jar to lift any settled material. The ideal consistency is heavy cream — thick enough to coat your brush or your piece evenly, but thin enough to flow smoothly. If the glaze seems too thick, add a few drops of distilled water and stir again. If it is too thin, let it sit uncovered for a few hours to evaporate some water.
Strain the glaze through an 80-mesh sieve if you see any lumps or particles. Lumps in the glaze will produce bumps and craters in the fired surface.
Step 4: Apply the Glaze
There are several methods for applying glaze, and the best choice depends on the size and shape of your piece and the effect you want to achieve.
Brushing. For small pieces, detailed work, or multiple colors, brushing is the most controlled method. Use a soft, wide brush — a hake brush or a glazing mop — and apply the glaze in even, overlapping strokes. Apply two to three coats, allowing each coat to dry for a few minutes before applying the next. The glaze should be thick enough to completely hide the bisque color beneath it. If you can see the clay through the glaze after three coats, your glaze is too thin or you need more coats.
Dipping. For even coverage on simple shapes like mugs, bowls, and vases, dipping is fast and produces a uniform coating. Hold the piece by the foot (the waxed area) and lower it into the glaze bucket at a steady pace. Hold it submerged for two to three seconds, then lift it out smoothly. Allow excess glaze to drip off before setting the piece down. Dipping requires a larger volume of glaze than brushing — you need enough glaze in the bucket to fully submerge your piece — but it produces a beautifully even finish.
Pouring. For large pieces that cannot be dipped, pouring is an excellent alternative. Pour glaze over the interior and exterior of the piece, rotating it to ensure complete coverage. Catch the runoff in a bucket and reuse it. Pouring works well for vases, large bowls, and sculptural pieces.
Spraying. Spraying requires a spray booth and a respirator, but it gives you the finest control over glaze thickness and allows for smooth gradients between colors. For beginners, spraying is best left until you have mastered the simpler methods.
Step 5: Clean Up and Inspect
After applying the glaze, use a damp sponge to clean any glaze from the waxed foot and from the inside rim if you are applying an interior glaze. Glaze that runs onto the kiln shelf will ruin both your piece and the shelf. Inspect the piece under good light, looking for thin spots, bare areas, or globs of excess glaze. Touch up thin spots with additional glaze, and gently scrape away drips with a needle tool or fine sandpaper.
Clean any glaze off your work surface before it dries. Dry glaze is difficult to remove and creates airborne dust when disturbed.
Firing Your Glazed Pottery
Once your piece is glazed and dry, it is ready for the glaze firing. The firing temperature depends on the type of clay and glaze you are using. Most home potters work in one of three ranges.
Low-fire (cone 06-04, about 1,830 to 1,945 degrees Fahrenheit). Low-fire glazes are bright, colorful, and relatively forgiving. Earthenware clays fired at this temperature remain porous, so low-fire pieces must be glazed completely if they will hold water. Low-fire glazes are ideal for decorative pieces, jewelry, and small sculptures.
Mid-range (cone 5-6, about 2,160 to 2,230 degrees Fahrenheit). Mid-range is the sweet spot for most home potters. Stoneware clays fired at this temperature become vitrified — non-porous and durable. Mid-range glazes offer rich colors and excellent food safety. If you are making functional pottery like mugs, bowls, and plates, mid-range is your best choice.
High-fire (cone 9-10, about 2,300 to 2,345 degrees Fahrenheit). High-fire glazes have a subtle, sophisticated beauty — think celadon, tenmoku, and shino. Porcelain and high-fire stoneware develop stunning depth and translucency. However, high-fire firings consume more energy and require a kiln capable of reaching these temperatures consistently.
For your first glaze firing, keep it simple. Program your kiln for a medium-speed firing to your target cone, with a fifteen-minute hold at peak temperature to allow the glaze to mature fully. Let the kiln cool naturally — opening it too early can cause glazes to craze (develop fine cracks) or shiver (flake off).
Troubleshooting Common Glaze Defects
Even experienced potters encounter glaze defects from time to time. Here are the most common issues and how to address them.
Pinholes. Tiny holes in the fired glaze surface are usually caused by trapped gases escaping during firing. To minimize pinholes, ensure your bisque ware is thoroughly clean, apply glaze evenly without overworking it, and add a soak period at peak temperature to allow bubbles to heal.
Crawling. When glaze pulls away from the clay body during firing, leaving bare patches, it is called crawling. This is often caused by grease or dust on the bisque surface, or by applying glaze too thickly. Clean your bisque thoroughly before glazing and reduce your coating thickness.
Crazing. A network of fine cracks in the glaze surface, crazing occurs when the glaze and clay body expand and contract at different rates. The fix is either to change your glaze formulation (add more silica to reduce the glaze's thermal expansion) or switch to a clay body with a better match for your glaze. Some potters intentionally seek crazing for decorative effect — it is only a defect if you do not want it.
Running. Glaze that drips down the side of the pot and pools on the kiln shelf has run too much. This usually means the glaze was applied too thickly or fired to too high a temperature. Reduce your coating thickness and confirm your kiln is reaching the correct cone.
Shivering. If flakes of glaze pop off the finished piece, the glaze is under too much compression. This is the opposite of crazing — the glaze wants to be smaller than the clay allows. Switch to a glaze with higher thermal expansion or a clay body with lower expansion.
Expanding Your Repertoire: Decorative Techniques
Once you are comfortable with basic glazing, a world of decorative possibilities opens up. Here are a few techniques worth exploring.
Wax Resist
Beyond protecting the foot, wax resist can be used decoratively. Paint a design with wax on bisque ware, then dip or brush glaze over the entire piece. The wax repels the glaze, leaving the design in bare clay. Fire the piece, and you will have a matte clay design against a glossy glazed background. For color contrast, apply a colored underglaze before the wax, then a transparent glaze on top.
Majolica
Majolica is a traditional technique in which a white tin-opacified glaze is applied to bisque ware, then painted with colored oxide stains before firing. The colors blend and soften during firing, creating the characteristic painterly quality of majolica. It is a wonderful technique for floral designs, geometric patterns, and freehand illustration on pottery.
Wax and Glaze Layering
For complex surfaces, try layering multiple glazes. Apply a base coat of one glaze, allow it to dry, then apply a second glaze over part of the piece. The two glazes will interact during firing, often producing unexpected and beautiful results. Keep notes on which combinations work well — the interaction between glaze layers is one of the most experimental and rewarding aspects of pottery.
Conclusion: The Joy of Glaze
Glazing is a skill that rewards patience, curiosity, and a willingness to embrace imperfection. Your first pieces may not turn out exactly as you envisioned — the green you mixed might fire to brown, the glossy finish you wanted might come out satin, the clean lines you painted might blur into soft washes of color. But each kiln opening teaches you something. Each unexpected result is a clue about how your materials behave.
The potters of ancient China, the Islamic world, Renaissance Italy, and modern studios around the globe have all walked this same path. They mixed, applied, fired, and learned. And the glazes they created — the celadon of Longquan, the lusterware of Persia, the majolica of Deruta — continue to inspire us centuries later. Your glazes will be part of that same conversation.
So stir your glazes thoroughly. Wax your feet. Keep a notebook of your results. And when you open that kiln and see what the fire has done, remember that every potter before you has felt that same mix of anticipation, surprise, and quiet joy. The glaze does not lie. It simply reveals what you have made.