Introduction
I will be honest with you: my first resin project was a disaster. I mixed the two parts too fast, introduced a million bubbles, poured it way too thick, and ended up with a sticky, cloudy mess that never cured. It sat on my workbench for three weeks like a sticky reminder that I had not done my homework. I had watched a few videos, nodded along, and assumed I could figure it out as I went. I could not. That coaster set cost me about twenty dollars in materials and a whole lot of pride.
Here is the thing about resin: it is not difficult, but it is not forgiving either. You cannot fake it. The good news is that the rules are straightforward, and once you learn them, you can create beautiful, glass-like pieces that look professional. Let me save you the sticky mess I went through. In this guide, I will walk through the essential supplies, the safety basics nobody tells you about, and three starter projects that will build your confidence without wasting your money.
What Is Resin Art?
Resin art uses epoxy resin — a two-part liquid that hardens into a clear, durable plastic. You mix equal parts resin and hardener, pour it into molds or onto surfaces, and let it cure for 12 to 24 hours. The result is a glossy, glass-like finish that preserves whatever you put in it: dried flowers, pigment, glitter, or photographs.
There are two main types of resin for crafters. Epoxy resin is what you want for coating and casting small items like coasters, trays, and jewelry. It cures relatively fast and is food-safe once fully cured (though not heat-resistant — do not put a hot mug directly on a resin coaster). Polyester resin cures harder and is better for larger projects like tabletops, but it has stronger fumes and requires better ventilation. Stick with epoxy for your first several projects.
What You Will Need
Let us start with the shopping list. One of the traps beginners fall into is buying a cheap kit that has everything except the things that actually matter. Here is what I recommend spending money on and where you can save.
Essential Supplies
- Epoxy resin kit — Get a brand designed for art and craft use, not hardware-store epoxy. Look for a 1:1 mixing ratio (equal parts resin and hardener), which is simpler to measure than 2:1 or 3:1 ratios. A 16-ounce kit costs about twenty-five to thirty-five dollars and will make six to eight coasters or three to four small trays. Do not buy the cheapest option on Amazon — the difference in clarity and bubble release is dramatic.
- Silicone molds — Coaster molds, square tray molds, and pendant molds are widely available for five to fifteen dollars each. Silicone is non-stick, so your cured pieces pop right out. Avoid plastic or metal molds — resin will stick to them permanently.
- Mixing cups and stir sticks — Use graduated plastic cups (the ones with ounce markings on the side) and flat wooden popsicle sticks. You will need multiple cups because you cannot reuse a cup once resin has cured in it. A pack of 50 cups costs about eight dollars.
- A digital scale — I know the instructions say you can measure by volume. Do not. Volume measurements are inconsistent because resin and hardener have slightly different densities. A digital scale that measures to 0.1 grams costs fifteen dollars and will save you from ruined projects. Measure by weight for consistent results every time.
- Isopropyl alcohol (91% or higher) — This is your secret weapon. A spray bottle filled with alcohol pops surface bubbles instantly. It also cleans uncured resin off your hands and work surface.
- Gloves and a respirator — Resin is not toxic when cured, but the liquid components can cause skin sensitization over time. Wear nitrile gloves (not latex, which can react with resin) and work in a well-ventilated area. If you are working indoors without cross-ventilation, pick up a respirator with organic vapor cartridges. It costs about thirty dollars and is worth every penny.
Nice-to-Have Supplies
- A heat gun or torch — Passing a heat gun or small butane torch over your poured resin pops bubbles instantly. A culinary torch from the kitchen aisle works fine. Hold it six to eight inches above the surface and wave it back and forth — do not hold it still or you will scorch the resin.
- Pigments and additives — Alcohol inks, mica powders, and resin-specific colorants let you customize your pieces. Start with a pack of three to four colors rather than a full set.
- A dust cover — While resin cures, it attracts dust like a magnet. A cardboard box or plastic tote placed upside down over your piece keeps dust off. Punch a few small holes for airflow — resin needs oxygen to cure properly.
- A toothpick or pin — For coaxing bubbles out of tight corners in molds.
Safety First: What Nobody Tells Beginners
Let me be direct about this: epoxy resin is not something you want to treat casually. I made the mistake of working without gloves my first time, and my hands were red and itchy for two days. That is a mild reaction. Some people develop permanent allergies to uncured epoxy after repeated exposure.
The rules are simple. Wear nitrile gloves whenever you are handling liquid resin. Work in a space with good airflow — open a window and run a fan. Do not pour resin down the drain; it will cure in your pipes and cause expensive plumbing issues. Wipe cups and tools with a paper towel first, then let the towel cure in the sun before throwing it away. For cleanup, use white vinegar on uncured resin, not harsh solvents.
Once resin is fully cured, it is inert and safe to handle. Food-safe epoxy is fine for serving trays and coasters, but do not use it for cutting boards or anything that will see repeated contact with hot items.
Project 1: Simple Resin Coasters
Coasters are the perfect first resin project. They are small, use minimal material, and are forgiving enough that minor imperfections just add character. You will learn the mixing and pouring process without committing to a large, expensive piece.
Step 1: Prepare Your Workspace
Cover your work surface with wax paper or a silicone mat. Resin will not stick to either. Set up your mold on a perfectly level surface — a slight tilt will give you coasters that are thicker on one side. Use a small level if you have one. If your table is uneven, shim the mold with pieces of cardboard until it is level.
Step 2: Measure and Mix
Put on your gloves. Place your mixing cup on the digital scale and tare it to zero. Pour in the resin component until you reach your target weight (for a 1:1 ratio, the total weight is whatever you decide — 30 grams per coaster is a good starting point for a standard 4-inch round coaster). Then add the hardener until the scale reads double that amount. If you aimed for 15g of resin, add hardener until the total reads 30g.
Stir slowly and thoroughly for at least two to three minutes. Scrape the sides and bottom of the cup as you stir. Slow stirring is critical — fast stirring introduces bubbles that are hard to remove. You will know the mixture is ready when it looks clear and uniform, with no streaks or swirls.
Step 3: Pour
Pour the mixed resin into the coaster mold in a thin stream. Start in the center and let the resin spread naturally. Fill the mold to about 80 percent full — resin shrinks slightly as it cures, so a full mold gives you a flush finish.
After pouring, spray a fine mist of isopropyl alcohol over the surface. You will see bubbles pop immediately. If stubborn bubbles remain, use a toothpick to gently nudge them to the surface.
Step 4: Wait and Demold
Cover the mold with your dust cover and leave it alone for 12 to 24 hours. Do not touch it, do not move it, do not check it every hour. Resin needs uninterrupted time to cure. After 24 hours, gently flex the silicone mold. The coaster should pop out easily. If it feels flexible or sticky, let it cure for another 12 hours.
Once demolded, inspect the bottom edge. If there is a sharp lip where the resin leveled itself, sand it lightly with fine-grit sandpaper (400 grit or higher) wet. That means dipping the sandpaper in water first to keep the dust down.
Project 2: A Small Serving Tray
Once you are comfortable with coasters, a serving tray is the natural next step. The technique is the same, but you will work with a larger surface area and have more room for creative effects.
Choosing a Mold
Look for a silicone tray mold with a flat bottom and low sides. Rectangular or oval shapes work well. Avoid molds with intricate details in the bottom — they can trap bubbles and are harder to demold. A simple shape lets the clear, glossy finish speak for itself.
Adding Color and Effects
This is where your pigments come in. For a first tray, try a simple technique: pour a thin layer of clear resin first, then add a few drops of alcohol ink in two complementary colors. Swirl them gently with a toothpick. Do not overmix — the best effects come from partial blending, not a uniform color.
You can also embed small objects in the tray. Dried flowers, gold leaf flakes, or small seashells look beautiful suspended in clear resin. Place them in the mold before pouring, or arrange them after the first thin layer has been poured. If objects float, pour in layers — let the first layer cure enough to hold them in place, then add the top layer.
Layering for Depth
For a professional look, pour in two or three thin layers rather than one thick pour. Each layer should be about one-eighth of an inch thick. Let each layer cure for four to six hours before adding the next. This technique prevents heat buildup (resin generates heat as it cures, and thick pours can overheat and crack) and gives you the ability to embed objects at different depths.
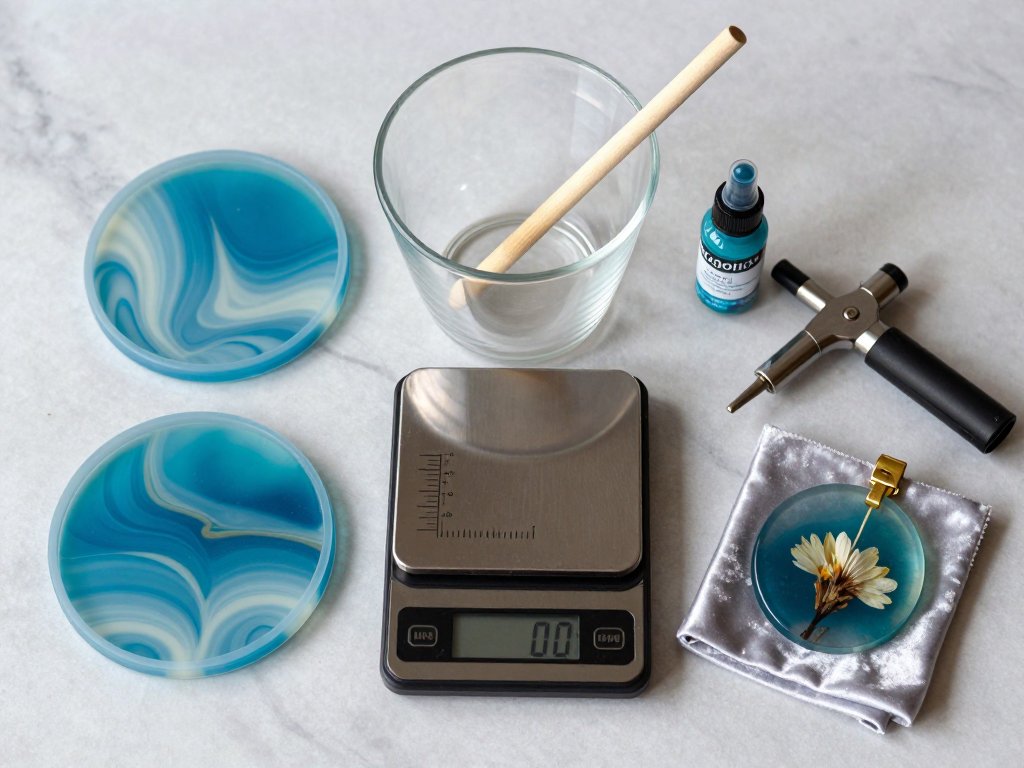
Project 3: Resin Pendant Jewelry
Resin jewelry is one of the most popular applications for beginners, and for good reason — it uses very little material, the pieces are quick to make, and the results make wonderful gifts. A pendant requires about 5 grams of resin, so a single kit can make dozens of pieces.
What You Will Need
In addition to your basic resin supplies, pick up a pendant mold. These are small, shallow molds shaped like circles, ovals, rectangles, or teardrops. A set of six to ten pendant molds costs about eight dollars. You will also need pendant bails — small metal findings that glue onto the back of the cured pendant so you can thread a chain through. These cost about two dollars for a pack of ten.
The Process
Mix a small batch of resin — 10 grams total is plenty for two or three pendants. Pour a thin layer into the pendant mold, filling it about one-third full. Add your decorative elements: a tiny dried flower, a swirl of mica powder, or a few specks of gold leaf. Then pour the remaining resin to fill the mold.
After curing, pop the pendant out of the mold. Sand the back lightly with wet 400-grit sandpaper to create a rough surface for the glue. Apply a small drop of jewelry-grade epoxy glue to the bail and press it onto the back of the pendant. Hold it for 30 seconds, then let it sit for another 24 hours before wearing.
Common Beginner Mistakes and How to Avoid Them
Let me save you the headaches I went through. These are the five most common mistakes beginners make, and exactly how to avoid each one.
1. Not Measuring Accurately
This is the number one cause of resin that never cures. If your resin-to-hardener ratio is off by even a few percent, the chemical reaction will not complete, and you will end up with a sticky mess. Use a digital scale. Measure by weight, not volume. Check your scale battery before you start — a dying scale can give wrong readings.
2. Overmixing
Stirring too fast or too long introduces bubbles that are difficult to remove. Stir slowly and deliberately. Two to three minutes of gentle stirring is plenty. If you see bubbles forming as you stir, you are stirring too fast.
3. Pouring Too Thick
Epoxy resin generates heat as it cures. A pour thicker than one-quarter of an inch can overheat, causing the resin to crack, yellow, or even smoke. For thick pieces, pour in multiple thin layers, each no more than one-quarter inch thick.
4. Working in a Cold Room
Resin cures best at 70 to 75 degrees Fahrenheit. If your workspace is colder than 65 degrees, the resin will thicken, trap bubbles, and cure slowly or not at all. Warm your resin bottles in a bowl of warm water (not hot) for ten minutes before mixing if your workspace is cool.
5. Skipping the Dust Cover
Nothing ruins a glossy finish like dust particles that settled into the resin while it cured. Always cover your pieces with a box or tote. Even in a clean room, air carries dust that will find your resin.
How to Fix Common Problems
Even experienced resin artists have projects that go wrong. Here is how to diagnose and fix the most common issues.
Sticky or tacky surface after 24 hours: This usually means the resin-to-hardener ratio was off. If the piece is only tacky on the top surface, it may be inhibition from a silicone mold that was not fully cured. Wash the mold with warm soapy water and try again. If the entire piece is sticky, the batch is not salvageable — let it cure as best it can in a warm spot, then dispose of it.
Cloudy or milky resin: Moisture got into your resin. This happens when you work in a humid environment or when the resin bottles were not sealed properly. Warm your resin bottles before mixing to drive out any dissolved moisture. Store your resin in a cool, dry place with the lids tightly sealed.
Bubbles that will not pop: If alcohol spray and a heat gun do not work, the bubbles may be coming from air trapped in your pigments or embedded objects. Coat your decorative elements with a thin layer of resin and let it cure before embedding them. This seals the air pockets.
Yellowing over time: All epoxy resin yellows eventually, but some brands yellow faster than others. Look for resin labeled "UV-resistant" or "non-yellowing." Keep your finished pieces out of direct sunlight to prolong their clarity.
The Bottom Line
Resin art is one of those crafts where preparation matters more than talent. If you measure accurately, mix gently, pour in thin layers, and protect your pieces while they cure, you will get great results every time. The mistakes I made on my first coaster set taught me every rule I just shared with you — rules I wish I had known before I wasted that first twenty-dollar batch.
Start with coasters. They are small, forgiving, and you will use them every day. Then move to trays and jewelry as your confidence grows. By your third or fourth project, the process will feel natural, and you will start experimenting with your own color combinations and embedding ideas.
And here is the best part: once you master the basics, resin is one of the most versatile craft supplies you can own. You can make jewelry, home decor, keychains, paperweights, serving boards, and even repair broken pottery. A single set of skills opens a whole range of projects. Just keep your measurements accurate, your pours thin, and your workspace clean. You have got this.