Introduction
Let's be honest about scrapbooking for a moment. The gorgeous pages you see online took hours to make. Yours will not, and that is a good thing.
Memory keeping is a gentle practice, not a performance. You are documenting real life, not staging it for an audience.
Hold onto one simple truth: a done page beats an empty album every single time.
If your photos stay in a box, your children cannot see them. A simple page, finished tonight, changes that story.
This guide is written for the season you are in right now. There are toddlers underfoot, school runs, and a to-do list a mile long.
So we will keep everything kind, small, and doable. One page at a time, with tools you can actually manage.
By the end of this article you will know how to choose an album, what to buy, and four layout formulas that always come together.
No perfectionism is allowed here. Just you, your photos, and the stories only you can tell.
Choosing Your Album and Format
Your album is the foundation for every page you will ever make. Choose one you can live with happily for years.
The classic choice is a 12x12 album. It gives you a generous canvas and room for almost any layout idea.
Post-bound albums lie flat and you add pages at the back as you finish them. They are simple, sturdy, and beginner-friendly.
Three-ring albums let you rearrange pages anywhere in the book. You can move a finished page when you want to fix the order.
Both styles work beautifully, so choose by feel. Post-bound feels calmer and more linear; three-ring feels flexible and free.
Whatever you pick, buy matching page protectors right away. They keep your finished pages safe from little hands and snack crumbs.
Mini albums are sweet for a single trip or a baby's first year. A small 6x6 or 8x8 book feels quick to finish and deeply satisfying.
Pocket-page albums are the fastest system of all. They use pre-printed grid page protectors with clear slots sized for photos.
You simply slide photos and journaling cards into the pockets. No adhesive, no measuring, no design decisions. Done in minutes.
Many busy moms keep a pocket album for everyday life and a 12x12 book for holidays and milestones. You get the best of both worlds.
Look for papers labeled acid-free and lignin-free. These protect your precious photos from yellowing and fading over time.
Most scrapbook brands print these claims clearly on the package. When you are unsure, check the label before you buy.
Your album is a promise to your future self and your family. Make it one you will genuinely enjoy opening again and again.
The Minimal Starter Supply List
You do not need a dedicated craft room or a wall of supplies. Here is the honest starter list, and nothing more.
What to buy first
- One 12x12 album with a pack of matching page protectors.
- Two or three patterned paper packs in colors you already love.
- A pack of plain cardstock in white, cream, and one or two accent colors.
- A tape runner adhesive for sticking paper to paper smoothly.
- Photo squares or glue dots for photos and small delicate pieces.
- A paper trimmer so your cuts come out straight and even.
- One good journaling pen that will not bleed through your paper.
A corner rounder is optional but lovely. It softens the corners of photos and mats for a polished, finished look.
That is the whole list. You can build dozens of beautiful pages with exactly these tools and nothing else.
What NOT to buy at first
Skip die-cutting machines until you know you love the hobby. They are expensive and demand serious counter space.
Do not buy every embellishment in the store on day one. Stickers and washi tape can wait until page two.
Avoid themed paper packs for every upcoming holiday. You will rarely use more than one sheet from each.
Skip the fancy pen collections until journaling becomes a habit. A single reliable pen is enough to begin.
Resist buying supplies for the crafter you hope to become someday. Buy for the busy mom you are right now.
Start small, actually use what you own, and add new tools only when a real page truly needs them.
Four Layout Formulas That Always Work
Designing a page from a blank sheet feels intimidating at first. These four formulas remove all the guesswork for you.
Each one has been proven by scrapbookers for decades. Choose one that fits your photos and simply follow the steps.
Formula One: The One-Photo Feature Page
This is the classic layout for one favorite photo. A single large image carries the whole design with quiet confidence.
- Choose one photo you adore and print it large, roughly 6x8 or bigger.
- Trim a sheet of patterned paper to 12x12 for your background.
- Cut a cardstock mat about one inch larger than the photo on every side.
- Adhere the photo to the mat, then attach the mat to the background.
- Add a title near the top and a few journaling lines near the bottom.
The large photo anchors the eye immediately. Nothing competes with the memory itself, and that is exactly right.
Formula Two: The Three or Four Photo Grid
This layout is perfect for an event with several good shots. The tidy grid brings calm order to many images.
- Pick three or four photos that tell one small, connected story.
- Crop them all to the same size, such as 4x6 or 3x4 inches.
- Trim each photo slightly smaller so every one can wear an even mat.
- Arrange them in a neat row or block on your 12x12 background.
- Leave equal gaps between the photos so the grid reads clearly.
- Add a short title and your journaling in one open corner.
Matching sizes let the eye travel smoothly across the page. The grid always looks intentional, even on your first try.
Formula Three: The Photo Plus Journaling Card Page
This layout gives your written words equal weight with your pictures. It is perfect for storytelling families.
- Choose one or two photos and print them a little smaller than usual.
- Select a 4x6 journaling card in a pattern or color that coordinates.
- Mat the photos and the card alike so they feel like one set.
- Place the photos on one side of the page and the card on the other.
- Write your story on the card in your own handwriting.
The pretty card becomes a home for your words. Your story finally gets the space and honor it deserves.
Formula Four: The 12x12 Pocket Page
This is the speed layout for your busiest seasons. The page protector itself does the design work for you.
- Choose a pocket page protector with nine or twelve slots.
- Sort the photos from your event and slide one into each slot.
- Fill a few slots with patterned journaling cards for color and rhythm.
- Tuck a written story behind one photo so the card peeks out.
- Write the date on a small card and slip it into a front pocket.
You will use no adhesive at all. An entire month of memories can be finished in one quiet evening.
These four formulas cover most of real life. Birthday parties, beach trips, first days of school, and ordinary Tuesdays.
Simple Design Principles in Plain Language
You do not need art school to make beautiful pages. A handful of simple habits will make every layout look polished.
Pull colors from the photo. Choose papers that echo a color already present in your picture.
If your daughter wears a red dress in the photo, a whisper of red in your paper ties the whole page together.
White space is your friend. Let generous areas of the background stay empty so the eye can rest.
Overcrowded pages feel frantic and hard to read. Calm pages feel like memory keeping should feel.
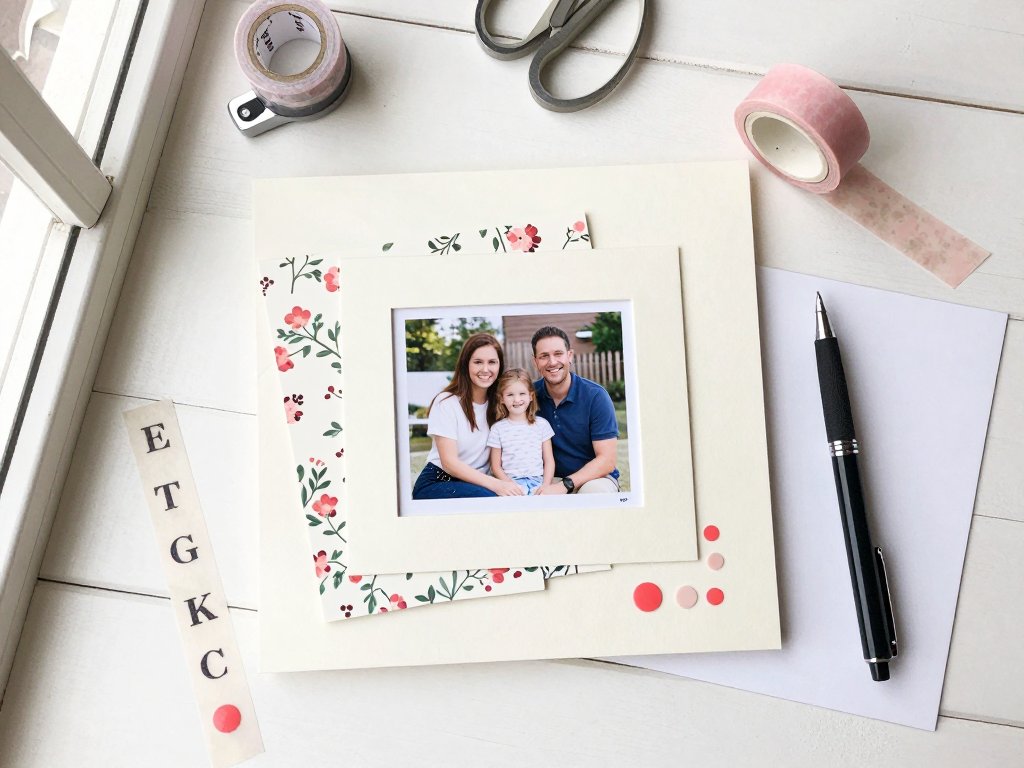
Repeat one color or shape. Use the same shade twice, or echo a circle in your title dots and your enamel dots.
Repetition quietly unifies a page. It reads as deliberate design even when you chose it by pure instinct.
Align your edges. Line up your photos and mats along a straight edge, even if you never touch a ruler.
Staggering is fine when it is deliberate. Crooked by accident simply reads as messy.
Odd numbers look balanced. Three photos or five accent dots feel more pleasing to the eye than two or four.
Florists and photographers have used this trick for ages. Odd counts simply look right, and now you know why.
Keep these five ideas in your pocket. Check your finished page against them before you declare it done.
Then stop. A page that follows the rules is finished, while a page that chases perfection never is.
Titles and Lettering
Every page deserves a title. It names the moment so future readers understand the page at a single glance.
You have easy lettering options that need no special machines. Sticker letters, chipboard, die-cut words, or your own handwriting.
Sticker alphabets come in every size, color, and style imaginable. They are forgiving because you can peel and reposition them.
Chipboard letters, often sold as Thickers, are puffy and dimensional. They add lovely texture with almost no effort.
Die-cut words arrive ready to use in one piece. A whole title like First Day or Beach Trip is already spelled for you.
Handwriting is always welcome in scrapbooking. Your own letters carry your voice in a way store-bought fonts cannot.
Where should the title live? Choose the top, the bottom, or a corner, and pick exactly one spot.
Top titles frame the page like a newspaper headline. Bottom titles anchor it like a quiet caption.
Corner titles feel relaxed and modern. They balance a photo cluster placed on the opposite side of the page.
Size your title so it can be read from across the room. Bigger than you think is usually exactly right.
As a rule of thumb, aim for letters one to two inches tall on a 12x12 page.
If a letter sits slightly crooked, that is part of handmade charm. Perfection was never the goal here.
Spell the words, stick them down, and let the memory carry the rest of the design.
Journaling That Fits Real Life
Here is the secret of this whole hobby: photos fade in memory, but written words last forever.
Years from now, your children and grandchildren will read your journaling. It matters more than any embellishment you could buy.
Future readers will not know who is in the photo or why that day mattered. Only you can tell them.
Journaling does not need to be poetic or profound. A few honest sentences are a genuine gift to your family.
Feeling stuck on what to write? Answer these three simple prompts and your journaling is done.
- Who is in this photo, and how old were they on this day?
- What was happening, and where were you all?
- What do you want to remember about this moment in ten years?
Three answered prompts make a complete story. That is all journaling really asks of you.
Handwritten journaling feels personal and warm. Your children will treasure seeing your actual handwriting on the page.
Typed journaling is neat, fast, and easy to edit. Print it on plain cardstock, trim it, and adhere it down.
You can do both as the mood strikes. There is no wrong way to leave your words for the people you love.
Short on space? Tuck a journaling card behind a photo so part of it peeks out from the edge.
Write your story on the card, slide it under the photo, and adhere both pieces in place.
The eye sees a hint of pattern, and readers lift the photo corner to discover your words. It is a delightful little moment.
Date everything you journal. Future you will thank present you a thousand times over.
Embellishments with Restraint
Embellishments are the fun part of scrapbooking, and the easiest place to overdo it. Restraint is the real trick.
A little washi tape adds color and pattern without bulk. It is cheap, repositionable, and very forgiving for beginners.
Enamel dots are flat, shiny circles in every color you can imagine. They make wonderful accents and sweet photo corners.
Stickers have grown up in recent years. Look for elegant florals, simple shapes, and refined word stickers.
Brads are tiny metal fasteners that add a hardware touch. Push them through paper for instant, sturdy interest.
Here is the simple rule that saves every page you will ever make: the three item rule.
Choose no more than three types of embellishment for one layout. That is your entire decorating budget.
Two enamel dots, one strip of washi tape, and a single small sticker. Beautiful, calm, and complete.
When you are in doubt, leave it out. You can always add more later, but removing is far harder.
Remember why you started this page. The memory is the star, and the embellishments are only the stage crew.
Making It Work with Kids Around and Little Time
You are a mom, so your craft time arrives in fragments rather than free afternoons. Plan for that reality from the start.
Try fifteen minute sessions. Set a timer and complete one small task, like matting photos, writing journaling, or choosing paper.
Small steps compound beautifully. Three short sessions can finish an entire page by the end of the week.
Hold a monthly batch cropping party. Once a month, print and crop every photo from the past few weeks all at once.
Store the finished crops in labeled sleeves sorted by event. Assembly later becomes pure joy with zero prep work.
Schedule a monthly scrapbook date with yourself. Put it on the family calendar like a doctor's appointment.
One hour after bedtime, once a month, keeps you current without guilt during all the weeks in between.
Let your kids add their own pages. Give them a small album of their own, some paper, and child-safe scissors.
Their crooked pages and scribbled captions will become your favorite keepsakes of all. Trust this completely.
Store your supplies in a rolling cart. Wheel it out at nap time and tuck it away before dinner.
A cart protects your materials from little hands and protects your sanity from permanent clutter.
You do not need a dedicated craft room. You need a rolling cart and a door that closes.
Finishing: Label It, Store It, Keep Going
A finished page deserves a finished album. A few simple closing habits will make everything you make last.
Label the album spine. Write the years or your child's name so you can find the right book on the shelf.
A permanent marker or a neat label sticker on the spine edge is all it takes.
Store albums upright on a shelf, away from direct sunlight, heat vents, and damp basements.
Sunlight fades photos and papers over time. A cool, dry, shaded spot keeps your colors true for decades.
Now let us talk about falling behind, because every scrapbooker does it. It is completely, utterly normal.
You will look at a pile of photos from four months ago and feel the weight of all those unmade pages.
Here is the permission you need right now: skip backward, and go forward.
Do not try to catch up on everything you missed. Start fresh with today, or with last week.
Scrap the memories that still feel alive and vivid. Let the rest go without a single apology.
An album that begins this month is better than an album that begins never. Say it until you believe it.
One page at a time, one small story at a time. That is how every beautiful album in the world gets made.
Your family does not need perfect pages. They need your photos, your words, and your hand on the paper.
Close the album, set it on the shelf, and begin the next page when you are ready. Welcome to the practice of memory keeping.
