Introduction
It happens every July, right around week three. The pool is fun for exactly an hour, the tablet battery dies, and suddenly you hear the three words every parent dreads: "I'm so bored."
You are not alone. Screen-free summer activities are having a real moment this year, and for good reason. Kids need hands-on time — time where their fingers make things, their brains solve little problems, and their imaginations do the heavy lifting instead of a glowing rectangle.
The good news? You do not need a Pinterest-perfect craft room or a bin of specialty supplies. Every project in this list uses things you probably already own: cardboard boxes, popsicle sticks, paper plates, food coloring, and the treasures your kids collect on nature walks.
Here is exactly what you need to survive (and enjoy) the rest of summer, one craft at a time.
Before You Start: The Screen-Free Craft Basics
A little planning makes every project smoother. These five habits keep crafting calm instead of chaotic:
- Designate a craft tray. A plastic tray or baking sheet catches glitter, glue, and paint spills. It also gives your child a defined workspace they can clean up themselves.
- Pre-cut what you can. For younger kids, cut cardboard, paper, and fabric ahead of time. Kids aged 4 to 6 can handle the craft itself; scissors are the tricky part.
- Cover the table. A cheap vinyl tablecloth or opened trash bag saves the table and your sanity. Lay it out before you start, not after the first paint spill.
- Keep wipes and a trash bowl nearby. A bowl for scraps means fewer trips to the bin and less mess tracked through the house.
- Let go of the finished product. The goal is the process. If the suncatcher is lopsided and the rock looks more like a blob than a ladybug, that is a successful craft. It was made by small hands, and that is the point.
Each project below includes a supply list, a time estimate, and a suggested age range. Most take under an hour from setup to cleanup.
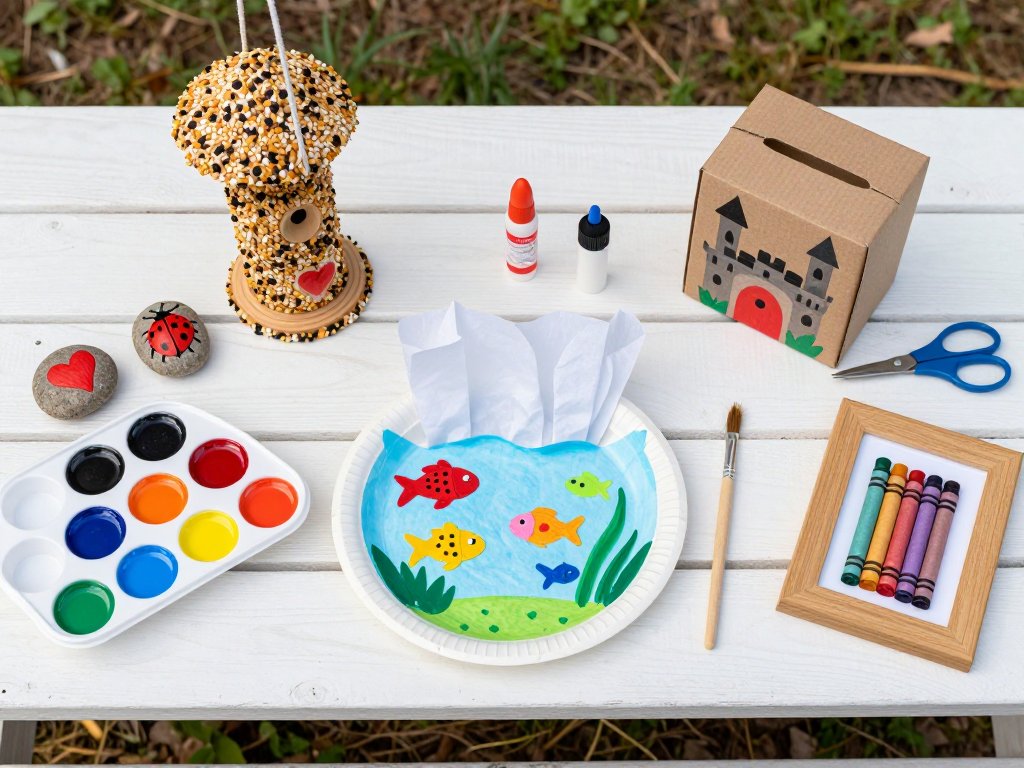
Project 1: Painted Kindness Rocks
This is the perfect first project because it is almost free, completely mess-friendly, and doubles as a neighborhood kindness activity.
What you'll need: smooth rocks (collect them on a walk or buy a bag at the dollar store), acrylic paint or washable paint, paintbrushes, and a clear sealer (optional but recommended if they will live outside).
How to make them:
- Wash and dry the rocks so the paint sticks.
- Paint a base color and let it dry for 20 minutes.
- Add designs: ladybugs, hearts, flowers, bees, or simple smiley faces.
- Once dry, seal with a thin coat of clear sealer.
- Hide them around the neighborhood or leave one on a neighbor's porch with a note that says "You matter."
Kids love the idea that a stranger will find their art. It turns a craft into a small act of kindness, and it gives them a reason to check on their rocks all week.
Project 2: Cardboard Box Town
Before you recycle that big delivery box, look at it again. To a kid, it is a castle, a rocket ship, a store, or a car — all in the same afternoon.
What you'll need: one large cardboard box (or several), markers or crayons, child-safe scissors, tape, and any extras like paper plates (steering wheels), bottle caps (buttons), or fabric scraps.
How to build it:
- Cut a door and windows in the box (an adult should do the cutting).
- Let your child decorate the outside with markers — bricks, flowers, rocket flames, or a storefront sign.
- Add details: a paper plate steering wheel, a "doorbell" drawn in marker, or a mailbox taped to the side.
- Place it in a corner of the living room or on the porch and let the story unfold.
This project keeps kids busy for days, not just one afternoon. The box becomes a fort, then a shop, then a spaceship. All you did was hand them a marker.
Project 3: Pressed Flower Suncatchers
This one gets kids outside collecting, then brings the outside in. It is delicate enough to feel special and simple enough for little hands.
What you'll need: fresh flowers, leaves, and grass (collected on a walk), clear contact paper or clear packing tape, a paper plate or cardstock frame, and scissors.
How to make them:
- Press the flowers between the pages of a heavy book for a few hours, or use them fresh if they are flat enough.
- Cut a frame shape from cardstock — a circle, a heart, or a sun.
- Peel a sheet of contact paper and stick it to the back of the frame, sticky side up.
- Arrange the flowers and leaves on the sticky surface.
- Cover with a second sheet of contact paper and trim the edges.
- Tape the suncatcher to a sunny window and watch the light glow through the petals.
This project teaches patience and observation. Kids start noticing the shape of leaves and the colors of petals they walked past a hundred times before.
Project 4: Popsicle Stick Bird Feeders
A craft that feeds real birds? That is instant magic for a child. This project takes about 20 minutes and creates something the whole family can watch from the kitchen window.
What you'll need: popsicle sticks (about 10 per feeder), craft glue or a low-temp glue gun (adult supervision), string, peanut butter or honey, and birdseed.
How to make it:
- Glue four popsicle sticks into a square frame. Let it dry.
- Glue more sticks across the back to make a flat base.
- Attach a string loop to the top for hanging.
- Spread peanut butter or honey over the frame.
- Press the frame into a shallow dish of birdseed until it is coated.
- Hang it from a tree branch or porch hook.
Check the feeder together each morning and count the birds. It turns a 20-minute craft into a week of quiet observation — the kind of screen-free activity that keeps on giving.
Project 5: Ice Tie-Dye
Tie-dye without the dye bottles, the mess, and the staining. Ice tie-dye is the coolest (literally) way to make a summer shirt, and kids are fascinated by watching the ice melt and spread color.
What you'll need: a white cotton shirt (or socks, tote bag, or pillowcase), ice cubes (a couple of trays), powdered dye or food coloring, and a wire rack set over a tray or bucket.
How to make it:
- Wet the shirt and wring it out. Twist or scrunch it into a compact bundle.
- Place it on the wire rack over the tray.
- Cover the shirt completely with ice cubes.
- Sprinkle powdered dye or drop food coloring over the ice.
- Wait for the ice to melt completely (1 to 3 hours). The slower it melts, the more defined the pattern.
- Rinse the shirt in cold water until the water runs clear, then wash and dry.
Every shirt comes out different, which means no one can be disappointed — it is science and art at the same time. Do this outside or over a bathtub to keep the mess contained.
Project 6: Homemade Sidewalk Chalk Paint
Sidewalk chalk is great until it crumbles into dust. Homemade chalk paint is cheaper, washes off with a hose, and goes on like finger paint — kids can make enormous masterpieces on the driveway.
What you'll need: cornstarch, water, food coloring, small bowls or a muffin tin, and paintbrushes or sponge brushes.
How to make it:
- Mix equal parts cornstarch and water in each bowl (about half a cup each).
- Stir until smooth, adding a little more water if it is too thick.
- Add several drops of food coloring to each bowl and stir.
- Paint directly on the driveway, sidewalk, or patio.
- Let the sun dry it into a chalky finish, then hose it off at the end of the day.
Mix the colors in a muffin tin for an easy paint palette. Kids can paint hopscotch boards, giant flowers, underwater scenes, or a "welcome home" message for Dad's car.
Project 7: Seashell Wind Chimes
If your family made a beach trip this summer, you already have the supplies. If not, a bag of shells from the craft store costs about two dollars and works just as well.
What you'll need: shells with small holes (or a drill/needle for adult prep), a sturdy stick or embroidery hoop, string or fishing line, and beads (optional).
How to make it:
- Tie a piece of string to each shell. If your shells lack holes, glue a small bead to the top and tie around it.
- Tie 5 to 7 strings along the stick at different lengths so the shells hang at staggered heights.
- Add beads between shells for extra color and clacking sound.
- Tie a longer string at the top of the stick for hanging.
- Hang it on the porch and listen.
This project is a keepsake as much as a craft. Every time the wind chimes sing, your child remembers the beach day, the shell hunt, and the wave that soaked their shoes.
Project 8: Glow-in-the-Dark Fairy Jars
This is the after-dinner craft that turns bedtime into an adventure. It takes five minutes of setup and rewards you with weeks of glowing jars on the nightstand.
What you'll need: a clean glass jar, glow sticks (the bracelet or necklace kind), and scissors. That is it.
How to make it:
- Snap a glow stick to activate it. (An adult should do the snapping and cutting.)
- Cut the glow stick open and pour the glowing liquid into the jar. The liquid is safe to handle but should not be ingested, so keep it out of little mouths.
- Seal the jar with its lid, or leave it open for a brighter glow.
- Charge it under a bright light for a minute, then watch it glow in the dark.
Kids can shake the jar to make the glow swirl, which is endlessly entertaining. Charge it during dinner, and it is ready for story time. This is one of those crafts that feels like magic but costs about a dollar.
Project 9: Paper Plate Aquariums
Hot days call for an indoor craft that is cool, calm, and quiet. Paper plate aquariums take about 30 minutes and use almost nothing.
What you'll need: two paper plates, blue food coloring or blue paint, clear plastic wrap, glue, and construction paper for fish and seaweed.
How to make it:
- Color or paint the inside of one plate blue for the water.
- Cut fish, seaweed, and bubbles from construction paper.
- Glue the sea creatures onto the blue plate.
- Cut the center out of the second plate, leaving a rim.
- Cover the hole with plastic wrap and tape it on the back.
- Glue the rimmed plate on top of the blue plate, plastic wrap side up, like a window into the ocean.
Hold the finished aquarium up to the light and the plastic wrap gives it a watery shimmer. Add glitter for a magical touch — just keep the lid on that glitter jar.
Project 10: Leaf Print Nature Banners
This project combines a nature walk with printing, and it teaches kids that leaves have secret patterns hiding on their undersides.
What you'll need: fresh leaves in different shapes and sizes, washable paint, a paintbrush or sponge, paper or a long strip of craft paper, and a flat surface to work on.
How to make it:
- Collect leaves on a walk — look for variety in shape and size.
- Paint the underside of a leaf (the side with the raised veins) with a thin coat of paint.
- Press the leaf, painted side down, onto the paper.
- Press gently with a paper towel or your fingers, then lift carefully.
- Repeat with different leaves and colors to build a pattern.
Use a long strip of craft paper and make a banner to hang across the porch or a bedroom wall. Each leaf prints differently, and kids love discovering the vein patterns they can see up close.
Project 11: Salt Dough Beach Ornaments
Salt dough is the classic three-ingredient craft, and it makes perfect summer keepsakes: handprint ornaments, starfish, sand dollars, and shells.
What you'll need: 2 cups flour, 1 cup salt, 1 cup warm water, a rolling pin, cookie cutters or a butter knife, a straw (for hanging holes), and paint (once dry).
How to make it:
- Mix the flour, salt, and water into a smooth dough. Knead for a few minutes.
- Roll it out to about a quarter-inch thick.
- Cut shapes with cookie cutters, or press in a small handprint.
- Poke a hole near the top with a straw.
- Bake at 250°F for 2 to 3 hours, or air-dry for a couple of days.
- Paint the cooled ornaments and thread ribbon through the holes.
A handprint ornament makes a wonderful gift for grandparents — and a sweet way to mark how small those hands were this summer. This one is worth the flour dust.
Project 12: DIY Bubble Wands
End the summer the way it should be ended: outside, chasing bubbles. Homemade bubble wands are quick to make, and kids can test different shapes to see which makes the biggest bubbles.
What you'll need: pipe cleaners, a stick or dowel (optional), and bubble solution (store-bought or a mix of 6 cups water, 1 cup dish soap, and 1/4 cup corn syrup).
How to make it:
- Bend a pipe cleaner into a circle, heart, star, or triangle, leaving a tail to hold.
- Twist the tail around a stick or around itself to make a handle.
- Dip the shape into bubble solution and blow — or run with it held high to let the wind do the work.
- Experiment with different shapes and sizes to see which makes the biggest bubble.
This project is deceptively simple, but the experimenting part keeps kids busy for a surprisingly long time. Make a handful of wands and let siblings test their theories side by side.
How to Keep the Momentum Going
You now have twelve projects, but the real trick is making screen-free time a habit rather than a one-day event. Here is how to keep the momentum going all summer:
- Make a craft jar. Write each project idea on a popsicle stick or slip of paper and drop it in a jar. When boredom strikes, your child picks one — no arguing over what to do.
- Rotate supplies. Keep the craft tray stocked but change the extras weekly. One week it is shells, the next it is bottle caps. Fresh materials spark fresh ideas.
- Set a "creation hour." Pick a daily time — after lunch or before dinner — when screens are off and hands are busy. Ten minutes of your attention goes a long way.
- Display the work. Hang the banners, line up the rocks on the windowsill, and use the wind chimes. When kids see their work valued, they want to make more.
- Invite a friend. Crafts are twice as fun with a buddy, and it is a built-in playdate activity that needs no screens and no planning.
Looking for even more ideas? Our Summer Crafts for Kids: Paper and Popsicle Fun guide has ten more projects built from the two most classic craft supplies.
And if your crew loves building things, the mini glass garden terrarium project is a lovely way to bring a bit of summer indoors.
Conclusion
The best screen-free summer crafts are not the ones that win awards at the county fair. They are the ones that fill an afternoon, make a mess, and create a memory.
Start with one project this week. Pick the rocks or the bird feeder — the ones with the shortest supply lists — and let your child lead. You will probably find that the "bored" complaints disappear the moment their hands get busy.
And when the craft is finished, crooked edges and all, remember this: you did not just keep them busy. You showed them that the world is full of things to make, and that they are capable of making them. That is a pretty good summer, one craft at a time.