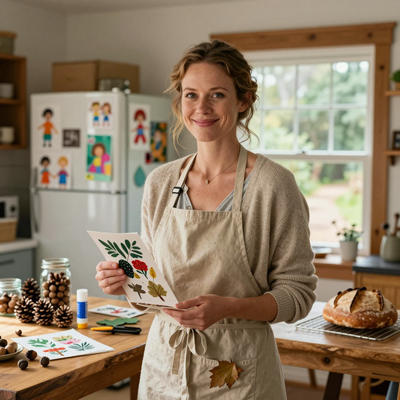
Introduction
I remember sitting on my grandmother's back porch, the summer I turned eight, clutching a stubby pencil and a sheet of printer paper that had already seen the back side of a school worksheet.
She had a garden that spilled over itself — zinnias as tall as me, marigolds that smelled like sunshine and dust, and a patch of lavender I wasn't allowed to touch because it was "for drying." I wanted to capture it all.
I wanted to make the flowers mine.
So I drew them. Badly. The zinnias looked like lopsided lollipops. The marigolds were orange scribbles.
The lavender came out as purple smudges that my grandmother kindly described as "abstract." But here's the thing nobody tells you about drawing flowers when you're eight, or twenty-eight, or sixty-eight: the flower doesn't care if you get it right.
It just sits there, being a flower, patient as the sun. And that, I've come to realize, is the greatest gift a beginner could ask for.
This article is for the person who hasn't picked up a pencil to draw since grade school.
The person who thinks they "can't draw a straight line." The person who bought a sketchbook during a hopeful moment and has been staring at its blank first page for months.
I see you. I was you. And I promise you — you can learn to sketch simple flowers and nature in a single afternoon, with materials you already own, using techniques so gentle they barely feel like learning.
Why Sketching Flowers Is Perfect for Beginners
When we think about drawing, our minds often conjure intimidating images: photorealistic portraits, sprawling cityscapes, the kind of anatomical sketches that make your wrist ache just looking at them. But flowers offer something different. They offer permission to be imperfect.
Think about it. No two flowers in a garden are identical. One petal curls left, another flops right.
A daisy might have seventeen petals on one side and twelve on the other. Nature doesn't do symmetry the way geometry textbooks do, and that means your hand doesn't have to, either.
A slightly wobbly line isn't a mistake — it's character. A lopsided tulip isn't wrong — it's a tulip that grew in the shade.
Flowers are also remarkably forgiving subjects because we know what they look like. We've seen them our whole lives — in gardens, in vases, on wrapping paper and wallpaper and grandmotherly tea towels.
Your brain already has a mental library of flower shapes. All we're doing here is teaching your hand how to talk to that library.
There's another layer to this, too, one that surprised me when I started sketching seriously as an adult.
Drawing flowers is an act of slowing down. In a world of notifications and screen glare and inbox zero, sitting with a single bloom and tracing its shape forces a kind of mindfulness that no meditation app can replicate.
You notice things you never saw before: the way light filters through a petal's thin edge, the tiny hairs on a stem, the gradient of color from base to tip.
You stop rushing. You start seeing. And that, honestly, is worth more than any finished drawing.
Materials: You Already Have Everything You Need
Let me save you from a common beginner trap: the urge to buy all the nice things before you've even made a mark.
I've been there. I have a drawer full of expensive blending stumps, fancy erasers shaped like pens, and a set of graphite pencils graded all the way from 9H to 9B that I used exactly once before realizing that a standard No.
2 pencil does 90% of what I need.
Here is your complete shopping list for this tutorial:
- A pencil. Any pencil. A No. 2 school pencil. A mechanical pencil from the bottom of your junk drawer. It all works.
- An eraser. The pink block eraser on the end of your pencil is fine. A white plastic eraser is better. A kneaded eraser — lovely if you have one, but absolutely not required.
- Paper. Printer paper. Notebook paper. The back of an envelope. If you want to treat yourself, grab a spiral-bound sketchbook from any craft store.
That's it. That's the entire list. No expensive art supplies. No special pens or watercolor sets or blending tools. Just you, a pencil, and something to draw on.
The only thing I would gently suggest, if you have access to one, is a flower — real or a good photograph. Drawing from life is different from drawing from imagination. It teaches your eye to follow the truth of a shape rather than your brain's simplified memory of it.
The Basic Shapes Technique
Here's a secret that professional artists know and beginners rarely do: every complex drawing — every landscape, every portrait, every still life — starts with simple shapes. Circles. Ovals. Triangles. Lines. That's the entire vocabulary of drawing. Everything else is just a conversation between those shapes.
Flowers are particularly cooperative with this approach because they're naturally geometric. A daisy is a circle with lines radiating outward.
A tulip is an oval with a stem. A rose, even in its intricate complexity, is a spiral nested inside concentric curves.
Once you train your eye to see these basic shapes, you'll wonder why drawing ever seemed hard.
Let's practice the foundational shapes you'll need:
- Circles and ovals — the center of most flowers, the bloom shape of buds, the curves of petals
- Lines and curves — stems, veins, the graceful arcs of petals
- Spirals — the heart of a rose, the unfurling of a fern frond
- Teardrops — individual petals on many flower types
Don't worry if your circles are wobbly. Don't worry if your lines curve when you want them straight.
We'll address those wobbles later. For now, just make some marks on paper. Draw five circles, some big and some small.
Draw ten straight-ish lines. Draw a spiral that starts tight and winds outward. This isn't practice — it's a warm-up.
Like stretching before a walk.
Every flower in this tutorial is built from exactly these shapes. If you can draw a circle, you can draw a daisy.
If you can draw an oval, you can draw a tulip. If you can draw a spiral, you can draw a rose.
The gap between "I can draw shapes" and "I can draw flowers" is smaller than you think.
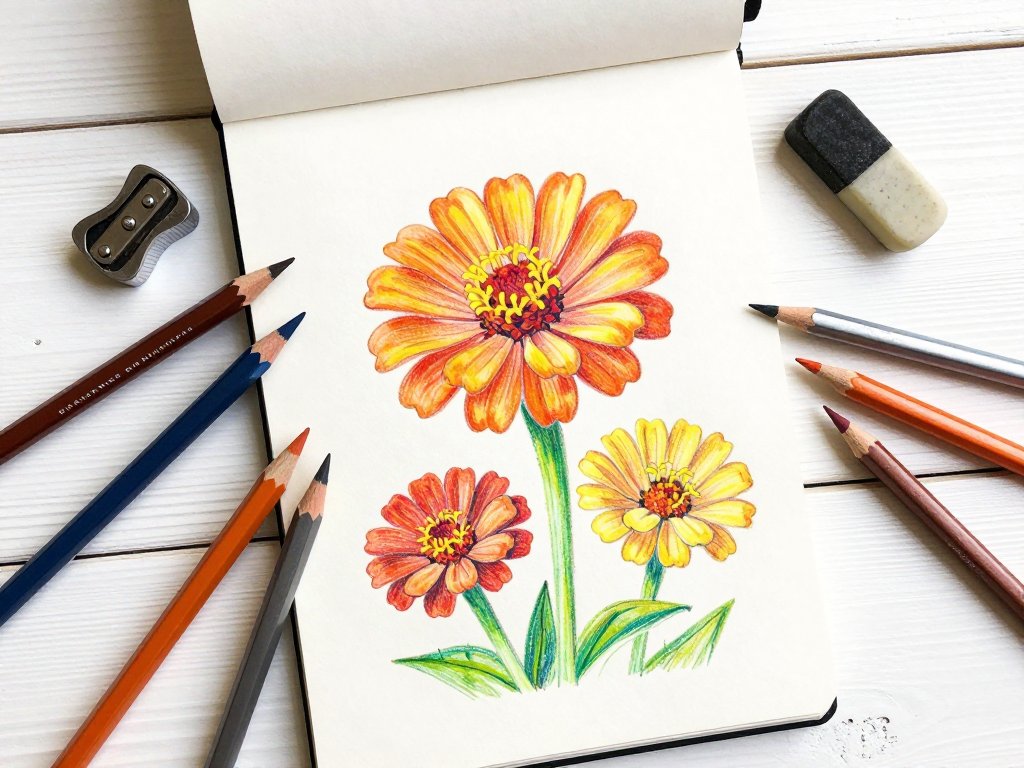
Step by Step: Five Simple Flowers
1. The Daisy
The daisy is the perfect flower for a beginner. It's essentially a circle with spokes, and if you can draw that, you've drawn a daisy. Here's how:
Step 1: Draw a small circle in the center of your page — this is the flower's eye, the central disk where all the petals attach.
Step 2: Around this circle, begin drawing small oval shapes radiating outward. Don't worry about making them all the same size. Daisies are wonderfully irregular. Some petals are longer, some shorter, some overlap, some stand apart.
Step 3: Continue adding petals until you've circled the entire center. Aim for about twelve to fifteen petals, but don't count. The moment it looks like a daisy to you, it's done.
Step 4: Add a stem — a gentle curve downward — and two or three leaves. For the leaves, draw an elongated oval shape with a pointed tip, then add a single line down the center for the vein.
Step 5: Shade the center with tiny dots or light cross-hatching. This gives the daisy's eye texture and depth.
The beauty of the daisy is that even your first attempt will look recognizably like a flower. It's almost impossible to get wrong. And that early success — that moment of looking at something you drew and thinking, "Hey, that's actually a flower" — is rocket fuel for your motivation.
2. The Tulip
Tulips have a more distinctive silhouette than daisies, which actually makes them easier once you see the basic shape. A tulip is essentially an egg sitting on top of a stem.
Step 1: Draw a tall, narrow oval — think of an egg standing on its narrow end. This is the overall shape of the tulip bud.
Step 2: At the top of the oval, draw a gentle U-shaped indentation. This is where the three petals of the tulip separate at the top.
Step 3: Draw the three visible petals. A tulip has six petals in total, but from most angles you'll see three — one in the center and one on each side. Each petal is a rounded teardrop shape that overlaps its neighbor.
Step 4: Add a long, graceful stem. Tulip stems are famously elegant, curving slightly as they rise from the ground.
Step 5: Add a large, broad leaf at the base of the stem. Tulip leaves are wide, with a slight fold down the center that you can suggest with a gentle curved line.
3. The Rose (Simplified)
I know what you're thinking. "A rose? For a beginner?" Yes. But I'm not asking you to draw a photorealistic rose with forty layered petals and intricate shadowing.
I'm asking you to draw a simplified rose — the kind that looks like a rose even though it's made of basic shapes.
And you can absolutely do this.
Step 1: Draw a small spiral in the center of where your rose will be. Start from the inside and wind outward, making the loops wider as you go. Don't be too precise — a loose spiral looks more organic than a perfect one.
Step 2: Around the spiral, draw a series of overlapping U-shapes. Each U represents a petal wrapping around the center. Start with small U-shapes close to the spiral, then make them wider as you move outward.
Step 3: Continue adding layers of petals. The outer petals should be wider and more open, curling slightly at the edges. You can suggest this curl by adding a small line at the edge of each petal.
Step 4: Draw the sepals — the small green leaf-like structures at the base of the bloom. These are small pointed shapes that cup the bottom of the rose.
Step 5: Add a sturdy stem with thorns (tiny triangles) and compound leaves — roses have groups of five to seven small oval leaflets on a single stem.
4. The Sunflower
Sunflowers are the extroverts of the flower world — big, bold, and unapologetically dramatic. They're also surprisingly easy to draw because their structure is so clear.
Step 1: Draw a large circle in the center of your page. This will be the dark center disk of the sunflower, and it should be much larger than the daisy's center — about the size of a golf ball or bigger.
Step 2: Begin adding petals around the edge. Sunflower petals are long and somewhat rectangular, with rounded tips. Unlike daisy petals, which are oval, sunflower petals are more like narrow rectangles with soft corners.
Step 3: Add two layers of petals. Sunflowers have a dense ring of petals, and a second layer slightly offset from the first gives the flower its characteristic fullness. The petals in the second layer peek out from behind the first.
Step 4: Draw the seed pattern in the center circle. This is where you can get a little meditative.
Add small cross-hatched lines, dots, or a spiral grid in the center. The seeds of a sunflower arrange themselves in a spiral pattern (a Fibonacci sequence, for the mathematically inclined), but any crisscrossing pattern will read as seeds to the viewer.
Step 5: Add a thick, sturdy stem — sunflower stems are chunky and slightly hairy — and large, heart-shaped leaves with visible veins.
There's a reason sunflowers make people happy. They're unapologetically themselves. Drawing one encourages a similar boldness.
Use firm, confident strokes. Let those petals be big. Let that center be dark and textured.
A sunflower drawn timidly doesn't look like a sunflower at all — so draw it like you mean it.
5. Lavender
Lavender is my grandmother's favorite, so I saved it for last. It's also the most forgiving flower in this list because it's not really a single bloom — it's a cluster of tiny florets along a stem. And clusters are wonderfully forgiving.
Step 1: Draw a tall, thin line for the stem. Lavender grows in long, elegant spikes.
Step 2: Along the top third of the stem, begin adding small oval shapes tightly packed together.
These are the individual lavender buds. Don't draw them one by one — instead, think of them as a cluster, a collection of tiny ovals that together form a rough teardrop or elongated cone shape.
Step 3: Add a few small leaves at the base. Lavender leaves are narrow, needle-like, and slightly silvery. A few short, thin lines curving away from the stem is all you need.
Step 4: If you want to add detail, vary the density of the buds. The top of the cluster should have fewer, more spread-out buds. The middle should be dense and full. The bottom should taper off with smaller buds.
Lavender teaches an important lesson: sometimes the best way to draw something is to stop trying to draw every single part and instead draw the shape of the whole. Your eye naturally fills in the details when the silhouette is right.
Adding Leaves and Stems
Flowers don't float in midair — or at least, the ones in grandmother's garden don't. Leaves and stems give your sketches context, grounding them in the real world. Here are a few basic leaf shapes to practice:
- The simple leaf: An oval with a pointed tip, divided by a central vein line. This works for daisies, tulips, and many garden flowers.
- The heart-shaped leaf: Like a valentine with a point. Great for sunflowers and lilacs.
- The needle leaf: A thin, straight line with a slight curve. Perfect for lavender and rosemary.
- The compound leaf: A central stem with small oval leaflets arranged in pairs. Roses have these, as do peonies.
For stems, remember three things: they curve, they taper, and they connect. A stem drawn as a perfectly straight line looks stiff and unnatural.
Give it a gentle S-curve. Let it get slightly thinner as it reaches the bloom.
And make sure it visibly connects to the base of the flower — nothing breaks the illusion faster than a stem that stops short of the petals.
To add veins to a leaf, simply draw a central line from base to tip, then add smaller lines branching outward at a slight angle. Don't overthink it. A few well-placed lines read as veins; a hundred tiny lines read as noise.
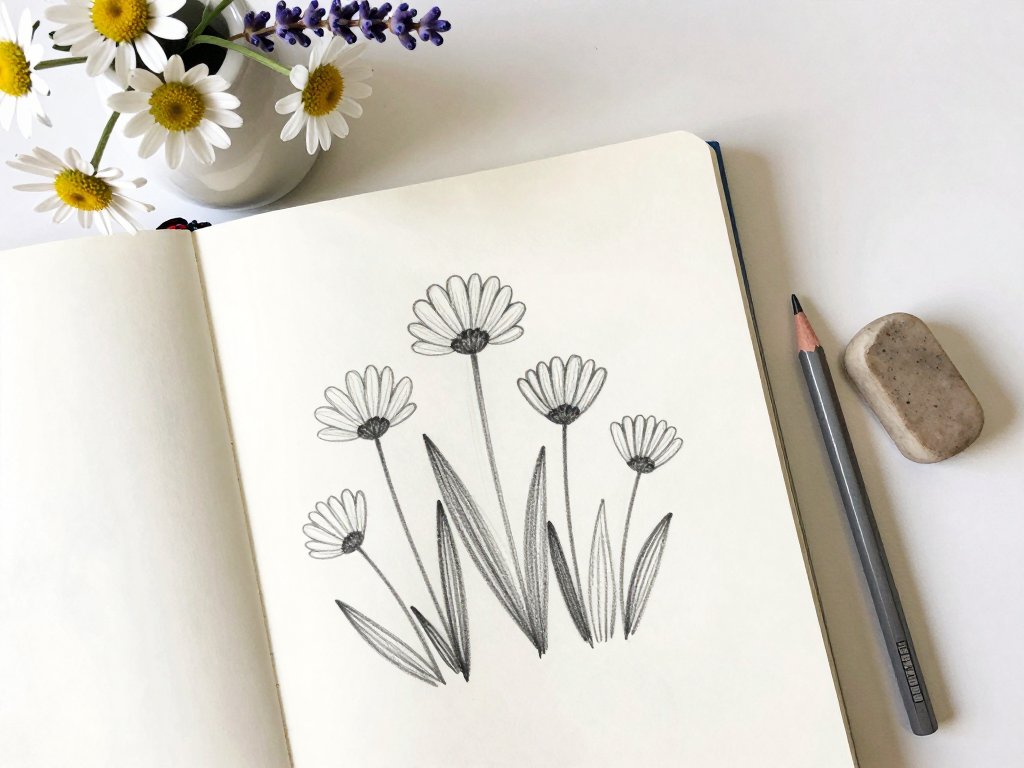
Image: Featured Hero Artwork
To accompany this article, have an AI image generator create a warm, illustrated scene in a hand-drawn sketchbook style.
The composition should show a collection of simple pencil-drawn flowers — a daisy, a tulip, a simplified rose, a sunflower, and a sprig of lavender — arranged in a casual, slightly overlapping cluster on an open sketchbook page.
A soft graphite pencil rests beside the page, and natural sunlight falls across the scene from the upper left.
The style should be clean and approachable: not hyper-realistic, but reminiscent of a beginner's first successful sketchbook page, with gentle shading and visible pencil strokes.
The background should suggest a wooden tabletop or garden bench, keeping the focus on the flowers.
The overall mood is calm, encouraging, and nostalgic — inviting the viewer to pick up their own pencil and try.
Warm earth tones and soft greens in the palette, with the white of the paper providing contrast.
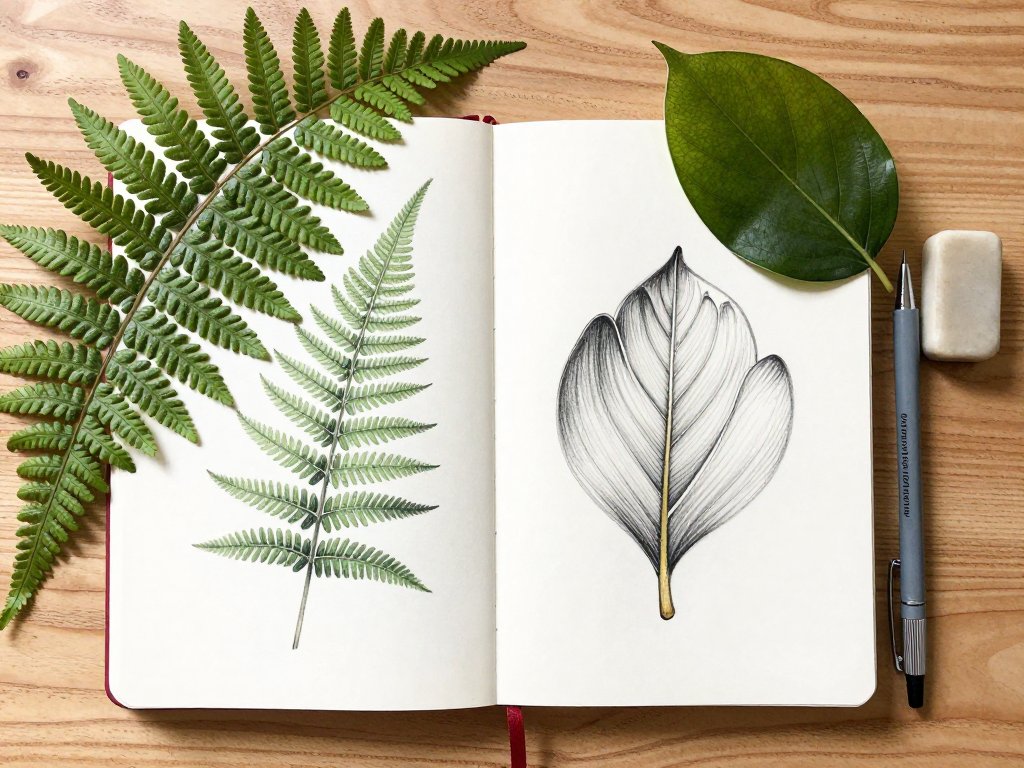
Nature Sketching Tips
Once you've drawn a few flowers from imagination or reference, I encourage you to take your sketchbook outside. There is something profoundly different about drawing from life — a shift that can't be replicated by any photograph.
Here's what I've learned from sketching in gardens and parks:
Start with gesture sketches. Before you try to draw a perfect flower, spend thirty seconds drawing the basic shape and direction of the stem.
Don't look at your paper — look at the plant. Let your hand follow your eye.
These quick drawings capture the energy of a plant in a way that careful, slow drawings sometimes miss.
Draw the same flower from different angles. A tulip looks completely different from above than from the side. By moving around your subject, you teach your brain to understand its three-dimensional structure.
Notice the negative space. Instead of drawing the flower itself, draw the sky shapes visible between the petals. This shift in perspective — from drawing the object to drawing the space around it — can break you out of a creative rut almost instantly.
Embrace imperfection. A bug-bitten leaf, a bent stem, a petal that's starting to brown — these are not flaws. They're the details that make a flower real. A perfectly symmetrical flower drawn with mathematical precision often looks less alive than one with a crooked petal and an uneven stem.
Practice anytime, anywhere. I keep a small sketchbook and a pencil in my bag at all times.
Waiting for coffee? I sketch the potted plant on the counter. Sitting in a park at lunch?
I sketch the dandelions growing through a crack in the pavement. These small, low-stakes moments of practice accumulate faster than you'd expect.
Troubleshooting Common Beginner Struggles
Let me address the frustrations that will almost certainly arise, because I want you to know they're normal. Every single person who has ever picked up a pencil has encountered these problems. They are not signs of talentlessness. They are signs of being human.
"My circles are wobbly." Good! Wobbly circles look more organic than perfect ones. Flowers don't grow with compass precision.
If your wobbles really bother you, try drawing your circles with your shoulder instead of your wrist — lock your wrist and move your whole arm from the shoulder joint.
This takes practice but produces much smoother curves. Also, draw circles quickly instead of slowly.
Fast lines are often steadier than hesitant ones. The wobbles come from second-guessing; a confident line, even if imperfect, reads as intentional.
"My proportions look wrong." Proportion problems almost always come from drawing what you think you see rather than what you actually see.
Here's a fix: hold your pencil at arm's length and use your thumb to measure the height of the flower against its width.
Translate that ratio to your paper. Another technique: divide your flower into quadrants and draw one quadrant at a time.
This breaks the visual complexity into manageable pieces.
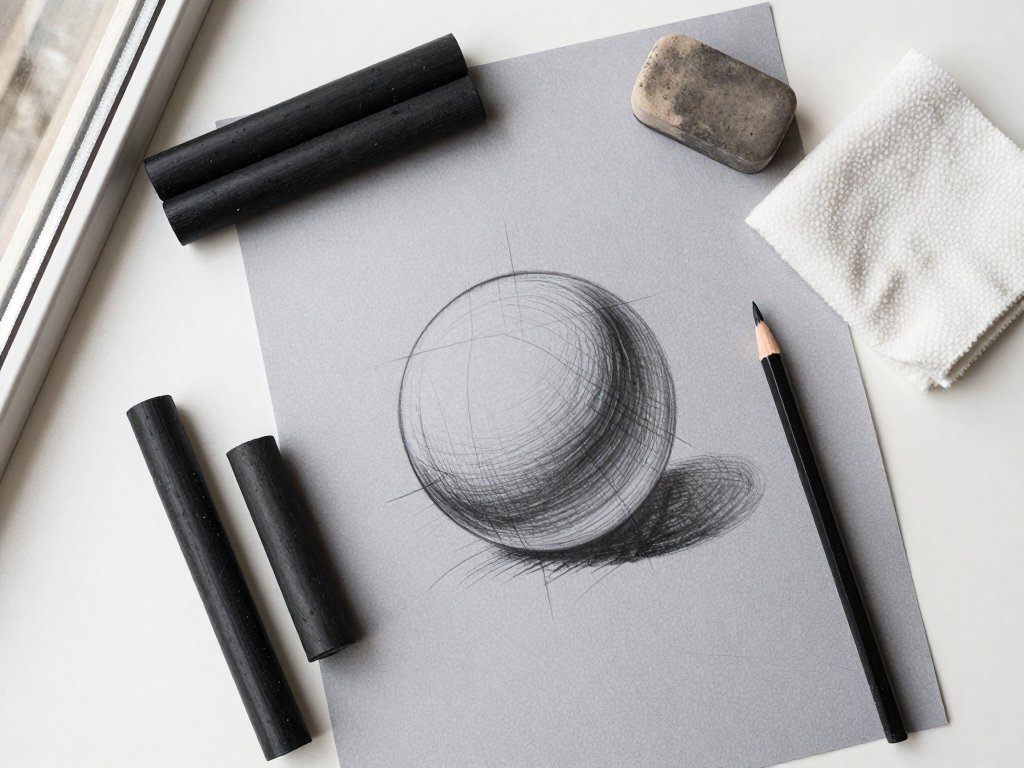
"My drawing looks flat." Flatness is usually a shading problem. Even the simplest sketch benefits from a little shadow.
Decide which direction your light is coming from, then add darker pencil strokes on the opposite side of the stem and the underside of the petals.
You don't need to be a master of light and shadow — just a few darker lines on one side will create an immediate sense of depth.
"I keep erasing too much." I know this one intimately. I was the child who wore holes through her paper.
Here's what I wish someone had told me: you learn more from a "bad" drawing you finish than from a "perfect" drawing you abandon.
Set a rule for yourself: no erasing for the first ten minutes. Whatever marks you make, you live with.
Sometimes you'll surprise yourself — a "mistake" turns into a happy accident that makes the drawing more interesting.
And if it truly doesn't work? Turn the page. That's what the next page is for.
Conclusion
I still have that first drawing — the lopsided zinnias, the orange scribble marigolds, the "abstract" lavender.
My grandmother kept it, tucked away in a recipe box, and when she passed a few years ago, I found it while clearing out her things.
The paper was yellowed and soft at the edges. The pencil marks had faded. But I could still see the eight-year-old joy in every wonky line — the joy of looking at something beautiful and trying to make it mine.
That's what sketching flowers is, when you strip away all the tutorials and techniques and supply lists.
It's an act of attention. It's a way of saying, "I see you, little flower, and I think you matter enough to draw." And somewhere between the first hesitant circle and the last stroke of shading, you might find what I found on my grandmother's porch that summer: the quiet realization that you don't need to be good at drawing to love drawing.
You just need to start.
So pick up your pencil. Find a flower — real, photographed, or remembered. Draw a circle in the middle of the page. Let it be wobbly. Let it be imperfect. Let it be yours.
The garden is waiting.
— Hannah Mercer