Introduction
Some embroidery announces itself from across the room. Blackwork does the opposite.
It sits quietly on the cloth as a fine geometry of dark lines, and only when you look closely do you realise how much counting went into every inch of it.
If you have ever studied a Tudor portrait and wondered how those intricate cuffs and collars were made, you have already met this technique.
Blackwork is one of the most approachable traditional embroideries a beginner can take up. It asks for one colour of thread, an evenly woven fabric, and a willingness to count.
There are no outlines to trace and no colours to match. Just lines, counted thread by thread, building into diamonds, lattices, and small eight-pointed stars.
What Makes Blackwork Different
Blackwork is counted thread embroidery. That one phrase explains most of what makes it unusual.
There is no printed design on the fabric. You work from a chart instead, and the pattern appears because you count the threads of the cloth as you stitch.
The colour scheme is, by tradition, one dark thread on a pale ground — historically black silk on white linen. That is where the name comes from.
Working in a single colour forces every decision to be about shape, spacing, and rhythm rather than palette. There is nowhere for a wobbly line to hide.
The patterns are geometric: diapers, diamonds, crosses, and repeating bands. They are built from straight counted stitches, which is exactly why they stay crisp.
A Short History: Moorish Spain to the Tudor Court
The origins of blackwork are not entirely clear. What the record suggests is a journey rather than a single moment of invention.
The geometric style is believed to have come to England through Spain, where Christian and Islamic textile traditions met and mixed.
Islamic textile design of the medieval period was full of interlocking geometry. Spanish needleworkers, including Moorish artisans, worked similar counted patterns in dark silk on pale linen.
When the technique reached England, it arrived with its origin still attached. Tudor inventories and household accounts call it "Spanysshe work," or Spanish stitch — a name that stuck long after the technique settled into English hands.
Catherine of Aragon is believed to have brought Spanish needlework with her to England in 1501, and it spread quickly through the royal court.
By the middle of the sixteenth century, blackwork was everywhere on English dress.
What It Was Used For
Blackwork was rarely worked across a whole garment. It was stitched on the parts of clothing seen up close and often — the parts that folded.
- Shifts and chemises, the linen underlayers worn against the skin
- Collars, cuffs, and necklines, framing the face and hands
- Coifs and forehead cloths, the close-fitting linen caps worn by women
- Sleeves and partlets, and later the embroidered linen jackets fashionable in the 1590s
This detail explains the technique. A collar or cuff folds back on itself, so both faces of the fabric are visible at once.
The embroidery had to look good from either direction, and that is why blackwork developed a reversible stitch.
The Holbein Connection
Hans Holbein the Younger was court painter to Henry VIII, and he painted his sitters with extraordinary attention to textile detail.
In his portrait of Jane Seymour you can trace the blackwork on her cuffs — the even line, the doubled thread, the interlocking pattern.
Because his portraits are so precise, historians have been able to study the stitches through the paint. The double running stitch became known as Holbein stitch.
Holbein almost certainly did not invent it. His name simply stuck to it, as names do.
The Decline and the Revival
Geometric blackwork fell out of fashion in the seventeenth century as floral and pictorial embroidery took over. The taste for it returned in waves.
The twentieth century saw several revivals — in the 1920s, again at mid-century, and then a lasting one from the 1970s onward as counted-thread embroidery and historical re-enactment both grew.
The Two Core Stitches
Blackwork is built on two stitches. Learn both and you can work almost any traditional pattern.
Holbein Stitch (Double Running Stitch)
Holbein stitch is a running stitch worked twice along the same path.
On the first pass you lay down an evenly spaced line of running stitches, leaving a gap the same size as each stitch. On the second pass you travel back along the same line and fill in every gap.
The result is a solid, unbroken line with no visible joins. It is the defining look of blackwork.
Here is what makes it special. Work the return pass correctly and the reverse of the fabric looks exactly like the front. There is no wrong side.
That reversibility is why Holbein stitch was standard for cuffs, collars, and coifs, where both faces of the cloth are on show.
The method is simple, but it demands accuracy:
- Bring the needle up at your starting point and take a running stitch forward, skipping the same number of threads each time.
- Keep every stitch and every gap the same length. This is where the crispness of the finished line comes from.
- At the end of the row, turn and work back along the same line, placing each return stitch exactly in the gap you left.
- Do not pierce the threads of the first pass. Slip the needle between them, not through them.
Back Stitch for Outlines
Back stitch is the workhorse of outline embroidery, and blackwork uses it freely.
It makes a continuous line by bringing the needle up ahead of the previous stitch and going back down into the end of it. The stitches share holes, so the line has no gaps.
Back stitch is stronger and simpler than Holbein, and quicker to work. On a single-sided project it is often the better choice.
Its one drawback is that it is not reversible. The back shows doubled thread, which is fine inside a framed piece and not fine on a folding collar.
Which One to Use
Use Holbein stitch when both sides of the work will be seen, or when you want the traditional doubled line that catches the light.
Use back stitch for outlines on single-sided pieces, and whenever you need speed.
If running stitch and back stitch are new to you, it is worth half an hour on the basics before you start counting. Our guide to hand embroidery stitches for beginners covers the foundation stitches blackwork builds on.
Filling Patterns: Diapers, Motifs, and Bands
Blackwork designs are mostly made of patterns that fill a shape. Traditionally these are called diapers, and the word has an older life than you might expect.
Diaper comes from the medieval cloth trade. A diaper was a linen woven with a small repeating diamond pattern.
The name is thought to derive from "dras de Ypres" — cloth of Ypres, a Flemish weaving town. The diagonal lattice that covered that cloth gave its name to any all-over repeating pattern.
That is exactly what a blackwork diaper is: a small geometric repeat spread evenly across an area.
The Diaper Grid
The simplest diaper is a diamond grid. You work parallel diagonal lines in one direction, then parallel diagonal lines crossing them.
The spacing is counted, never guessed. A diagonal crossing one thread in every four gives a fine, tight lattice; crossing every eight gives an open, airy one.
Motifs Inside the Grid
Once the grid is established, you place motifs in the spaces. A small dot of back stitch. A four-point cross. An eight-pointed star.
These motifs are placed by count, never by eye. If your diamonds are sixteen threads wide, every motif sits exactly sixteen threads from the last.
Shading With Density
You cannot shade with colour, so Tudor stitchers shaded with density. A dense diaper reads dark. A sparse one reads pale.
Fill one area of a shape with a tight lattice and the area beside it with an open one, and you create a convincing gradient from a single thread.
Alternating bands work the same way. A dense band, then an open band, then a dotted band creates rhythm and the illusion of tone across a piece.
Materials for Your First Piece
Blackwork is cheap to start, but fabric and thread choice matters more than usual: because you count threads, the cloth has to be countable.
Fabric
You need an evenweave ground — a fabric with a visible, regular grid of threads. Linen and Aida are both standard.
28 to 32 count linen is the comfortable starting point. The count is simply the number of threads per inch.
Working over two threads on 28-count linen gives the equivalent of fourteen stitches per inch, a good, readable scale for a first project.
Aida in 14 or 16 count is easier still, because the weave forms obvious square blocks and you never count individual threads. Save 36 and 40 count linen for later, when the counting feels automatic.
Thread
- Stranded cotton is the practical modern choice. On 28-count linen, one or two strands gives a fine or medium line.
- Perle cotton in sizes 8 or 12 has a soft twist and a slight sheen. Size 12 is close to two strands of stranded cotton; size 8 is bolder.
- Silk is the historical thread and still the most beautiful. Its natural lustre catches the light along a folded edge, which is why the Tudor examples glow. It is also dearer and less forgiving.
Needles and Tools
- Tapestry needles, size 24 to 26. The blunt tip slips between the threads of an evenweave rather than piercing them, which keeps the cloth smooth.
- Sharp embroidery needles, size 24 to 26 if you are working on Aida, where a point helps find the hole.
- A 5 to 7 inch hoop. Small enough to keep the fabric drum-tight, large enough to hold the whole design.
- Small embroidery scissors for trimming thread ends closely.
Marking and Centring
Every counted design starts from the centre of the fabric and the centre of the chart. Get that right first and your border cannot end up three threads out.
The traditional method needs no tools. Fold the fabric in half one way and press the crease, then fold it in half the other way.
The intersection of those creases is your centre point. Mark it with a pin, or run a basting thread along each crease so the guides stay visible.
A water-soluble fabric pen also works; keep the marks faint, since you want guides rather than lines that peek out from behind your stitches.
The Skills, In Order
There is an order to learning blackwork that makes everything easier. Take these five skills in sequence and the rest follows.
1. Read the Chart
A counted chart is a grid of symbols. Each symbol stands for a stitch, and each square stands for a thread or a small group of threads.
Before you thread a needle, read the whole chart. Work out where the pattern repeats, where the centre falls, and which lines are outlines and which are fills.
2. Find and Mark the Centre
Match the centre of the chart to the centre of the fabric. This is the anchor for every count you make.
Find the centre symbol on the chart, find the centre crease on the cloth, and place your first stitch there. Then work outward from it.
3. Count Without Losing Your Place
Counting is the real skill of blackwork, and it is entirely learnable. These habits save hours:
- Count twice and stitch once.
- Count in pairs rather than singles. It is harder to lose track of four, six, eight.
- Work outward from the centre in small blocks rather than across the whole design at once.
- When you reach a landmark in the pattern, mark it on the chart before you carry on.
- Use the needle tip to tick off threads on the fabric as you count them.
4. Start and End Thread Cleanly
Knots are best avoided in counted work, because a knot can distort the weave and will show through a fine fabric.
The traditional solution is the waste knot. Tie a small knot in your thread and take your first stitch a little way from where you mean to begin, on the right side of the fabric.
Work toward that knot, covering the loose thread on the back as you go, and when you reach it, cut the knot off. The thread is now anchored with no knot in the cloth at all.
To end a thread, run it under the backs of several finished stitches and trim. On a reversible piece, weave the end into the return pass instead, so it disappears from both sides.
5. Keep the Tension Crisp
The tension that makes blackwork lines crisp is not tight tension. It is even tension.
Pull each stitch until the thread lies flat on the surface and no further. If the fabric dimples where the needle went in, you have pulled too hard.
Keep the hoop drum-tight so the cloth does not stretch as you work, and let the thread relax between stitches. A slightly loose line will even out with wear; an overtight one never will.
Your First Project: A Three-Band Geometric Sampler
The best first project is small, flat, and finishable in one or two sittings. A sampler panel, a pincushion top, or a bookmark all fit that description.
Here is a design you can work exactly as written.
What You Need
- A piece of 28-count linen, cut 6 by 6 inches
- One spool of black stranded cotton
- A size 24 tapestry needle
- A 5 or 6 inch hoop
- A chart you are willing to mark on
The Design
The finished panel measures about 3 inches square. On 28-count linen worked over two threads, that is 42 threads across.
Divide the space into three horizontal bands, each 14 threads tall.
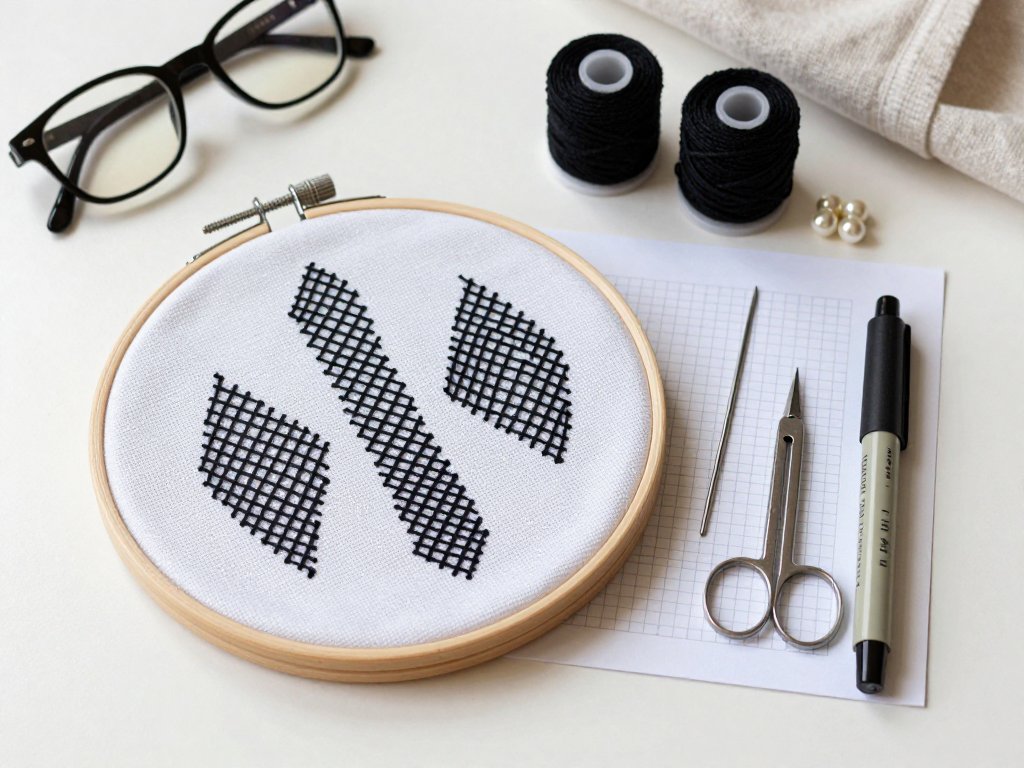
- Top band — small diamonds. Work a row of open diamonds, each 8 threads wide and 8 threads tall, with 4 threads between them, in Holbein stitch.
- Middle band — a solid diaper. Fill the band with a lattice of diagonal lines crossing every 4 threads. This is the densest band and will read as the darkest.
- Bottom band — diamond motifs. Work larger diamonds 12 threads across, each with a small four-stitch cross at its centre, spaced 4 threads apart.
Working Order
- Fold and mark the centre of your linen in both directions.
- Place the first stitch of the middle band at the exact centre point and work outward from there.
- Count 7 threads up from the centre line for the top of the middle band, then count the top band from that landmark.
- Repeat downward for the bottom band.
- Work the outlines first, then fill the interior lines. The structure gives you landmarks to count from.
- Press the finished panel face down on a folded towel, never with a hot iron directly on the stitches.
Allow about an hour for the diamond bands and two hours for the diaper. A patient evening crafter will finish in roughly three to five hours, across two or three evenings.
Common Mistakes and How to Fix Them
Miscounting
Everyone miscounts. What matters is what you do in the next minute.
Do not unpick all the way back to the start. Stop, look at the stitch you just made, and compare it directly to the chart.
Most miscounts are one or two threads out and reveal themselves within a few stitches. Unpick only the affected section, back to the last point you are certain of, and rework from there.
Tension That Pulls Too Tight
If the fabric puckers around your line, or the weave opens into visible holes, you are pulling too hard.
Undo the last few stitches and rework them more gently, then check your hoop. A slack hoop makes you pull tighter to compensate, and that is the whole problem.
The Wrong Needle
A needle that is too large splits the threads of the evenweave as it passes through. The damage is permanent and the finished line looks ragged.
Use a tapestry needle, which has a blunt tip, and check the size by eye. The needle should slide between threads with almost no resistance. If you can feel it forcing its way through the weave, go down a size.
Fabric That Is Too Fine
Starting on 36 or 40 count linen because it looks delicate is the most common beginner disappointment.
Put it away and start on 28-count linen or 14-count Aida instead. There is no prize for beginning on the hardest ground.
Uneven Spacing Between Motif Rows
Rows that drift apart or creep together spoil an otherwise clean piece, and it usually happens when the stitcher stops counting and starts estimating.
Fix it by counting every row from a fixed landmark rather than from the row above it. If your chart has repeated bands, mark the band height on the fabric with a basting thread, so you always have a physical line to count from.
Where to Take It Next
Once the sampler is finished, the natural second project is something you actually use. A bookmark is a lovely place to start — the same shape as your sampler, only longer.
From there, a pincushion top, a needle case, or a small drawstring bag all use the skills you have just practised: outline, fill, and a counted border.
If you want to stretch, try a coif or a cuff. These are the shapes blackwork was invented for, and they will push you to work both sides of the fabric properly with Holbein stitch.
There is a quiet pleasure in that. The stitches you are making are the same structure Tudor needlewomen used on their shifts and collars five hundred years ago.
Start with one band of diamonds. It is a small thing, and it is enough.
