Introduction
There is a particular quiet that settles in when your hands meet clay. For a stay-at-home mom stealing twenty minutes between school pickup and dinner, that quiet is a gift. And this October, I want you to spend it making something warm.
Here is the good news: you do not need a pottery wheel to build a beautiful ceramic pumpkin. You do not even need a kiln. Air-dry clay and oven-bake polymer clay both live happily on a kitchen table, no studio required.
Hand-built ceramics have a softness that factory pieces never quite capture. Every fingerprint, every slightly uneven rib, is yours. That is the whole point.
The method is gentle and forgiving. Pinch pots, a little scoring and slipping, a rolled stem. By tomorrow you will have a small glowing pumpkin on your mantel, and by next week, a whole patch of them.
If whimsical, character-rich pottery speaks to you, you will love what we explore in Kooky Pottery: Whimsical Hand-Built Ceramics. It pairs perfectly with the pumpkins you are about to form. Ready? Let's talk clay.
Choosing Your Clay
Your first decision is the most important one, because it shapes everything that follows: drying, finishing, and how long your pumpkin lasts. Three materials are worth understanding.
Air-dry clay is the beginner's joy. It needs no oven, no kiln, and no special handling. It dries hard at room temperature over one to three days. The surface finishes matte and rustic, almost like weathered terracotta.
The trade-off is durability. Air-dry pieces are sturdy but not waterproof, and thin sections can be brittle. Seal them well and treat them as decorative, and they will serve you for seasons.
Oven-bake polymer clay is the second option. You shape it, then bake it in a home oven at a low temperature. It cures to a smooth, slightly waxy, permanent finish that holds fine detail beautifully.
Polymer is wonderful for crisp ribs and delicate tendrils, but it stays somewhat soft until baked, so it can be less forgiving for large solid forms. For a small trio of pumpkins? It is lovely.
Earthenware is the third path, and the real thing. If you have kiln access through a community studio or a friend, real clay gives you true ceramic strength and that unbeatable fired stone texture.
It is also the fussiest. Real clay must stay damp while you work and requires two firings. If you are new to this, save earthenware for when you have a few pumpkins behind you.
For most readers, I recommend air-dry clay for a rustic matte look and polymer for a polished, permanent finish. A two-pound block costs about ten dollars, so you can afford to experiment without guilt.
One tip that saves frustration: buy a clay labeled "air-dry" rather than "cold porcelain" or "salt dough" if you want a ceramic-like finish. They behave differently, and the dedicated air-dry clays hold shape and sand far better.
The Tools You Actually Need
You already own most of this. Honestly, the list is almost embarrassingly short, which is part of why hand-building is so welcoming.
A rolling pin or a wooden dowel flattens clay and forms slabs. A craft knife or a butter knife cuts and trims. A small ball tool or a wooden skewer carves ribs and dimples.
Add a fork for scoring, a cup of water for making slip, and a smooth surface to work on. A sheet of parchment or a plastic mat is ideal and keeps cleanup kind.
That is genuinely it. No extruder, no wire cutter, no pricey sets. If you want to grow, a sponge and a wooden rib tool are nice next steps, but they are not needed to start.
The best tool for this project is patience, followed closely by a damp cloth to keep your hands from turning everything into a slippery mess.
Forming the Pumpkin Body
You can approach the body two ways: the pinch-pot method, or the two-lobed sphere. I will give you the sphere method first because it yields fuller, rounder pumpkins, then note how to adapt it.
Following ordered steps matters here. Work slowly, and keep the clay covered when you pause so it does not dry out mid-build.
- Condition and wedge the clay. Knead it in your hands for a minute or two until it feels warm, even, and slightly pliable. This removes air pockets that cause cracks later.
- Roll a ball. Cup a generous handful between your palms and roll until it is smooth and round. For a medium pumpkin, aim for a ball about the size of a tennis ball.
- Hollow or leave solid. For polymer, small pumpkins can stay solid. For air-dry clay, hollow the ball by pressing your thumb in and widening the cavity, then keep walls even, roughly a half inch thick.
- Create the vertical ribs. With the blunt side of a skewer or a ball tool, press gentle vertical grooves evenly around the sphere, spacing them like the sections of a real pumpkin.
- Soften the ridges. Run a damp fingertip along each ridge to round the sharp edges. The goal is a soft, natural swelling, not harsh valleys.
- Define the top dimple. Press your thumb or a ball tool into the top center to make a shallow well where the stem will sit.
- Set the shape. Gently cup the pumpkin and rotate it against your palm to firm the form and check that it sits evenly without wobbling.
For the pinch-pot method, simply start with a ball, press your thumb into the center, and pinch the walls outward between your thumb and fingers until the bowl is even. Turn it upside down and round the base, then add ribs as above.
If your pumpkin starts to slump or lean, the walls are likely too thin or the clay is too warm. Let it rest for ten minutes to firm up, then reshape gently. Clay has memory, so small corrections now save big ones later.
A quick trick for even ribs: mark eight or ten evenly spaced points around the equator with a pin before you carve. Working from those guide marks keeps the sections symmetrical without measuring.
Adding the Stem and Tendrils
The stem is what makes the shape read as a pumpkin. Without it, you have a charming ball. With it, you have October.
Roll a small sausage of clay and taper one end so it narrows as it rises. Pinch it slightly where it will meet the pumpkin, and bend it just a touch so it leans naturally.
Now for the join. This is where beginners lose stems, so slow down here. You will attach your stem with slip, a paste made from clay and water.
Score the base of the stem and the top dimple with your fork, creating rough, crisscrossed scratches on both surfaces. Rough surfaces grip far better than smooth ones.
Brush or dab a little slip onto both scored areas, press the stem firmly into the dimple, and wiggle it gently to seat it. Blend the base seam with your fingertip.
Tendrils are pure delight. Roll very thin, even snakes of clay, then wrap them loosely around a skewer or your finger to create a soft curl.
Attach tendrils to the stem base with the same score-and-slip method, and add a small curled vine trailing down the pumpkin's side. Two or three tendrils are plenty; more starts to clutter the form.
Let the joins firm up for an hour or so before you handle the piece again, so the stem has a chance to bond.
Texture and Detail
This is my favorite stage, where the pumpkin stops being generic and starts being yours. Texture is what makes a hand-built piece feel alive.
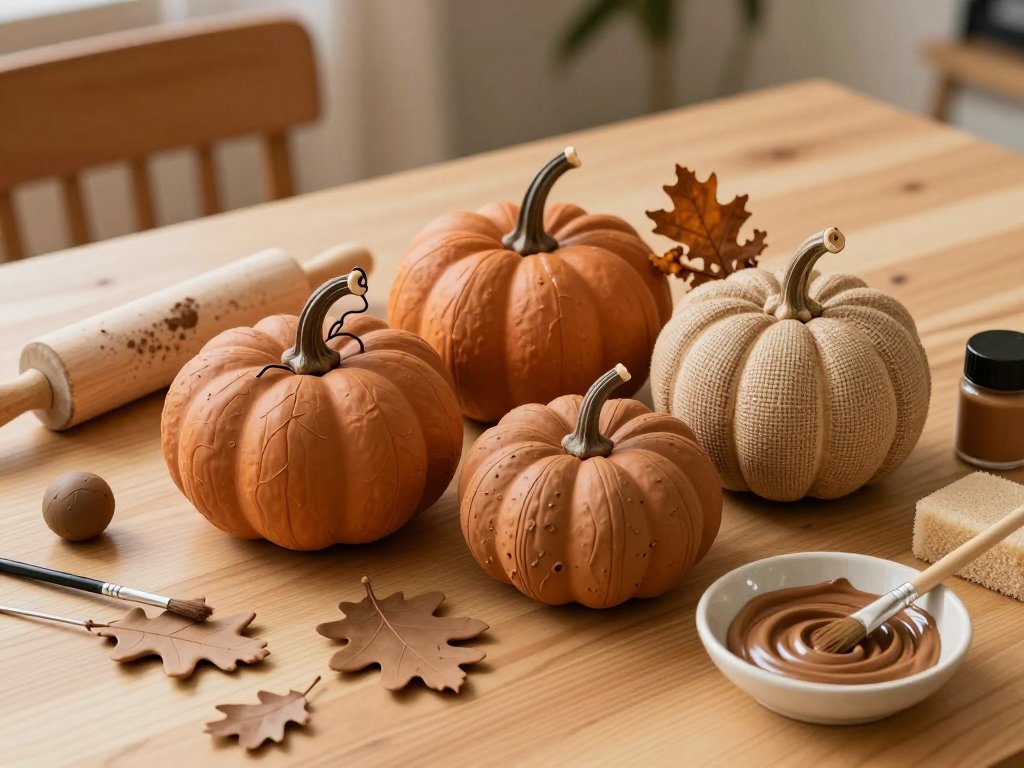
For an organic surface, press a scrap of burlap, a real leaf, or even a piece of lace gently into the clay and peel it away. You will be left with a soft, natural imprint.
A real pumpkin leaf pressed into the side is almost magical, veins and all. If you have maple or oak leaves falling nearby, use them; each one is a one-of-a-kind stamp.
You can also add a few small sculpted leaves at the stem base. Roll thin, cut a simple leaf shape, score the veins with your skewer, and slip them into place.
Here is the philosophy that carried me through my early pots: imperfect is charming. A wobbly rib or a slightly crooked stem is not a flaw. It is evidence of a human hand, and it is exactly what you want.
Resist the urge to smooth everything into plastic perfection. Leave a fingerprint or two. Let the ribs breathe unevenly. That softness is the soul of hand-built ceramics.
Drying and Finishing
Drying is where patience pays off, and where rushed pieces crack. Your timeline depends on thickness, so plan generously.
Air-dry clay pumpkins need anywhere from twenty-four to seventy-two hours to dry through, depending on how thick your walls are. A hollow, half-inch-thick pumpkin is usually dry in about two days.
Dry it slowly and evenly. Sudden heat, direct sun, or a heater will crack the surface as the inside shrinks faster than the outside. A cool, shaded spot is ideal.
Turn the piece every several hours so all sides dry at the same rate, and tent it loosely with plastic for the first day if you are in a dry climate. Slower is always safer.
Polymer clay skips this stage entirely. Once shaped, bake it in your home oven at the temperature on the package, usually around 275 degrees, for about thirty minutes, then cool it completely.
Once your air-dry pumpkin is fully dry, smooth any rough spots with fine-grit sandpaper, around 400 to 600 grit. A light buffing gives a lovely soft finish.
Next, seal the piece. Brush on a matte varnish or a matte acrylic medium to protect the surface and lock out moisture. One or two thin coats are better than one heavy coat.
If you love a soft sheen, burnish the dry surface before sealing by rubbing it firmly with the back of a spoon or a smooth stone. Burnishing compresses the clay particles and gives air-dry pieces a gentle, almost satin glow.
Finally, decide on color. You can leave the natural clay tone for a quiet, earthy look, or paint with acrylics in warm oranges, soft cream, or muted sage. Thin your paint and build up layers for depth.
For a subtle antique effect, paint the pumpkin, let it dry, then wipe a little watered-down brown into the grooves so the ribs darken naturally.
Display Ideas
The moment of arrangement is almost as satisfying as the making. A single pumpkin is sweet; a grouping is a display.
Start with a trio of pumpkins at different heights and sizes. Varying scale instantly creates the sense of a curated collection, even when it came together on a Tuesday afternoon.
A mantel arrangement is classic. Line them up with a few real candles, an autumn leaf garland, or a couple of dried branches for height and movement.
For a table centerpiece, nestle three or four pumpkins on a round tray or a linen runner, and tuck in a pillar candle at the center. The warm light flickering across the matte clay is gorgeous.
If your pumpkins turned out especially well, gift one to a friend. A handmade ceramic pumpkin is the kind of small, thoughtful object people keep for years.
You can also mix finishes deliberately: one painted orange, one left natural, one sealed in a soft cream, so the group feels collected rather than matched.
Troubleshooting
Every beginner hits a snag or two. None of these are failures. They are simply clay teaching you its language, and each has a fix.
Cracks forming during drying. This almost always means the piece dried too fast. Next time, slow it down: dry in a cooler spot, cover it loosely with plastic for the first day, and turn it regularly. For small hairline cracks, fill them with a little slip and smooth over.
The stem fell off. The join was too smooth or too dry. Reattach it by scoring both surfaces deeply, applying fresh slip, pressing firmly, and supporting the stem with a small coil of clay at the base while it dries.
The surface is too rough. This often comes from dry hands or overworking the clay. Smooth it with a damp fingertip or a soft sponge before it dries, and sand with fine grit once it is completely dry.
Paint is flaking. You likely painted before the piece was fully dry or skipped sealing. Let it dry completely, seal with matte medium first, then paint, then seal again to lock the color in place.
Clay feels too sticky or too dry. If it is sticky, let it rest uncovered for a few minutes and knead in a little dry clay. If it crumbles, wet your hands and knead in water drop by drop until it is smooth and workable again.
Conclusion
Look at what your hands made. No wheel, no kiln, no perfection required, just a small warm pumpkin that did not exist an hour ago.
Hand-building teaches something beyond technique. It teaches you to trust the slow, imperfect process, and to find beauty in the wobble. That is a lesson worth carrying into the rest of your week.
Make a second pumpkin. Make a whole patch. Then let your eye wander to the next form, because once you have built one thing from a lump of clay, the ideas come quickly.
Happy fall, and happy making. Your mantel is about to look wonderful.