Introduction
You have seen the sticker machines in the craft aisle. They cost more than your printer, they need their own software, and they take up half a shelf. You do not need any of it.
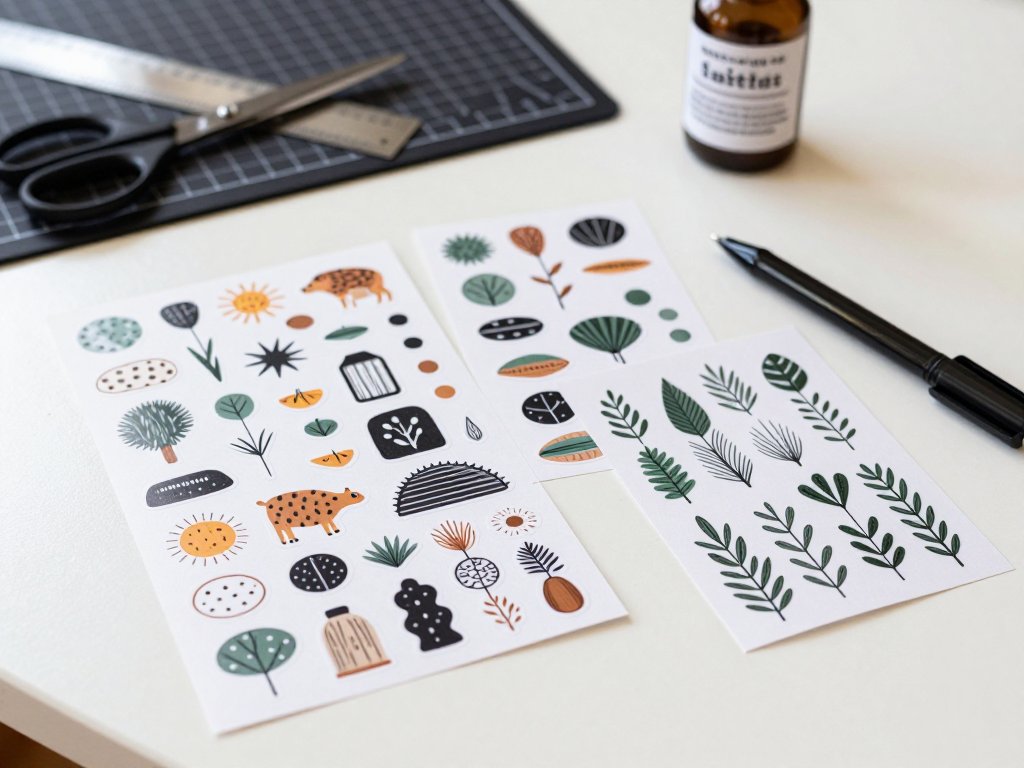
If you own a home printer and a pair of sharp scissors, you can turn a drawing into a real sticker this afternoon. Sticker paper costs cents per sheet.
This guide walks through the whole process in order: what to buy, how to draw and size your design, which printer settings matter, how to cut clean edges, and how to seal stickers so they survive water bottles and backpacks.
One drawing, one test sheet, one stack of stickers. Let us start with the supplies you actually need.
What You Actually Need
Here is the short list. You likely own half of it already, and none of it is expensive.
- Printable sticker paper, one pack of full sheets
- A home printer with ink or toner
- Small, sharp scissors
- A craft knife, a metal ruler, and a cutting mat
- A black fineliner and your usual colouring supplies
Everything on that list can be found locally and cheaply. If you already print photos at home, you are most of the way there.
Cutting Tools Do Most of the Work
Small scissors matter more than expensive ones. Look for a four to five inch pair with short, sharp blades; these are sold as detail or embroidery scissors. Long blades cannot turn a corner.
A craft knife handles every straight edge. Pair it with a metal ruler, because a plastic ruler will get shaved. A self-healing cutting mat protects your table and keeps the blade from dulling on contact.
Add a bone folder or the back of a spoon if you want to press edges down firmly. Your thumb works too, but a folder gives more even pressure.
Optional Extras That Speed Things Up
A one-inch circle punch turns a printed sheet into a pile of perfect round stickers in seconds. A two-inch punch does the same for journal and planner sizes.
A corner rounder removes sharp points, which is the single best trick against peeling corners. A die-cutting machine can cut hundreds of shapes precisely, but you can skip it entirely.
Tweezers help with tiny stickers and with lifting cut pieces off the backing without bending them. Nail scissors and clean kitchen tweezers both work fine.
The Sticker Paper Lineup
Sticker paper is not one product. Each type behaves differently under a printer and on a surface, so the choice matters more than the brand.
Buy a small pack first. A ten-sheet pack of mixed finishes costs less than one ruined twenty-sheet pack of the wrong thing.
Matte Sticker Paper
Matte takes ink easily and dries quickly. It is the most forgiving choice for a first project and the best for anything you plan to write on later.
Pen and marker glide over matte without skipping. Planner stickers, labels, and journal accents almost always belong on matte paper.
Glossy Sticker Paper
Glossy makes colours look rich and photographic. It also holds ink on the surface rather than absorbing it, which means longer drying times and a higher risk of smearing.
If your designs are illustrations with strong colour, glossy is worth the extra care. Just budget ten to fifteen minutes of drying time before you touch the sheet.
Clear or Transparent Sticker Paper
Clear paper lets the surface show through, which looks like printed glass. It works beautifully over white or pale backgrounds and disappears on glass and light plastic.
Handwriting on clear paper is hard to read, and pale colours can look washed out. Skip it for text stickers and for anything destined for a dark surface.
Printable Vinyl Sticker Paper
Printable vinyl is the tough one. It resists tearing, shrugs off a splash, and bends around a curved bottle without lifting.
Not all vinyl is printer-safe, so read the label before buying. Use it for water bottles, laptops, and anything that lives in a bag.
Full Sheets vs Pre-Cut Label Sheets
Full sheets give you total freedom. You print any shape anywhere and cut it out yourself, which is the method this guide uses.
Pre-cut label sheets, the kind used for address labels, come in fixed sizes with a slit backing. They need no cutting at all, but you are limited to the shapes on the sheet.
The Printer Question: Inkjet or Laser
Both printer types can make stickers. They behave very differently on coated paper, and that difference decides which paper you should buy.
Inkjet Printers
Most home printers are inkjet, and they love sticker paper. Ink soaks into matte stock beautifully and sits on top of glossy coating for vivid colour.
Dye-based ink is bright but water-soluble, so glossy inkjet prints must be sealed before they meet a water bottle. Pigment ink resists water better but can look flatter.
Laser Printers
Laser printers fuse toner with heat. That heat can melt the coating on glossy sticker stock, leaving smears, marks, or a jammed sheet.
Laser printing on matte sticker paper usually works well, and the result is durable. Use laser-safe glossy stock only, and never run the same sheet through twice.
If you are unsure which you own, check the cartridge. Liquid ink means inkjet; a sealed box of powder means laser.
Designing Your Stickers
Design is the fun part, and it does not need software. A pencil, a fineliner, and a sheet of plain paper will get you a finished sticker.
Drawing by Hand
Start with a black fineliner, around 0.5 mm, for the outline. A consistent dark line is what makes a sticker read clearly at two inches wide, even when the colour is simple.
Fill with marker or coloured pencil. Alcohol markers can bleed through the page, which is harmless here because the backing is opaque. Coloured pencils layer beautifully on matte stock.
Leave a small white border, about three millimetres, around every design. That margin is your cutting room, and it also gives the sticker a finished, deliberate look.
Scanning or Photographing Your Art
Scan at 300 dpi if you have a scanner. That resolution prints a crisp two-inch sticker with no visible pixel edges along the outline.
No scanner? Photograph the drawing flat on a white table in daylight, holding the phone directly above it. Turn the flash off to avoid a hotspot on the paper.
Most phone cameras at twelve megapixels are more than enough. Crop the photo so the drawing fills the frame, and keep the white border visible.
Designing on a Phone, Tablet, or Free Tool
Procreate and similar drawing apps export clean PNG files. Canva has sticker-friendly shapes and text, and the free tier covers most of what you need.
Google Drawings and even a word processor will work. Draw your shapes, add text, and export. The only real requirement is a file your printer can read.
Keep lines dark and shapes simple. Fine detail and pale colour both disappear at small sizes once printed on paper.
Sizing, Borders, and the Mirroring Question
A two-inch sticker is a good default. Planner strips run about 1.5 by 0.5 inches, and laptop decals look right at three to four inches.
You do not need to mirror your design. Sticker paper prints on the front, just like ordinary paper, and the artwork faces you when it comes out of the printer.
What you must check is the print scale. Set your printer to 100% or actual size. Any fit-to-page setting quietly shrinks your careful two-inch design.
Printer Settings That Matter
Four settings decide whether a sticker sheet is usable. Check them before every print run, because defaults change when you open a new document.
- Paper type. Choose glossy photo paper, matte brochure, or plain paper to match your sticker stock. The printer adjusts ink volume to suit that surface.
- Quality. Select best or high quality. On glossy stock, drop one step below the maximum if ink pools and smears.
- Scaling. Set scaling to 100% and disable fit to page. Otherwise your sizes drift and nothing lines up with your punch.
- Page size. Confirm the document page matches the paper in the tray. Letter and A4 are close but not identical, and the mismatch shifts everything.
Then do a test sheet. Print your design at full size on ordinary paper first and hold it against the sticker paper.
Measure the width with a ruler. If the two-inch sticker prints at 1.75 inches, the scale is wrong, and no amount of careful cutting will fix it.
Once the plain-paper test is right, print one small design on a scrap corner of sticker paper. This is your real test of colour, ink behaviour, and drying time.
Let the printed sheet rest flat for ten to fifteen minutes before touching it. Stacking wet sheets is the fastest way to smear a whole batch.
Cutting Clean Edges
Cutting is where a homemade sticker either looks handmade or looks bought. The tool follows the shape, so decide per design rather than per sheet.
Cutting With Scissors
For a white border, cut two to three millimetres outside the outline, following the curve smoothly. Cutting right on the line gives a tighter, more graphic look.
Turn the paper, not the scissors, as you go around a curve. Long, continuous snips leave a cleaner edge than short, choppy ones.
Keep a second pair of scissors for paper only. Blades that have cut fabric or tape chew the edge of a thin sticker sheet.
Craft Knife and Ruler for Straight Shapes
Rectangles, banners, and strips are faster with a knife. Line up the metal ruler along the cut and hold it firmly, with your fingers well clear of the blade path.
Make two or three light passes rather than one heavy press. Light passes follow the ruler, while heavy passes wander and tear the paper.
Change the blade when it starts dragging. A dull blade skips through the sticker layer and leaves a ragged edge on the backing.
Punches and Die-Cutting Machines
A circle punch is the fastest clean edge you will ever get. Print a grid of designs a quarter inch inside each circle and punch straight through the sheet.
Die-cutting machines cut custom shapes with far more precision than scissors. Load the sheet on a cutting mat, select the sticker paper setting, and let the machine trace each outline.
Machines also handle print-then-cut, where the printer adds small registration marks and the machine reads them. It is quick once set up, but not required for a first project.
Making Sheet-Style (Kiss-Cut) Stickers
Kiss-cut stickers stay on their backing sheet, with the top layer cut and the backing left whole. You peel each one off, exactly like a store-bought sheet.
Set your blade to cut only the sticker layer. Practise on a corner first, then adjust the depth until the top layer lifts and the backing holds.
If you are cutting by hand, score lightly with a craft knife and stop as soon as you feel the backing. A sheet of kiss-cut stickers stores beautifully in a planner pocket.
Sealing So They Last
Sealing is the step most beginners skip, and it is the reason homemade stickers curl or wash away. Ten minutes here decides whether a sticker lasts a week or a year.
Clear Packing Tape
The cheapest seal is clear packing tape laid over the printed sticker. Press from the centre outwards so no air bubbles or lifted edges remain.
Trim the tape flush with the sticker edge, or wrap it a millimetre around the back. Tape adds a glossy finish and stops ink lifting onto wet fingers.
Self-Adhesive Laminate Sheets
Laminate sheets sold as book-cover film give a smoother finish than tape and cover a full sheet in one pass. Peel the backing away slowly and smooth the film down as you go.
A hand-crank laminator gives the flattest result. If you use one, check that the pouch or film suits your paper, because heat can curl very thin sheets.
Acrylic Spray Sealer
Spray sealer gives the most professional finish and is the only realistic option for odd shapes. Work outdoors or with a window open, and hold the can ten to twelve inches away.
Apply three thin coats, waiting about twenty minutes between each. One heavy coat is why sealed stickers go cloudy or the ink bleeds underneath.
Why Glossy Inkjet Prints Need Sealing
Glossy inkjet paper holds dye ink above the surface coating. Water dissolves that ink almost immediately, so an unsealed sticker on a water bottle can fade in a single rinse.
Matte prints are more forgiving but still smudge under a wet thumb. Seal anything that will be handled, carried, or wiped, and seal anything headed for a kitchen or bathroom.
Troubleshooting: Four Common Sticker Problems
Almost every sticker failure comes down to one of four causes. Here is how to recognise each one and what to change.
1. The Ink Smears or Runs
You are printing at too high an ink volume onto coated stock, or touching the sheet too soon. Lower the quality setting one step and let the sheet dry for fifteen minutes.
Switch to matte paper if the problem persists. On glossy stock, seal with spray rather than tape, because tape drags wet ink sideways as you smooth it down.
2. Corners Curl Up
Thin label paper absorbs moisture from the air and from the print, then shrinks as it dries. The curl usually starts at a sharp corner.
Use heavier sticker stock or laminate the front before cutting. Round the corners with a punch or small scissors, and store finished sheets flat under a heavy book.
3. Stickers Peel Off After a Day
The adhesive is fighting a rough, dusty, or oily surface. Clean the target with a little rubbing alcohol and let it dry completely before you stick anything down.
Press the sticker for thirty seconds, working from the centre outwards. For curved or slippery surfaces, use printable vinyl instead of paper stock and round every corner.
4. Prints Come Out the Wrong Size or Off-Center
This is nearly always a scaling setting. Turn off fit to page, choose actual size, and confirm the document page size matches the paper in the tray.
Printers also leave a narrow non-printable margin, usually about a quarter inch. Keep your designs inside that margin, and use the document centre guides so each sticker lands where you expect.
Where to Use Your Stickers
Once you have a stack, the question becomes where to put them. These six uses cover most of what people actually stick.
- Planner stickers. Half-inch strips mark habits, water, and appointments across a weekly spread.
- Laptop and phone decals. Vinyl stock handles the curves and the daily friction of a bag.
- Water bottle labels. Print a name or a tiny illustration, seal it well, and it survives a hand wash.
- Gift tags. Punch a hole in a corner, thread twine through, and you have a handmade tag in a minute.
- Kids' reward charts. A row of small printed stars or animals makes a chart feel like a game rather than a chore.
- Journal covers. A cluster of stickers gives a plain notebook a cover you chose yourself.
If those journal covers make you want to go further, hand-bound notebooks pair perfectly with stickers. This guide to Japanese stab binding walks you through sewing your own cover and spine, ready to decorate.
Homemade stickers also make lovely additions to greeting cards, lunchbox notes, and spice jar lids. Anywhere a label would go, a printed sticker looks better.
Conclusion
Start small. Pick one drawing, print a single test sheet, and cut out three stickers. That is a complete project, and it takes less than an hour.
Your first batch will not be perfect. One edge will wobble and one corner may lift, and that is entirely normal. Change one setting at a time and the second batch improves.
Keep your test prints in a folder with the settings written on the back. Next time you sit down to print, you start from a known result instead of guessing.
Then choose one small next project: a set of planner stickers, a page of gift tags, or a cover for the notebook you have been meaning to bind. One afternoon, one stack, and every one of them your own.
