Introduction
Broken tile is the rare craft material that gets better the more damaged it becomes. A chipped plate, a cracked floor tile, a handful of offcuts from a tile shop's bin — these are not waste to a mosaicist. They are the palette.
That forgiveness is why mosaic has lasted. Roman floors, Byzantine church walls, and kitchen tabletops follow the same idea: many small pieces, set into a bed, held by grout. When you press your first tile fragment into place, you join a line of makers stretching back two thousand years.
A tile shop will often give away its offcut bin for free or for a few dollars. A single cracked floor tile breaks into dozens of usable tesserae, so one small box of scraps can carry several beginner projects.
Mosaic also asks very little of your workspace. A tray, a board, and a free afternoon are enough, and you can stop mid-piece without ruining anything. The work waits patiently for the next nap time.
What a Mosaic Actually Is
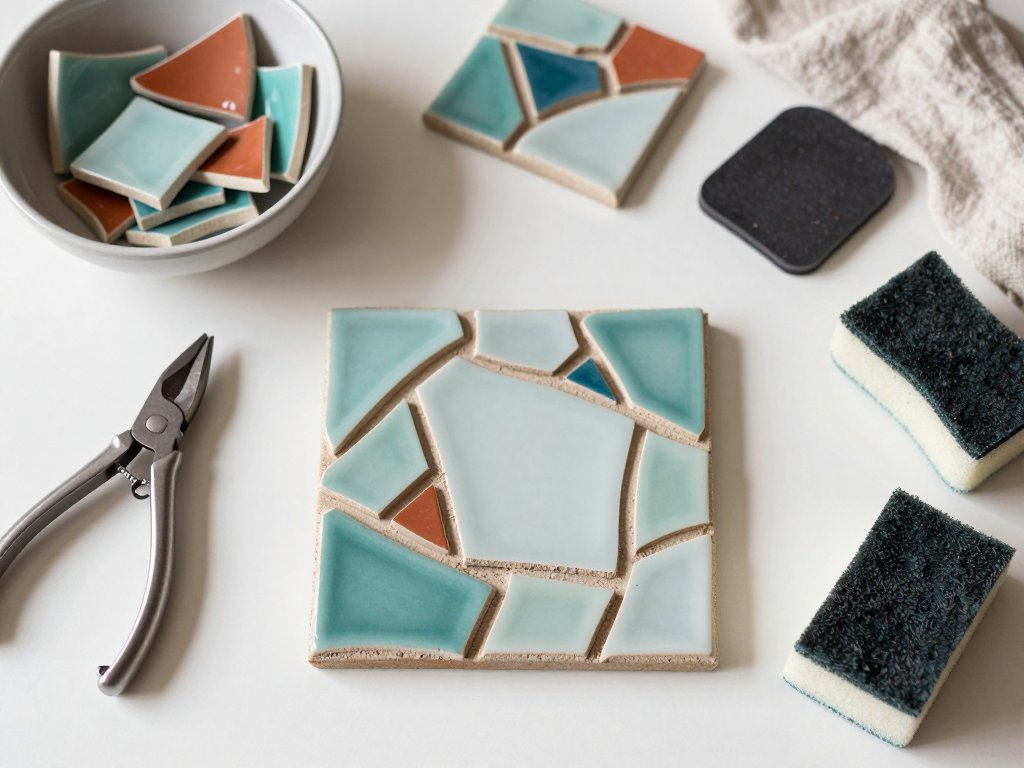
Three things make a mosaic: the tesserae, the bed, and the grout. The tesserae are the individual pieces — your broken tile fragments. The bed is the surface and adhesive that hold them. The grout is the mortar that fills the gaps between them.
Gap width does most of the visual work. Tight gaps of a millimetre or two let colour flow across the surface, so the eye reads a flat picture. Wide gaps let grout become a colour in its own right, and the whole surface reads as texture.
Because the grout is a colour, choosing it is a design decision, not a chore. Grout that matches the tiles recedes and softens the surface; contrasting grout outlines every piece and makes the pattern pop. Decide before you set the first tile.
There are two ways to set a mosaic: the direct method and the indirect method. In the direct method you glue each tessera face-up onto the finished surface, which suits small boards, trivets, and anything you can reach comfortably with your fingers.
In the indirect method you build the mosaic face-down on paper or tape, then flip the whole sheet onto a bed and peel the paper away. It suits large floors and pieces where a perfectly flat surface matters, but it is fussier for a first attempt.
What You Need to Start
Buy eye protection and a pair of tile nippers first. Everything else can come from a kitchen drawer or be borrowed. Nippers are the one purchase that has no safe substitute, usually fifteen to twenty-five dollars.
- Safety glasses and thin gloves — fragments are sharp and fly when snapped.
- Tile nippers — the only tool worth buying to begin.
- A small notched trowel — or an old butter knife for spreading adhesive.
- Tile adhesive or thin-set mortar.
- Sanded grout — sanded grips better in gaps wider than two millimetres.
- A grout float — a firm rubber-edged spreader.
- Sponges — a few clean ones, plus a plastic bag for mixing grout.
- A backing board — see below for choosing one.
Your backing board sets the rules for everything above it. A small board of plywood or MDF works indoors, and a terracotta plant saucer makes a charming round trivet. For an outdoor stepper, pour-in-place concrete pavers hold up best.
Any rigid, flat sheet will do as long as it will not flex, warp, or go soft when damp. Flex the board gently before you start; if it bends, the mosaic may crack later as the adhesive cures.
Sourcing your tiles is half the fun. Ask at a local tile shop for their offcut bin, watch for clearance boxes at hardware stores, and save cracked plates and saucers before they reach the bin. Free material keeps the practice low-pressure.
Sorting and Breaking Tiles Safely
Breaking tile is where mosaic earns its reputation. You score a line with the nippers, then squeeze your hand closed, letting the tool bite a small section off the edge rather than the middle. Small bites give control; one big bite shatters unpredictably.
Wear eye protection every time you snap a piece, no exceptions. Glazed ceramic throws sharp flakes, and a fragment in the eye is a hospital visit, not a nuisance. Set the nippers down before you lift your glasses for any reason.
Softer ceramic tiles snap in clean lines, while dense porcelain resists the nippers and needs more pressure. Start with glazed wall tile or a broken dinner plate; save the hard porcelain for when your grip has learned the feel of a small bite.
Sort your pieces by colour into shallow trays, then roughly by size. A muffin tin, an ice-cube tray, or a row of small bowls keeps colours from mixing, so you can reach for the right family of fragments without hunting through a pile.
Keep a small bowl just for tiny pieces. These slivers fill awkward corners, tighten outlines, and finish the narrow spaces between larger tesserae. Nothing is too small to use except dust you would never pick up.
Irregularity is the signature of hand-made mosaic, not a defect. Machine-cut pieces give you a grid; hand-broken pieces give you rhythm. The slight wobble in each edge is what tells the eye a person made this.
Designing Before You Glue
Lay the whole design out dry, with no adhesive anywhere, before you commit. This dry-fit stage is free — you can rearrange, swap colours, and step back as often as you like. Once glue touches the board, the plan is set.
Work from the centre outward, or start with the strongest outline first. Keeping outline pieces roughly the same size makes the shape stay legible from across the room. If one edge is thick and the next thin, the eye loses the form.
Colour contrast does more for legibility than fine detail. A light shape on a dark field reads from across a room; two similar mid-tones blur together even when the drawing is perfect. Step back often and check the silhouette.
When the dry-fit looks right, photograph it with your phone. You will disturb the layout as you pick pieces up to glue them, and the photo becomes your map. A quick overhead shot is enough.
Simple beginner designs include a heart, a flower head, a leaf, a sun, or a house number. Choose one shape with a clear outline and one or two colours behind it, and the piece almost designs itself.
Setting the Pieces
Spread adhesive in small patches, no more than a few square inches at a time. Tile adhesive skins over within minutes; if you spread a whole board at once, the far side will be dry before you reach it, and the pieces will not stick.
Press each piece down with a slight twist, as if you were seating a lid on a jar. The twist pushes air out from under the tile and pulls adhesive up around the edges. A flat press alone leaves gaps that later shift.
Aim for an even gap of roughly one to three millimetres. Run a fingertip across finished rows and reset any piece that rocks. A wobbly piece will snag your sponge later and may pop loose during grouting.
Hold the board at eye level now and then while you work. Looking straight down flattens the surface and hides height differences, while a low angle shows you exactly which pieces sit proud of their neighbours.
Then leave it alone. Adhesive cures overnight in most weather, and longer on humid days or in a cool garage. Wait until the pieces feel rock-solid before you mix any grout, or you will undo your work.
Grouting Without Panic
Mix sanded grout with water to a peanut-butter consistency — thick enough to hold a peak on the float, loose enough to spread without dragging. Add water a little at a time; it is easier to thin grout than to thicken it.
Push the grout across the surface with the float held at a forty-five-degree angle, working diagonally across the mosaic. Diagonal passes push grout into both the horizontal and vertical gaps instead of riding over one set of them.
Work in small areas and keep the float moving, so no single patch of grout dries before the next one joins it. If the grout stiffens in the bucket, stir in a few drops of water rather than starting over.
After the grout sits for a few minutes, wipe with a barely damp sponge in gentle circles. Rinse the sponge often and wring it almost dry. The sponge should feel damp, never wet enough to drip onto the mosaic.
Over-wiping is the classic mistake. If your sponge is too wet or you scrub too hard, you pull grout straight out of the gaps, leaving shallow, uneven channels that look unfinished once dry. Wipe less than you think you should.
A soft film of grout haze left after the first clean is normal. Let the piece cure fully, then buff the haze away with a dry cloth. Do not try to scrub it off while the grout is still soft.
Sealing and Using Your Piece
Seal porous tile and grout with a stone and tile sealer once everything is fully cured. Sealer slows staining and makes a trivet or coaster wipe clean. Apply a thin coat, let it soak in, and buff off the excess.
Sealer is not a finish, it is a shield. It will not hide a wobbly surface or a wide gap, so it is the last step, not a fix. Apply it once the piece has cured for several days, and reapply it yearly on anything that sees daily use.
Indoor pieces like coasters and trivets only need standard adhesive and a flat backing. Outdoor pavers are different: they need frost-resistant adhesive and grout, or the first hard winter will lift tiles and crack the joints.
If you also work in clay, the same instinct for colour under a surface appears in painting color onto pottery with underglaze, where pigment sits beneath a clear glaze instead of in the gaps.
To wash a mosaic trivet, wipe it with a damp cloth and mild soap, then dry it immediately. Do not soak it or put it in the dishwasher, even if the tiles themselves are dishwasher-safe.
Your First Project: A Small Tile Trivet
This project uses a fifteen-centimetre square board and only two colours, which keeps every decision simple.
- Choose a fifteen-centimetre square backing board and two colours of broken tile — one for the outline, one for the background.
- Sketch your shape lightly on the board, or lay it out directly with dry pieces until it reads clearly.
- Dry-fit every piece in place, then photograph the finished layout before you move anything.
- Spread a small patch of adhesive and set the outline pieces first, twisting each one gently to seat it.
- Fill the background with your second colour, keeping gaps even and resetting any piece that rocks.
- Let the adhesive cure overnight, or longer if the air is humid.
- Mix sanded grout, spread it diagonally with a float, then wipe with a barely damp sponge and let it cure.
- Buff off any grout haze with a dry cloth, then seal the surface.
- Glue felt feet to the underside so the trivet does not scratch your table.
A Short Troubleshooting Guide
- Pieces slide out of place while gluing — your adhesive is too thick, or you spread too much at once. Thin it slightly and work in smaller patches.
- Grout keeps washing out of the gaps — your sponge is too wet. Wring it almost dry and wipe with a lighter touch.
- Pieces look uneven in height — the surface beneath is too uneven. Tap them level before curing, or accept the texture as deliberate.
- The finished piece looks busy — there is not enough single-colour area to let the pattern breathe. Give the main shape more quiet background next time.
Final Thoughts
Your first mosaic is a study, not a showpiece. It will teach you how much adhesive is too much, how wet a sponge should be, and how wide a gap wants to be. Those lessons do not show up in any instruction.
Save your broken crockery instead of throwing it out. A chipped mug, a cracked saucer, a lone tile from a renovation all become material for the next piece, and the collection builds quietly in a shoebox.
Keep a photograph of every piece you finish, even the clumsy ones. Seeing a month of mosaics side by side shows progress that is invisible day to day, and the early wobbles become proof you learned something.
Then make a second small piece, and a third. Skill in mosaic arrives through repetition faster than in almost any craft, because each attempt fixes one specific habit and the material costs nothing.
The same logic — plan the surface, then set the piece — runs through other surface-decoration crafts too. It shows up in découpage, in wood inlay, and in the pottery studio, wherever a maker builds an image from parts.
Start small, work with what is already broken, and let the gaps do half the work. Mosaic rewards patience more than talent, and the material is lying in your bin right now.