Introduction
Most drawing asks you to build something up. Scratchboard asks you to take something away. You begin with a solid black surface and remove the dark to reveal the white underneath. That single idea makes the whole medium feel oddly forgiving.
If you have ever felt nervous about a blank white page, this might be the friendliest start in art. A black board quietly hides your first tentative marks. You only ever add light where you actually want it.
This is a calm, low-pressure craft you can pick up in one evening. No colour mixing, no wet paint, no waiting hours for layers to dry. Just a small board, a sharp tool, and your own steady hand.
Busy hands do not need long studio hours here. Fifteen quiet minutes at the kitchen table is genuinely enough to see progress. The work rewards patience, not speed or expensive supplies.
So put aside the worry about getting it right. On scratchboard, drawing is simply scratching, and scratching is something your hands already know how to do.
What Scratchboard Actually Is
Scratchboard is a rigid panel coated with a layer of white clay, usually kaolin, then covered in black india ink. The white clay sits just beneath the ink. When a tool cuts through the ink, the pale clay shows through as a crisp white line.
That is the entire trick. You are not drawing with a pen; you are carving light out of darkness. Every scratch reveals the bright layer that was waiting underneath all along.
The surface is firmer than paper. Because it does not bend or buckle, you can press hard or barely graze it and get two very different whites. A light touch gives a faint grey; a firm press gives a bold bright line.
It is easy to confuse scratchboard with plain black paper, but they are not the same. Black paper only gives you the colour beneath, which is often dull and absorbent. Good scratchboard gives a clean, bright white with real contrast.
The medium is not new. Artists were scratching fine white lines into inked plates for engraving back in the nineteenth century. Printmakers used the same subtractive thinking to build shading and texture.
Today the boards are school-friendly and inexpensive. You do not need a printing press or any historical setup. One small panel and one tool will teach you the whole idea.
One quiet benefit is scale. A small panel fills fast, so a finished piece can arrive in a single sitting. That quick loop of finish-and-see keeps beginners motivated and eager to try another.
What You Need to Start
A beginner kit is small and affordable. Start with a single small panel, about five by seven inches across, and one scratch knife. Everything else can be added slowly as you go. A small beginner panel usually costs under about ten dollars.
- A scratchboard panel with an inked black surface, about five by seven inches to start
- A scratch knife, often sold with a fine pointed blade and a curved blade
- A fiberglass brush for softening edges and blending tones
- Fine steel wool for lightening large areas
- A fine abrasive pad for gentle, broad smoothing
- India ink and a small brush for repairing mistakes
- A soft brush for sweeping away clay dust
You do not have to buy a scratch knife on day one. A sharply pointed wooden skewer works well on softer boards. So does a craft knife used gently. Test a corner first to see how the surface responds.
A skewer gives a soft, slightly ragged line, which is lovely for fur and grass. A craft knife gives a cleaner edge but asks for a lighter touch. Use whichever you already own before spending more.
Keep a scrap piece beside you for testing pressure. It costs nothing and saves a good board from surprise marks. Practising one stroke on the scrap makes the real line far more confident.
None of these tools are precious, so nothing here needs a studio or a big budget. A shoebox holds the whole kit between sessions. That keeps setup short and tidying-up even shorter.
A Budget Scratchboard You Can Make Tonight
You can make a workable scratchboard at home for almost nothing. The idea is simple: hide a bright colour under a layer of black paint, then scratch the black away to reveal it.
- Cut a panel from heavy card stock or the flat side of a cereal box.
- Colour the whole surface with a dense layer of light crayon or oil pastel.
- Press firmly so the colour is solid, with no pale card showing through.
- Mix a little black acrylic paint with one drop of dish soap to help it grip.
- Paint a thick, even black layer over the colour and let it dry fully.
- Add a second black coat if any colour still peeks through the first.
- Scratch with a skewer or craft knife to reveal the colour underneath.
The dish soap matters more than you would think. Crayon and pastel are waxy, and paint tends to slide off wax. A single drop of soap helps the black acrylic cling to the surface instead of beading up.
Let the paint dry completely before you scratch, ideally for an hour or two. Damp paint will smear and tear under the tool. Once it is dry, your homemade board behaves much like the real thing, just a little softer.
Darker crayon colours hide better under black paint and reveal softly when scratched. Light yellows and pale blues give the brightest surprise. Try a few colours on separate cards to see which you love.
The Four Basic Marks
Almost every scratchboard drawing is built from four simple marks. Learn them and you can render fur, feathers, leaves, faces, and skies without any complicated technique.
The Straight Line
A straight line follows the direction of a form. Use it for stems, whiskers, edge highlights, and the ribs of a leaf. Keep the pressure even for a clean, confident stroke.
The Curved Line
A curved line follows rounder shapes. It is the mark you will reach for most often. Use it for petals, animal fur, folds in cloth, and the soft curve of a cheek.
Cross-Hatching
Cross-hatching means scratching lines in two directions, one set over the other. Where the marks cross, the area reads deeper and richer. It is the fastest way to build an even tone.
Stippling and Dots
Dots create soft texture and gentle gradation. Tap the tool lightly for small marks, or press harder for larger ones. If you enjoy dot work, our guide to stippling with dots covers the same thinking in pen and ink.
Pressure is your main control. A light touch skims the inked surface and leaves a faint grey. A firmer press cuts deeper and gives a vivid white. Vary it to create mood and distance.
To taper a line, simply lift the tool as you move. The scratch starts bold and fades to nothing. Tapers are perfect for the tips of feathers, blades of grass, and the ends of fur.
Keep your wrist relaxed and let the tool do the cutting. Gripping tightly tires your hand quickly and makes lines wobble. A loose, comfortable hold gives smoother marks and calmer hands.
Build Value With Layers
Value is simply how light or dark an area looks. On scratchboard you travel from dark to light by adding more scratches. The black surface is your deepest dark; fresh scratches are your brightest light.
To make a soft grey, scratch lightly and leave space between your lines. Add a second set of lines crossing the first to deepen the tone. Build slowly, a little at a time, and step back often.
Here is the hard truth of the medium: you cannot un-scratch. A mark is permanent once made. So plan your darks first and save your brightest whites for the very end.
The fiberglass brush softens edges and blends one tone into the next. Drag it lightly across an area to blur a scratch. The steel wool comes out for large pale zones, such as a sky or a pale background.
Work gently with both tools. Rubbing too hard in one spot flattens the surface and dulls your contrast. Short, controlled passes do far more than long, heavy scrubbing ever will.
Working from the darkest area outward keeps your picture readable. Let the black carry the weight while whites punch through. That contrast, not fine detail, is what makes a scratchboard sing.
Your First Project: A Simple Feather or Leaf
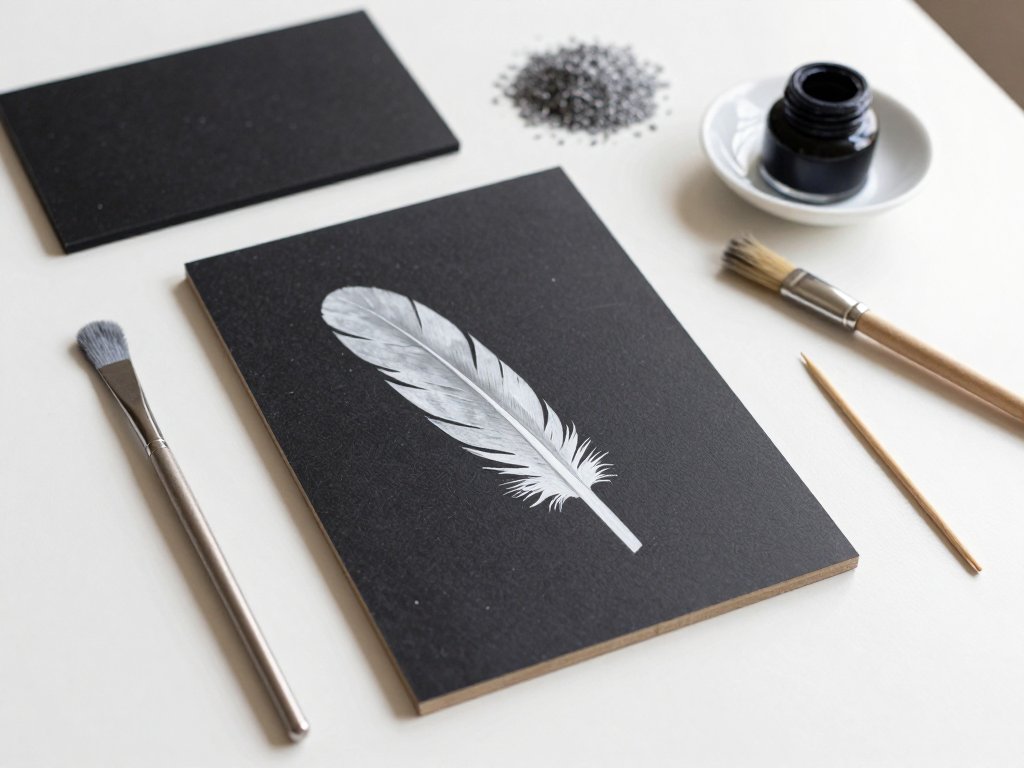
A single feather or leaf is the perfect first piece. The shape is simple, the texture is forgiving, and you get to practise every basic mark on one small board.
- Sketch the outline lightly with a white charcoal pencil or chalk, which shows clearly on black.
- Scratch the outer contour with a firm, even line to lock in the shape.
- Add the central shaft or vein with a few clean, confident strokes.
- Fill the mid-tones with light curved lines, keeping them well spaced.
- Layer a second set of lines over the first to deepen the shadows.
- Leave the palest areas almost untouched so they stay dark.
- Add your brightest highlights last, with firm pressure and short marks.
- Step back, then soften any harsh edges with the fiberglass brush.
Start in the safest corner before committing to the main shape. Testing your pressure there tells you exactly how the board responds. Then work with confidence rather than hesitation.
Chalk and white charcoal wipe away easily, so treat the outline as a suggestion. If a curve feels wrong, brush it off and redraw it. Only the scratched lines are truly final.
Finish the feather before you start a second board. Completing one small piece teaches more than leaving three half-finished. Momentum, not perfection, is what carries you into the next drawing.
Fixing Mistakes Without Starting Over
Every scratchboard artist makes a mark they regret. The good news is that most mistakes can be repaired, hidden, or turned into something better. You rarely need to start again.
To undo a scratched area, paint over it with India ink and a fine brush. Let the ink dry completely, then scratch back into it. The surface takes the new ink well and the repair blends in.
For a larger unwanted zone, sand it back gently with fine steel wool. This lightens the area evenly instead of leaving a visible patch. Work in soft circles and check your progress often.
Sometimes the kindest move is to keep the mistake. A stray line often reads as texture, a shadow, or a fold in the subject. Step back before you fix what might already be working.
Keep your repair brush fine and your ink neat. A small, precise dab hides far better than a broad patch. Patience here saves the whole drawing from a heavy dark smear.
Care, Sealing and Display
Scratchboard ink can smudge if it is rubbed, so seal your finished piece. A matte fixative or workable sealer sprayed in thin coats protects the surface without changing its look.
Spray outdoors or in a well-ventilated spot, holding the can about a foot away. Apply two or three light passes rather than one heavy coat. Let each coat dry before adding the next.
Store unfinished boards flat and dust-free. Stacking them face down or leaning them can press the soft surface and leave marks. A simple folder or a flat box keeps them safe.
When you frame the piece, choose a pale or bright mat. A light mat sets off the black board and makes the white lines read clearly. It gives the whole drawing room to breathe.
Sign the back of the board rather than the front, where a mark would distract. A small note of the date helps you see your own progress over a year of quiet weekend work.
A Short Troubleshooting Guide
Most beginner troubles have a simple cause and a quick fix. Here are the four that come up again and again at the kitchen table.
Lines look chalky and white dust is everywhere. Brush the dust away as you work. The tool is scraping the clay too aggressively, so lighten your pressure and try again.
The tool skates and slips across the surface. Hold it more upright and use shorter strokes. A more vertical angle gives you far better control of every line.
The surface looks muddy and dull. You are using the fiberglass brush too much in one place. Stop, let the area rest, and rebuild contrast with fresh scratches.
The whole piece reads flat and lifeless. It simply needs more contrast. Push the darkest darks and the brightest whites further apart until the image has life.
Final Thoughts
Scratchboard rewards patience more than talent. Every line you make is a small decision, and those small decisions add up to a finished drawing. You do not have to feel confident to begin.
Start with one small board this weekend. Keep it simple, scratch slowly, and let the white appear where you least expect it. Your first piece does not have to be perfect to be worth keeping.
The same scratch-away thinking shows up across other ink techniques. Once you understand drawing by subtraction, you will notice it everywhere, from stippling to engraving.