Introduction
Halloween decorating can feel like a choice between two extremes. Either you spend an afternoon wrestling with cobwebs and a glue gun, or you buy a plastic garland that looks exactly like everyone else's.
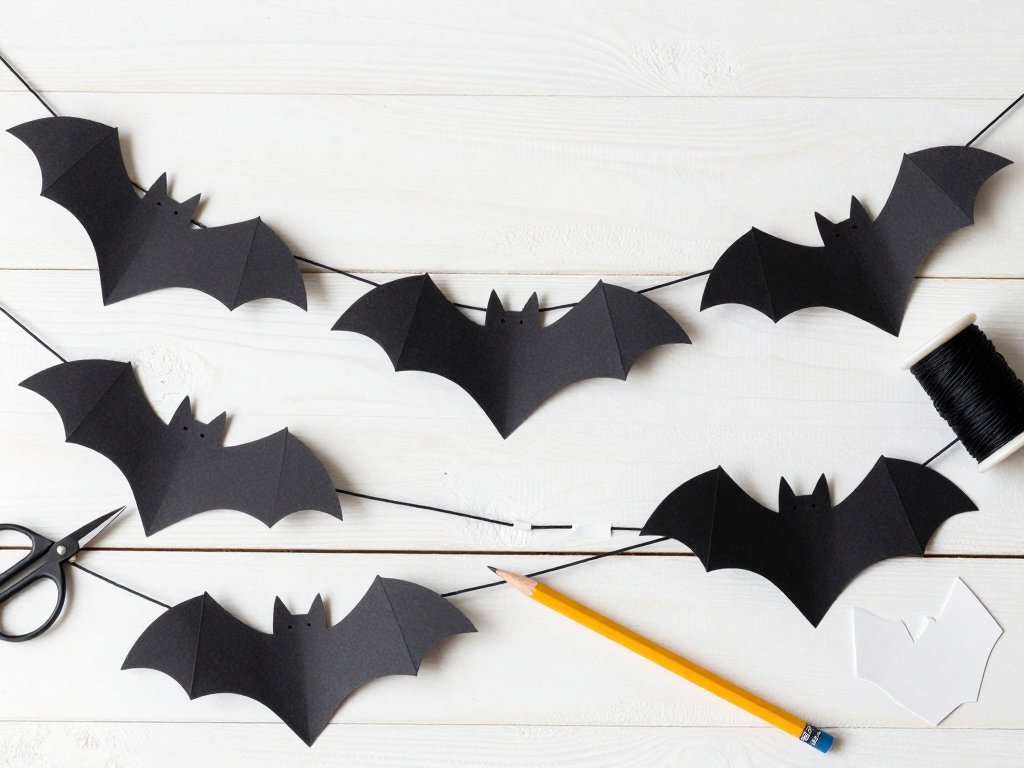
Paper bats are the calm middle path. A sheet of black cardstock, a pair of scissors, and an hour at the kitchen table give you a garland that looks far more expensive than it is.
The shape is simple enough that a beginner can cut twenty of them without losing patience. And because bats hang in the dark corners of a house, no one notices a wobbly wing or an ear that came out slightly short.
This guide walks you through the whole project in order: what to buy, how to make a reusable template, how to string the garland so it looks like it is flying, and where to hang it. There are no special tools and no Cricut required.
What You'll Need for a Paper Bat Garland
Everything on this list comes from a craft drawer, a dollar store, or a single sheet of paper. Gather it first and the project takes one sitting.
- Black cardstock — 65 lb to 110 lb weight. Two or three 12 x 12 inch sheets make a six-foot garland.
- Scissors — small, sharp craft scissors are easier around the wing scallops than kitchen shears.
- A pencil — for tracing the template onto the back of the paper.
- Template paper — one sheet of printer paper or a cereal box panel.
- String or twine — baker's twine for a rustic look, black thread or fishing line for a floating look.
- A needle, tape, or mini clothespins — pick whichever attachment method suits you.
- A hole punch — a standard single-hole punch is enough.
- A glue stick — only if you plan to add details or stiffen the wings.
Optional extras that make the project nicer: a white chalk marker for drawing tiny eyes, a bone folder or the back of a spoon for creasing folds, and a ruler for spacing bats evenly.
Why Paper Bats Are the Easiest Halloween Decor to Start With
Bat silhouettes are forgiving in a way that pumpkins and ghosts are not. A pumpkin needs shading to look round. A ghost needs soft edges to look soft.
A bat is essentially a triangle with two scalloped wings, and the eye fills in the rest. Even a rough cut reads as a bat from across the room.
That forgiveness matters if you are crafting with children or squeezing the project into nap time. You can cut quickly, hang quickly, and still get a result that looks intentional.
Cost is the other advantage. A halloween garland made from cardstock costs a few dollars and stores flat in a folder. Store-bought garlands tangle, shed glitter, and rarely survive to next October.
Pick Your Paper: Three Good Options
The paper you choose decides how the garland behaves on the wall. Here is how the three common options compare.
Black cardstock (best overall)
Cardstock holds a shape. Bats cut from cardstock keep their wing curl, hang flat instead of drooping, and survive being packed away in a box.
Look for 65 lb to 110 lb weight. Heavier than that and scissors fight back, especially around the small scallops on the wing edge.
Construction paper (cheapest, needs care)
Construction paper is easy to cut and easy to find, which makes it the best choice for a classroom or a large swarm of small bats. It also fades and creases.
Cut with the grain if you can, and plan to replace the garland next year rather than store it.
Kraft paper painted black (best for big bats)
For oversized bats, kraft paper or a brown paper grocery bag painted with black craft paint works beautifully. The paper is thin enough to cut quickly and stiff enough to hold a large shape.
Paint one side, let it dry flat, then cut. Skip this option if you want the project finished in an hour.
How Many Bats Do You Actually Need?
A little planning up front saves a second trip to the craft store. The math is simple enough to do on the back of a receipt.
- Spacing: bats look best 4 to 6 inches apart. Closer than 4 inches and they bunch into a black stripe.
- Six-foot garland: about 15 to 18 bats at 4-inch spacing, or 12 bats at 6-inch spacing.
- Yield per sheet: a 12 x 12 inch sheet of cardstock yields roughly 4 bats at a 5-inch wingspan, or 6 smaller bats at 3 inches.
So a typical doorway garland needs three to four sheets of cardstock. A mantel garland needs two. If you are hanging bats in several rooms, cut forty and divide them later.
Cutting in a batch is faster than cutting to order. Stack four sheets, pin them together with a paper clip, and cut once through the whole stack.
Make a Bat Template You'll Reuse for Years
A template turns a fiddly shape into a repeatable one. Making it takes five minutes and it will outlive the garland.
Fold a sheet of printer paper in half, short edge to short edge. The fold becomes the center line of the bat's body, which guarantees both sides match.
Draw half a bat shape against the fold, starting at the top with a small pointed ear. Curve out to the shoulder, out again to the tip of the wing, then scallop back in toward the body in three gentle arcs.
Finish with two little feet at the bottom of the body, close to the fold. Cut along your pencil line through both layers, then open the paper.
If the result looks lopsided, the fold line was off center. Refold, redraw, and cut again — this test bat costs almost nothing.
Once you like the shape, trace it onto a cereal box panel. Cardboard templates keep their edge through twenty or thirty tracings, while paper templates curl and tear.
Cutting the Bat Silhouette
With a template in hand, the cutting goes quickly. Work in a small stack and the whole garland takes about forty minutes.
- Trace on the back. Lay the template on the back of the cardstock and trace around it with a pencil. The back is the side that faces the wall, so pencil lines stay hidden.
- Stack and clip. Line up three or four traced sheets and hold them together with paper clips at the corners.
- Cut the body first. Cut the ears and the curved line between the ears before the wings. The middle is the strongest part of the stack.
- Cut the wings in one motion. Long, smooth scissor strokes give cleaner scallops than short choppy snips.
- Trim the feet last. The two small feet are easy to lose in a crowded stack, so leave them until the end.
- Check the first bat. Open one bat and hold it up. If the wings look too heavy, trim a little from the lower edge before cutting the rest.
Keep your scraps in a bowl. The offcuts are useful for tiny bats that fill gaps in the finished garland.
Giving the Wings a Little Lift
Flat paper bats look fine. Folded paper bats look alive, and the fold takes ten seconds each.
Hold a bat in both hands and find the line running from the shoulder to the wing tip. Fold the wing slightly upward along that line, so the wing tip rises away from the table.
Do the same on the other side. The body now sits flat while both wings angle up, which lets the paper catch light and cast a small shadow on the wall.
For a stronger curl, wrap the wing around a pencil and hold for a few seconds. The curl relaxes overnight, so fold the wings again when you unpack the garland next year.
You can also press a crease down the center of the bat's body. The crease gives the body a ridge and makes the whole silhouette read as three-dimensional from a few feet away.
Stringing the Garland So It Looks Like It Flies
A garland of bats hung in a perfect line looks like laundry. The trick is varying the thread lengths so the bats appear to swoop.
Punch one hole at the top of each bat, just above the head between the ears. If you would rather hang from the wing tips, punch two holes, one at each tip, and thread through both.
Cut lengths of thread between 2 and 8 inches. Longer threads go to the bats in the middle of the garland, shorter ones to the bats near the ends.
Tie each bat to the main line with a simple double knot, then slide the knot along the line to space the bats out. Knots slide easily on twine and hold well on thread.
Hang the main line loosely rather than tight. A slight droop between anchor points lets the bats drift with air movement, which is exactly the effect you want over a doorway.
Step back after every four bats. The garland usually needs one or two bats moved to look balanced.
Where to Hang Your Bat Garland
The same garland reads differently depending on where it goes. These placements work in most homes.
- Mantel edge: drape the line along the front of the shelf and let the longest strands hang below the mantel.
- Doorway or arch: anchor both ends with clear tape or a small hook and let the bats swing at eye level for a doorway surprise.
- Stair rail: wrap the line once around the newel post at each end so it stays put on busy stairs.
- Mirror or window: hang bats in front of glass so daylight silhouettes them from inside and outside.
- Porch ceiling: screw two small cup hooks into the ceiling trim and hang the garland across the seating area.
Height matters more than people expect. Bats hung above eye level read as flying. Bats hung below eye level read as sitting, which is a small detail that changes the whole mood of the room.
Three More Ways to Use the Same Bats
Once you have a stack of cut bats, you have the makings of three extra decorations. All three use the bats you have already cut.
A bat swarm wall
Tape bats directly to the wall in a loose diagonal flock, using a few small loops of painter's tape on the back of each body.
Start with three bats as the leaders and trail the rest behind them, angling each one slightly differently. The swarm takes ten minutes and covers a large blank wall.
A bat mobile
Tie three strands of thread to a wooden embroidery hoop or a wire hanger, then knot two or three bats along each strand at different heights.
Hang it from a ceiling hook above a table or in a corner. Mobile bats spin gently in the air from a furnace vent, which is the best part of the whole project.
A bat wreath
Wrap a grapevine wreath form with black ribbon, then hot glue bats around the ring with the wings overlapping the form.
Separate the bats with a few small clothespins holding a scrap of the same ribbon. The wreath works on a front door if you seal the bats first.
Kid-Friendly Bat Garland Variations
This is a project children can genuinely help with, not just watch. Handing over the right step keeps small hands busy and the garland intact.
- Tracing and cutting: children over eight can trace and cut with slightly larger bats, since big shapes are easier to steer.
- Decorating: a white chalk marker for tiny eyes turns a plain silhouette into a character. Chalk wipes off if someone changes their mind.
- Gluing and punching: toddlers can glue paper scraps onto a bat body and punch holes in a stack with a hand-over-hand grip.
- Stringing: let older kids choose the thread lengths. Their spacing choices make the finished garland feel like theirs.
Plan for a short session with younger children. Cutting five bats is plenty for one sitting, and the rest of the garland can be finished after bedtime.
Keep a container on the table for scraps so pieces do not migrate under the couch. A shallow box works better than a bag for quick cleanup.
Weatherproofing for the Porch
Paper and rain are not friends. If the garland is going outside, prepare it before you hang it.
The simplest method is a layer of clear contact paper on both sides of each bat. Press it on, trim around the silhouette with scissors, and the bats shrug off damp evenings.
A laminator does the same job faster if you own one. Laminate the bats before you fold the wings, since the plastic stiffens the paper and the fold holds better afterwards.
For a covered porch with no direct rain, a light coat of matte acrylic sealer sprayed outdoors is enough. Spray one side, let it dry, then spray the other.
Hang outdoor bats on fishing line rather than twine. Twine absorbs moisture and sags, while fishing line stays taut all month.
Troubleshooting: Common Paper Bat Problems
Almost every problem with this project has a quick fix. Here are the ones that come up most often.
The bats curl overnight
Cardstock curls when it absorbs humidity, which is normal in a house with a running furnace or an open window.
Press the bats under a heavy book for an hour before hanging them. Storing the finished garland flat between two sheets of cardboard prevents most curling altogether.
The garland sags in the middle
Paper is light, but a long span of thread still stretches. Add a third anchor point in the middle of the run, or split one long garland into two shorter ones.
The thread tangles while you work
Cut all your thread lengths first, then tie them to the bats one at a time. Working from a tangled pile is the single biggest slowdown in this project.
The bats spin and face the wall
Bats hung from one hole rotate freely. Punch two holes at the wing tips and thread through both to hold the bat facing outward.
The stack cuts unevenly
Paper clips shift when the stack is thick. Cut two or three sheets at a time, or clip the corners and cut the body before the wings.
Storing Your Garland for Next October
A paper garland that survives storage saves you an entire afternoon next year. Ten minutes of packing does the work.
Gently flatten the wing folds, then lay the garland in a single layer on a sheet of cardboard. Wrap the strand around the cardboard lengthwise, like thread on a spool, until the whole garland is wound.
Slide the wound cardboard into a large zip bag or a shallow box and tuck it somewhere dry. Damp basements and hot attics both ruin paper over a year.
Label the bag with the year and the count. Knowing there are eighteen bats inside means you can plan next year's doorway before you open the bag.
Fold the wings up again when you take the garland out. Cardstock remembers the fold and curls back into shape within a minute.
Keep the Halloween Crafting Going
If you enjoyed this project, the same skills carry into other paper and seasonal ideas. Paper folding and cutting are the backbone of a lot of Halloween decor.
Our DIY paper pumpkins guide uses the same cardstock and the same trace-and-cut rhythm to build a fall centerpiece. Start with those if you want another paper project that finishes in one sitting.
For the mantel itself, DIY clay Halloween decor adds weight and texture next to your paper bats without a trip to a craft store.
And if you want one wall that ties the whole room together, easy Halloween watercolor paintings give you a painted backdrop for the swarm of bats you just cut.
Conclusion
Start with one sheet of paper and one bat. Fold, trace, cut, and hold it up against the wall. The first silhouette is always the slowest, and the second one takes a third of the time.
By the end of the afternoon you have a garland that cost a couple of dollars, a template that lasts for years, and a stack of bats you can redeploy in a doorway, a mobile, or a wreath whenever the mood strikes.
This year, hang your garland a little higher than feels natural. Then pour a cup of tea, turn off the overhead light, and watch the paper wings drift in the dark.

